Comment

Tile Shower Repair

Tile Shower Repair

I am sorry if you are reading this because you have a similar issue 😢 There’s nothing worse than a leaky, moldy shower…..

Unfortunately, I see this quite a bit in very expensive newer homes!

This home was only built 7 years ago

There are typically 2 major reasons for a shower that leaks or is not draining properly

The reason for the call at this home was cracking of grout joints & water not draining after a shower

The #1 cause for water not drain properly in a tile shower is not having any pre-slope under the rubber liner.

This was a big shower 5ft x 5ft. The rubber liner needs to be pitched to drain in order for water to escape this kind of shower system. This floor was completely level

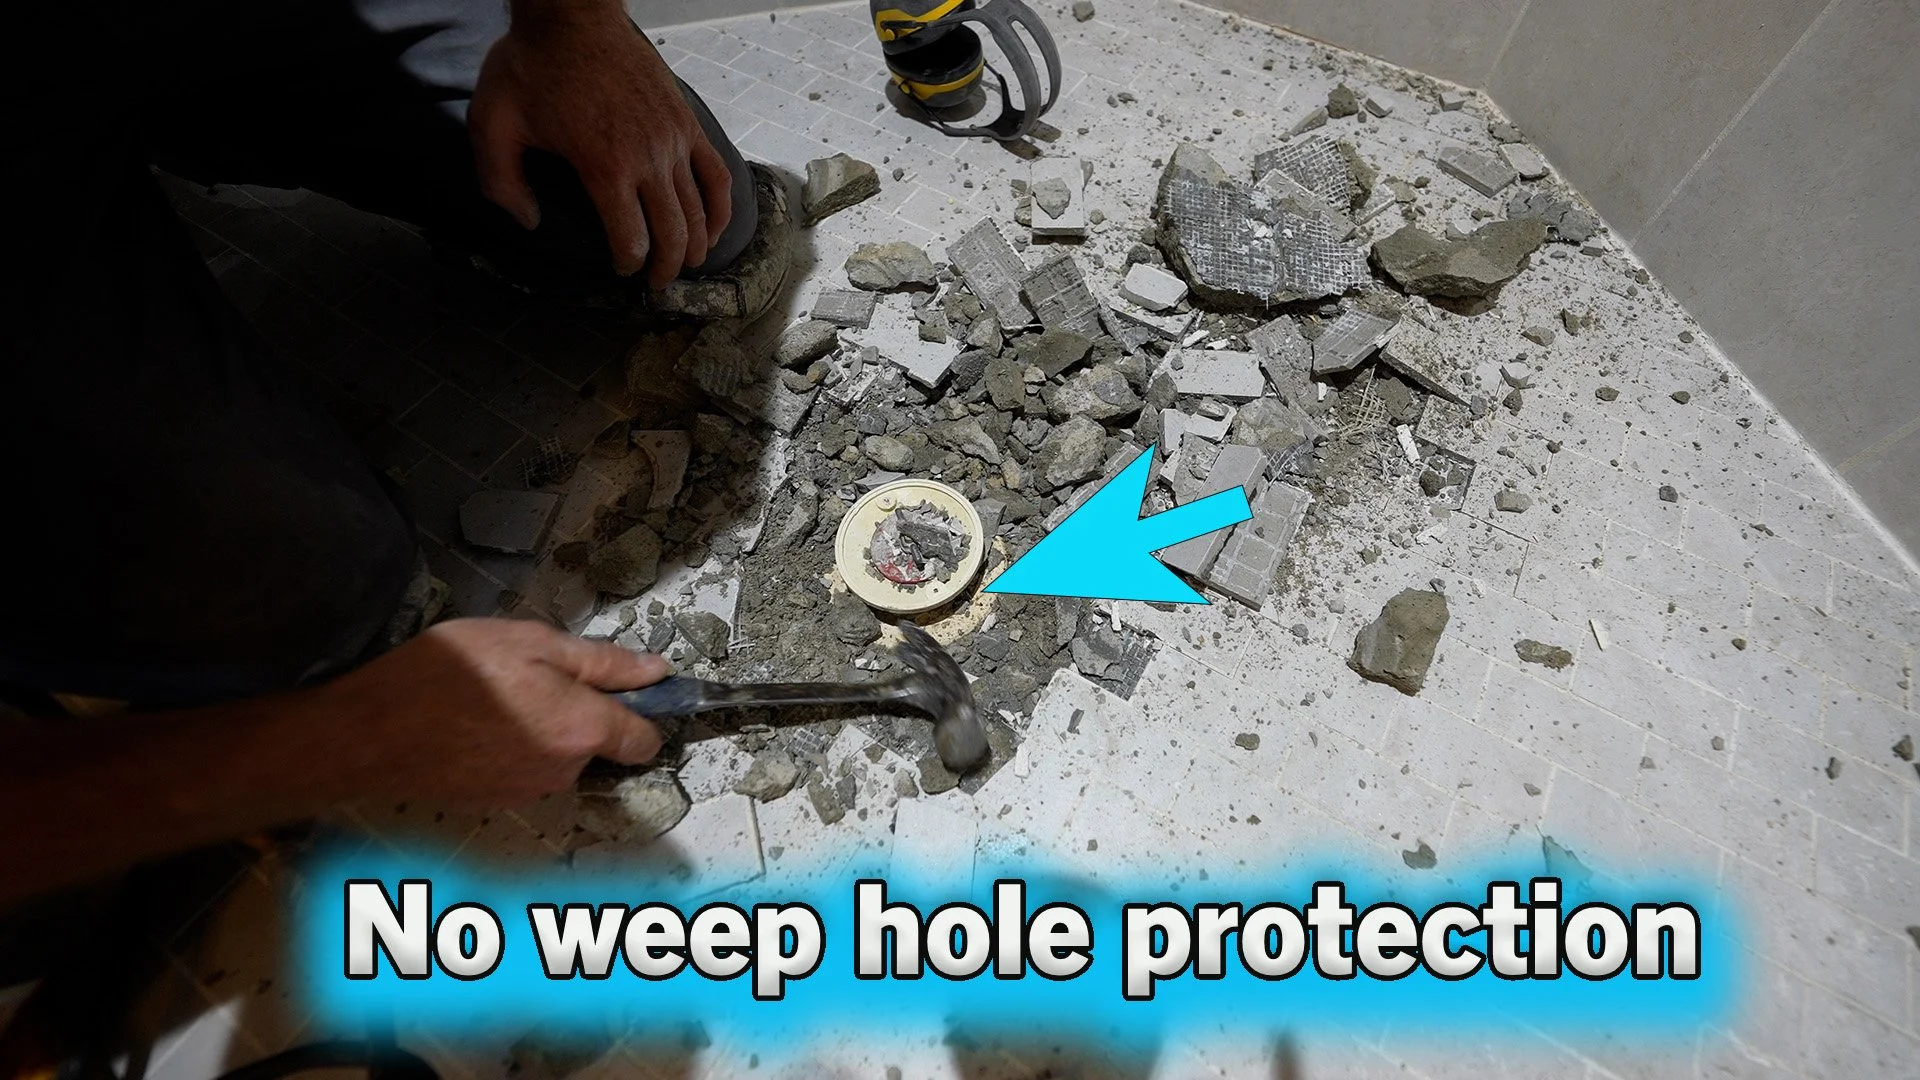
The #2 reason for water not escaping a tile shower pan system is clogged weep holes

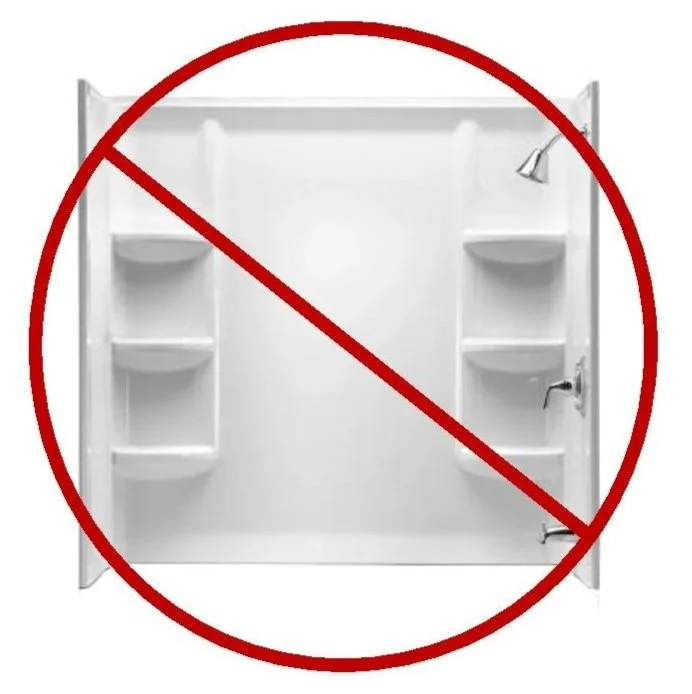
Believe it or not, this whole system is relying on a few small 1/4” holes around the clamping drain for water to escape the mud bed. This is the primary reason I prefer not to install a rubber liner shower pan system 👊

There are better ways to build a tile shower pan!

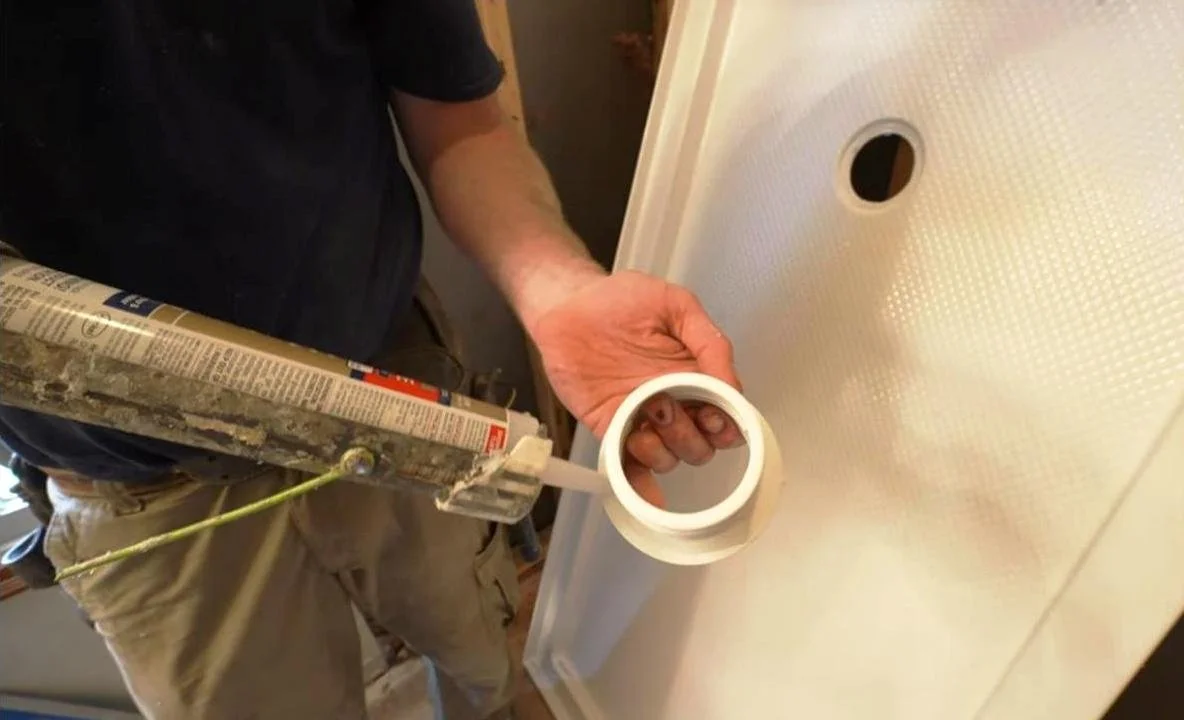
It starts with a better shower drain system 👍 This FLO FX drain system is a bonding flange drain system that is designed for waterproofing to be on top of the mud bed (directly below tile) and allow water to escape easily from all angles when water gets under tile

Set & support bonding flange with mortar & thinset

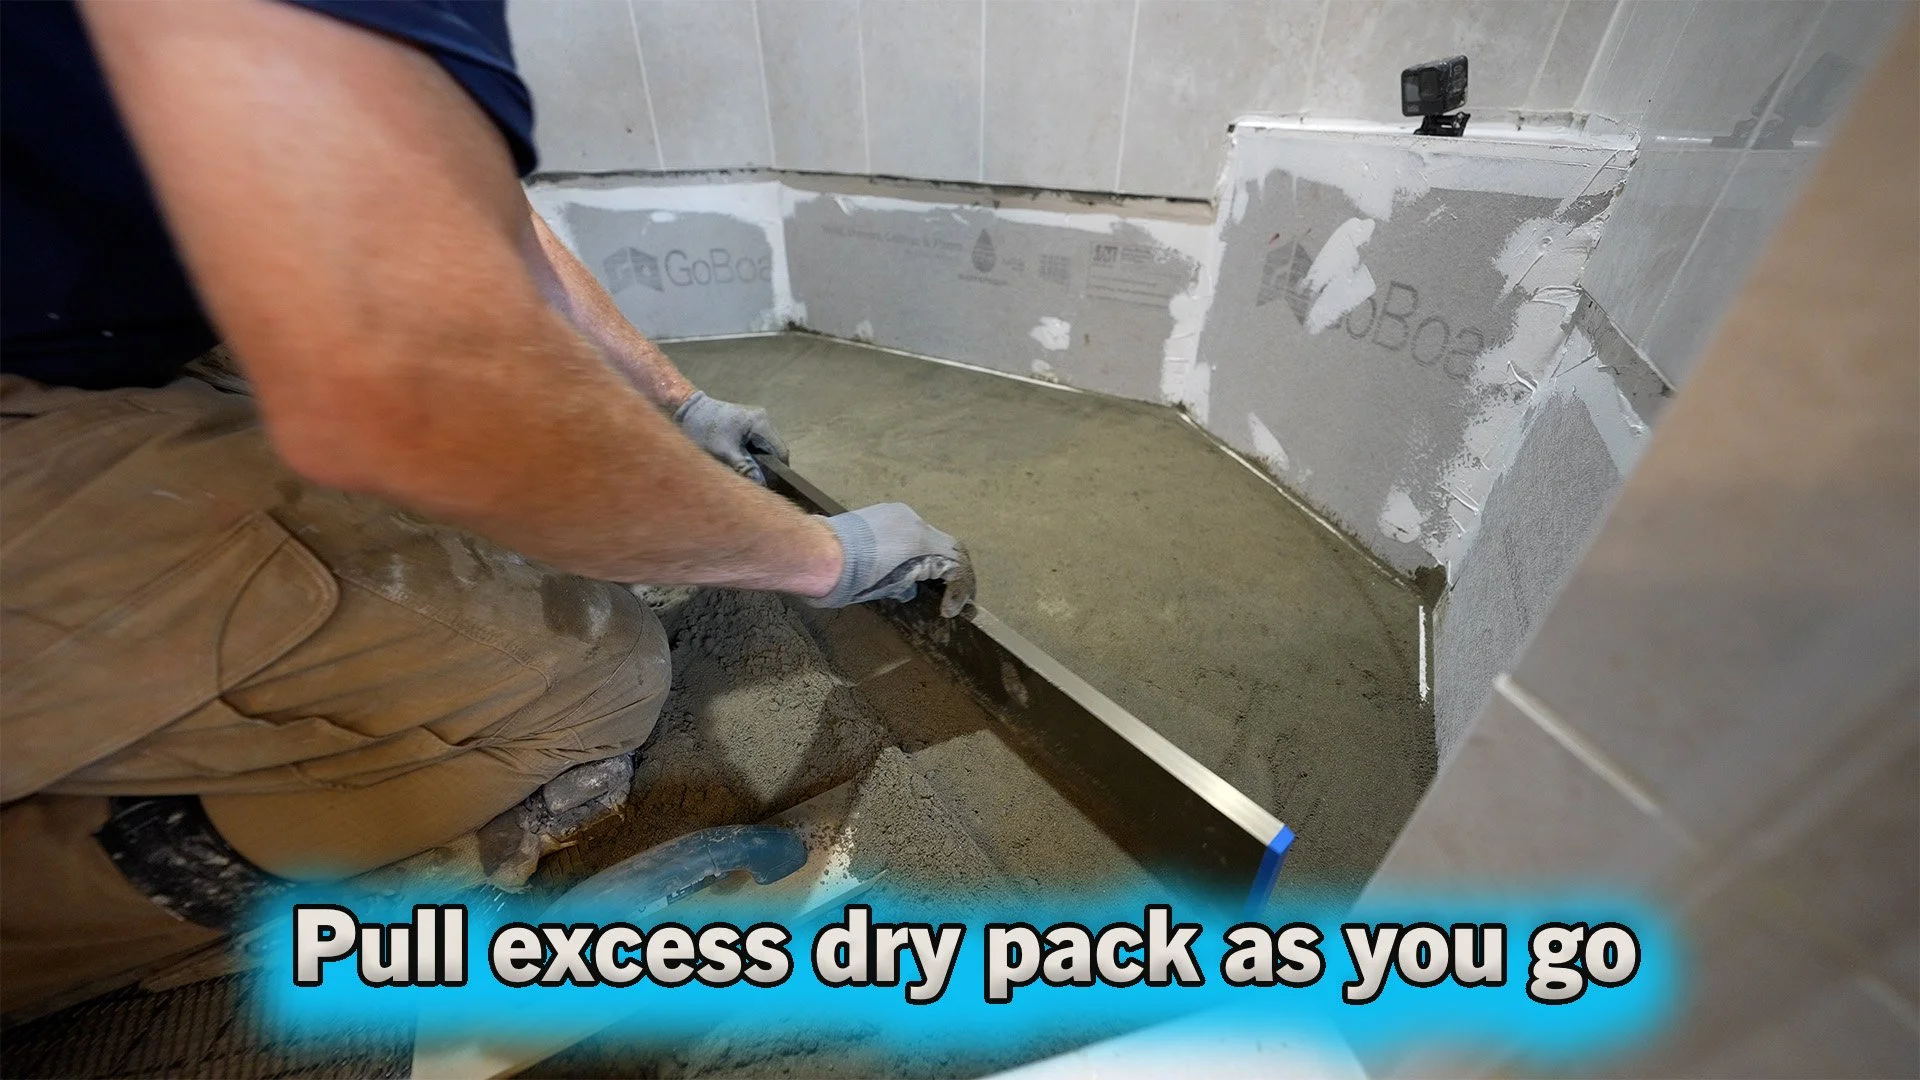
An easy way to pack a mud bed for a shower pan is to add a perimeter guide to screed to. Minimum 1/4” per foot

Definitely a lot easier with an odd shape shower like this

Now you can simply apply pressure to drain body and perimeter guide to create a sloping shower pan

Sloped mud bed for a tile shower 👍

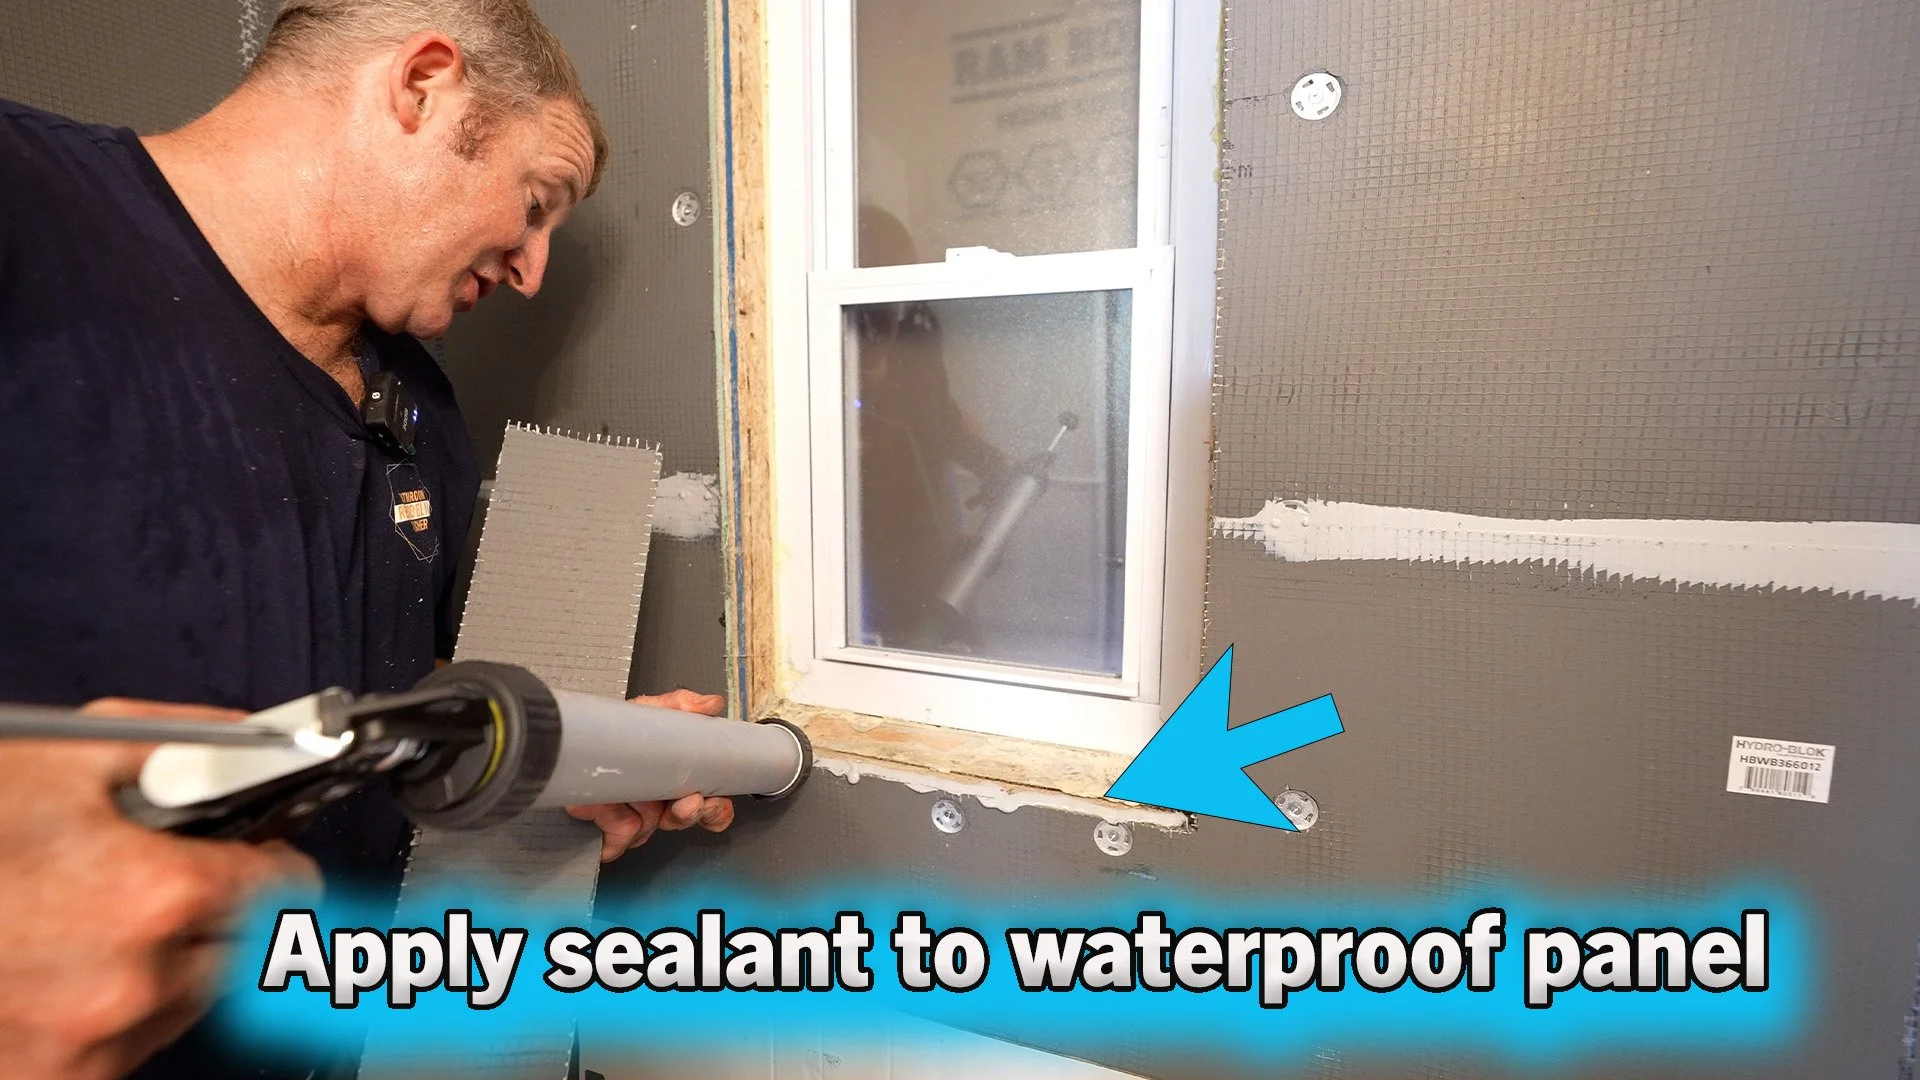
The most important aspect about this method is adding waterproof on top of the sloping mud bed 👍 This is Schluter Kerdi Sheet Membrane . I used this because it’s the fastest method to get into tiling. You can immediately tile over this membrane after setting

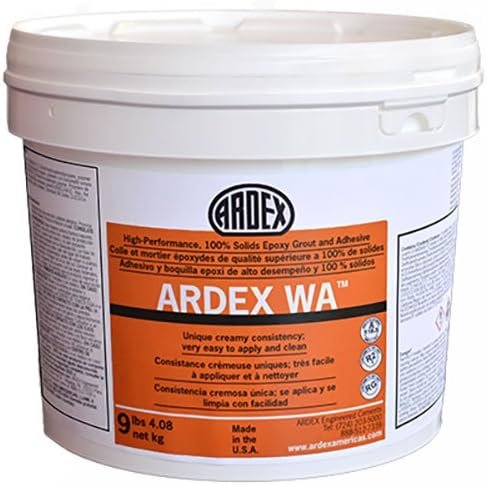
An alternative is to use a liquid waterproofing system like Ardex 8+9 . In some ways this is a better more fool proof way to go. For more details on this method check out the Basement Bathroom Course

No matter what method is used, flood testing is important 👊

In this Tile Shower Repair Course, I highlight some of the most efficient ways to tile a shower 👍

One of my favorite trowels for setting smaller tiles. Superiorbuilt 1/4” x 14” trowel

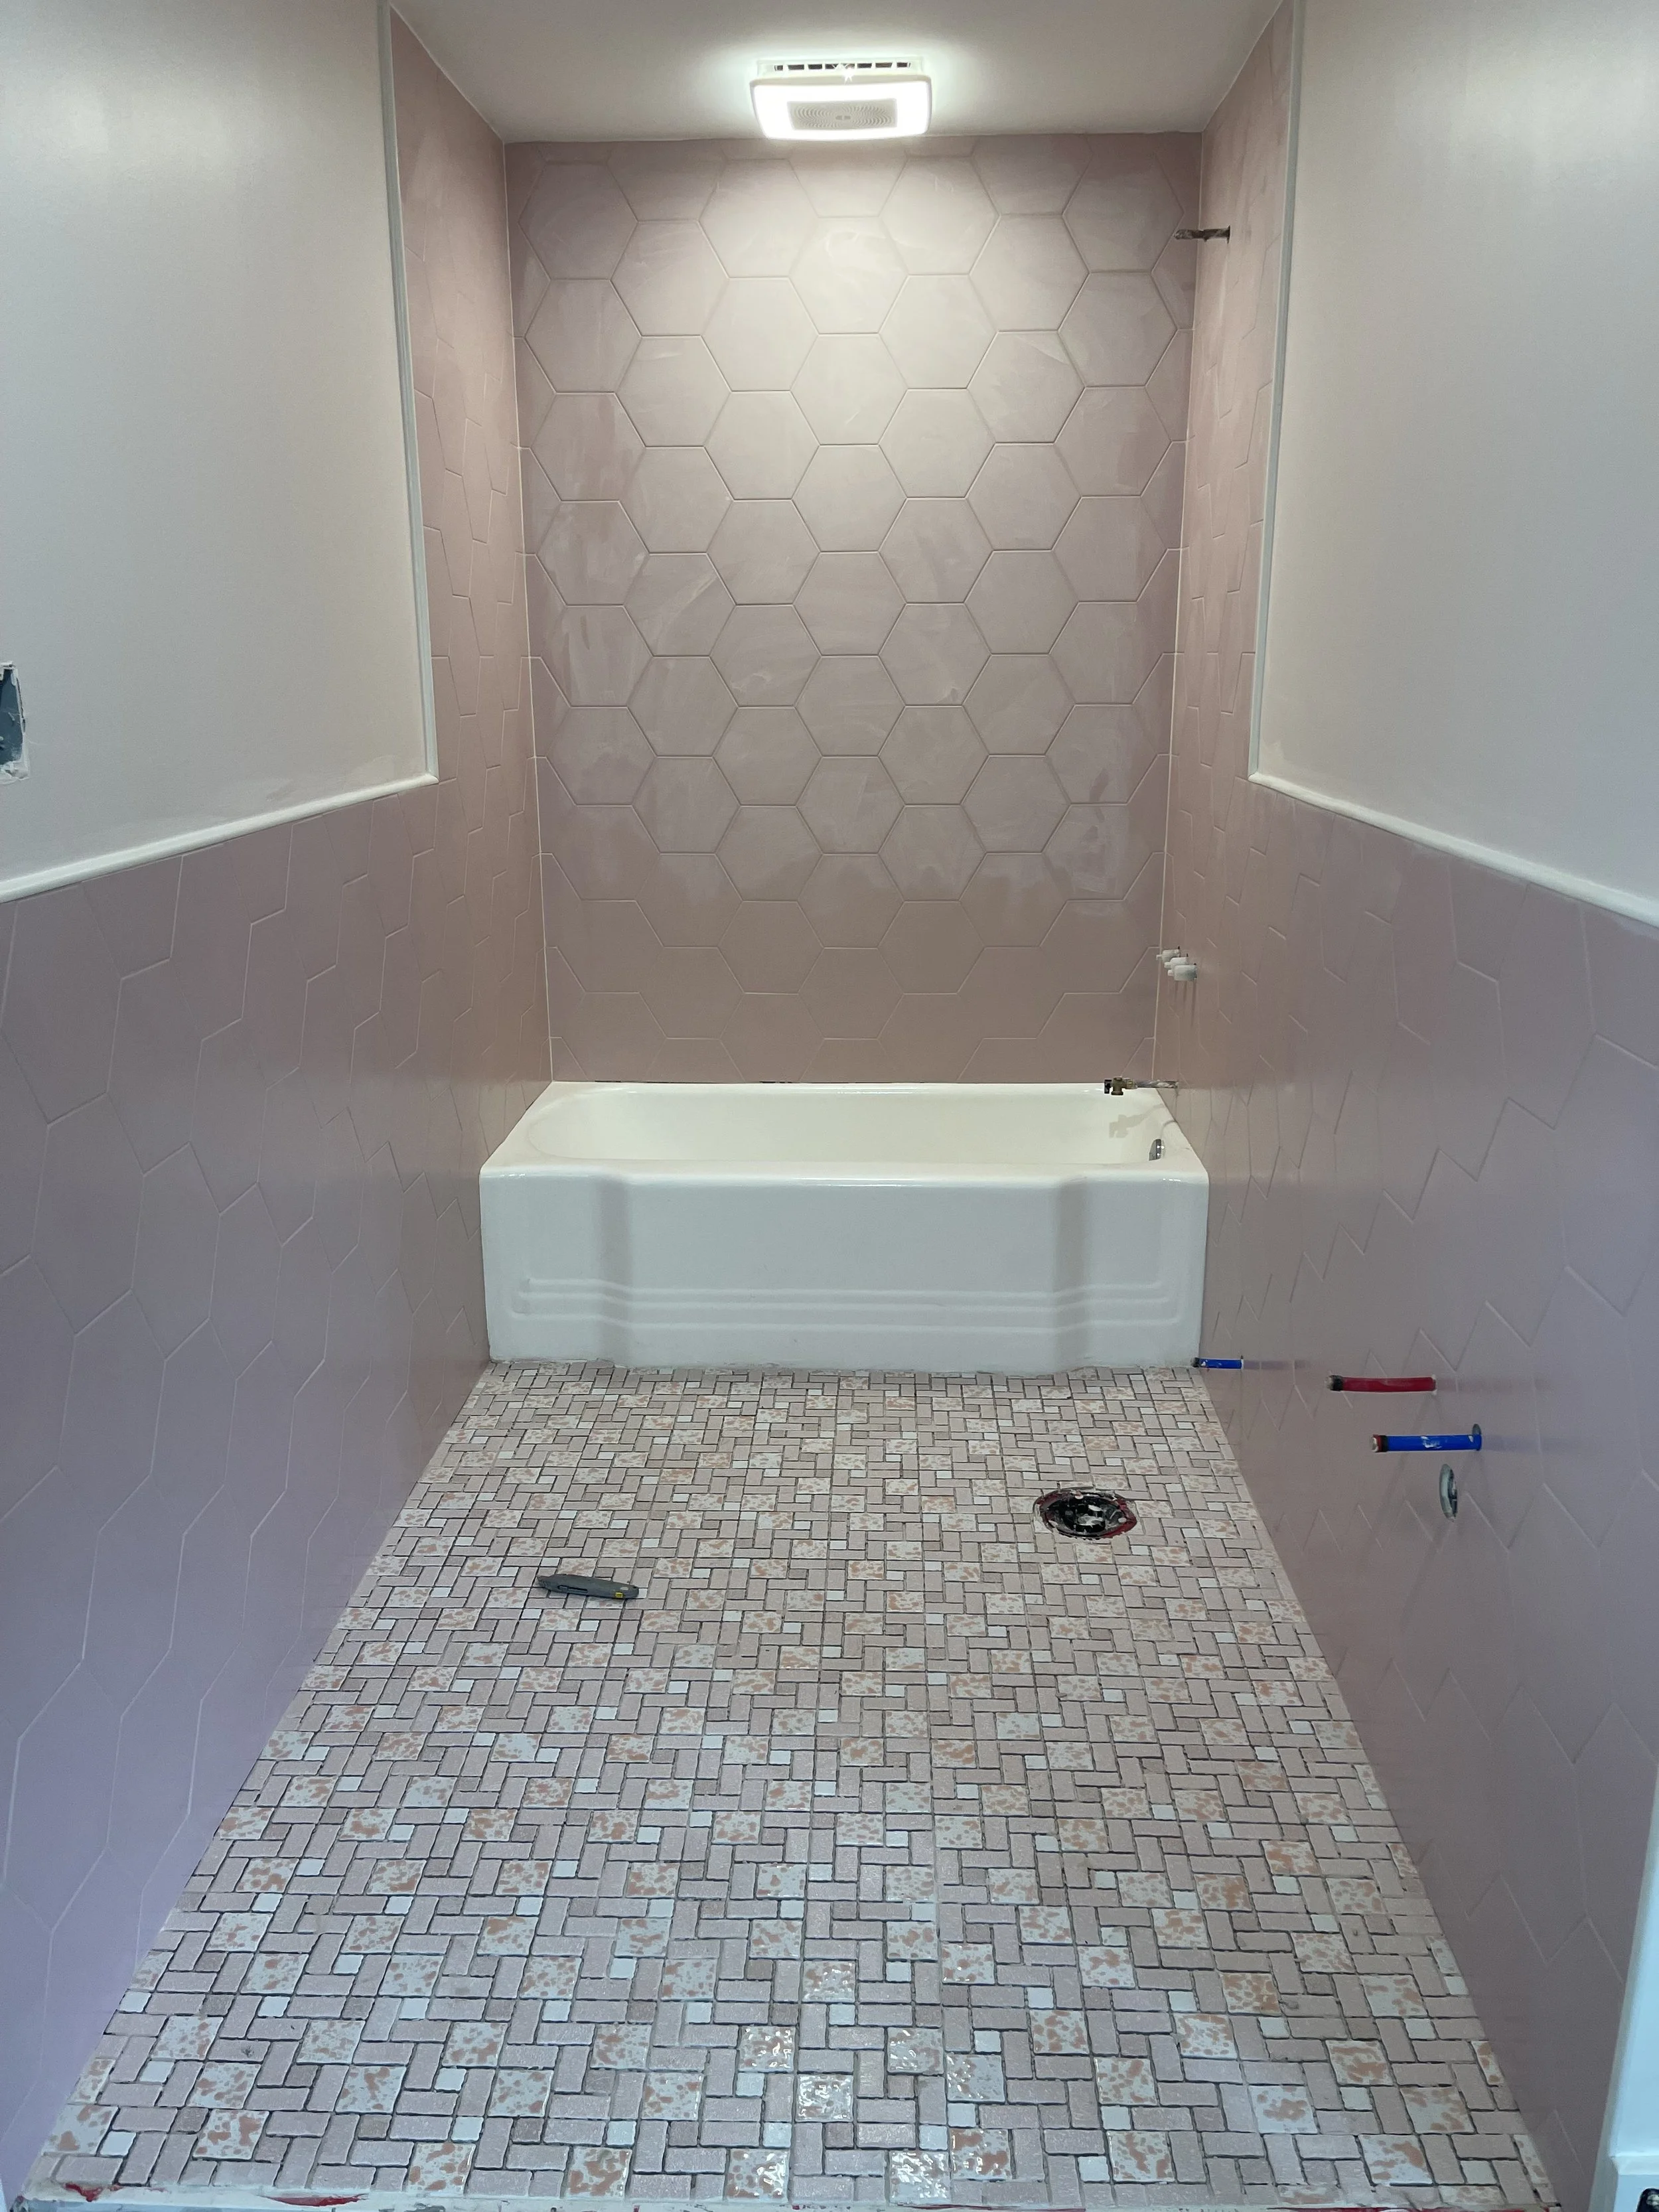
The most complex task of a repair like this is fitting in the bottom row of tiles.

It can be very time consuming! If you are a contractor bidding on something like this, I highly recommend a full day just for fitting in the wall tiles 👍

In this Tile Shower Repair Course I’ll help guide you through the entire grouting installation process

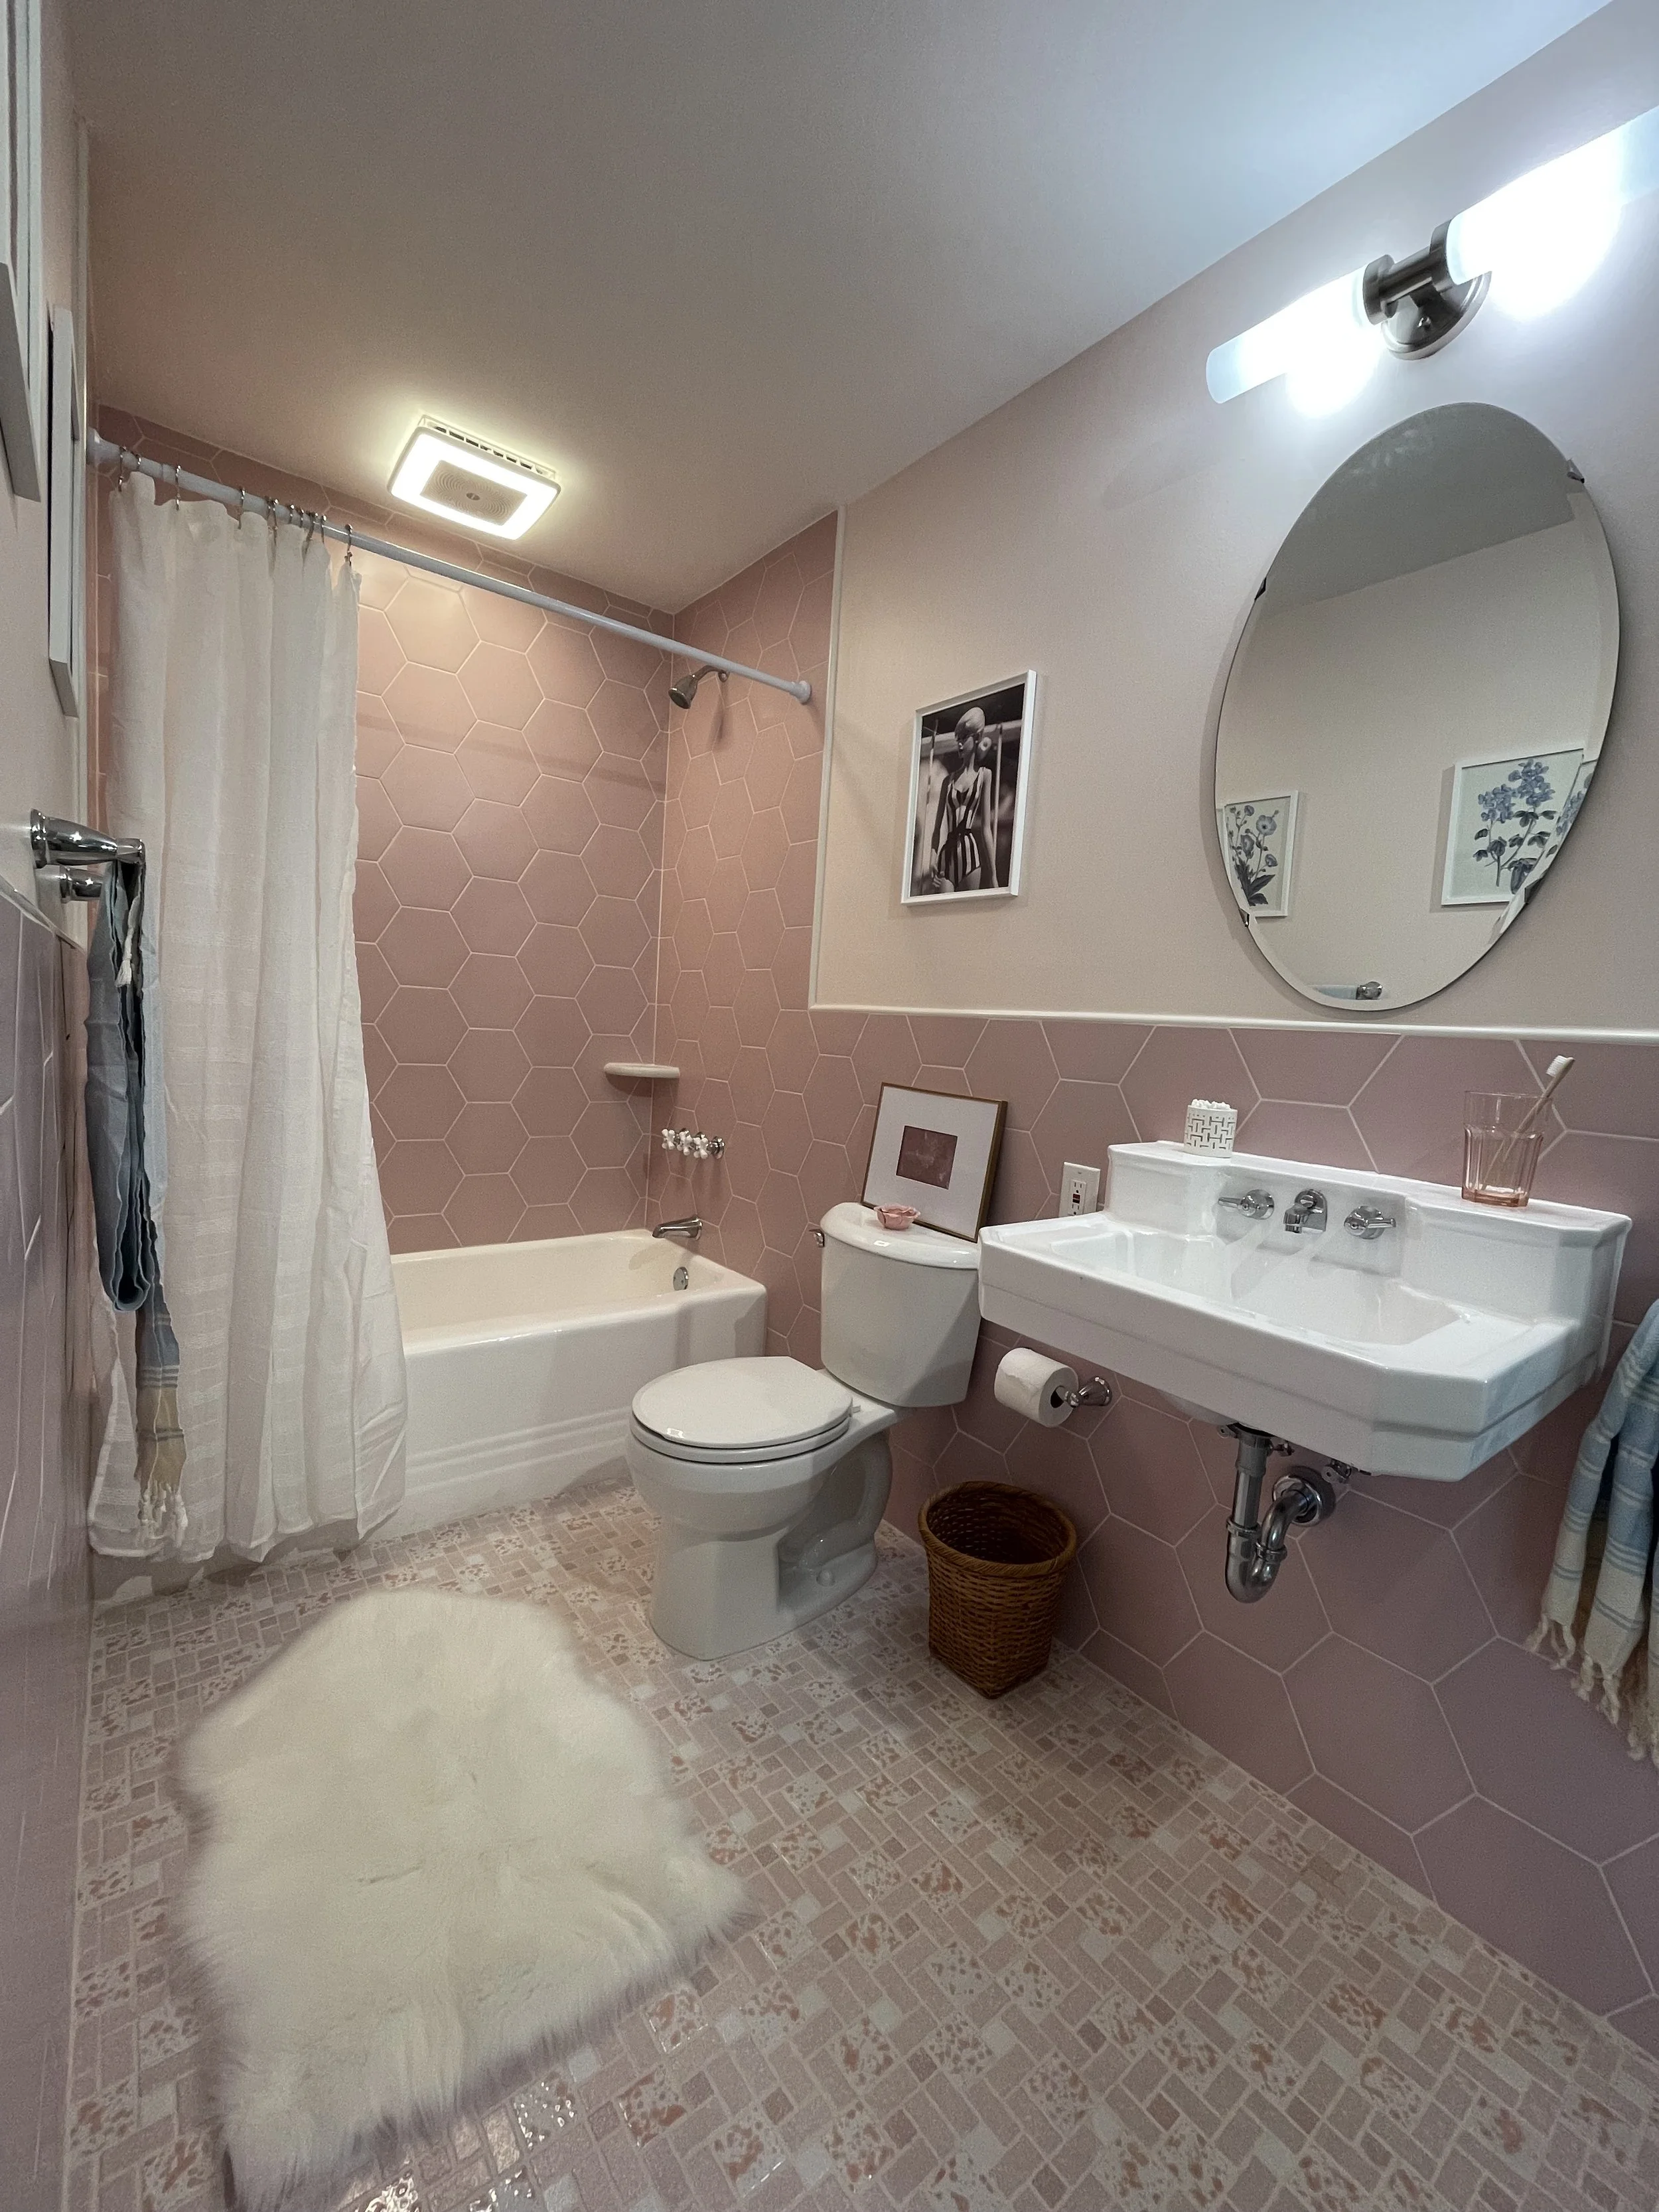
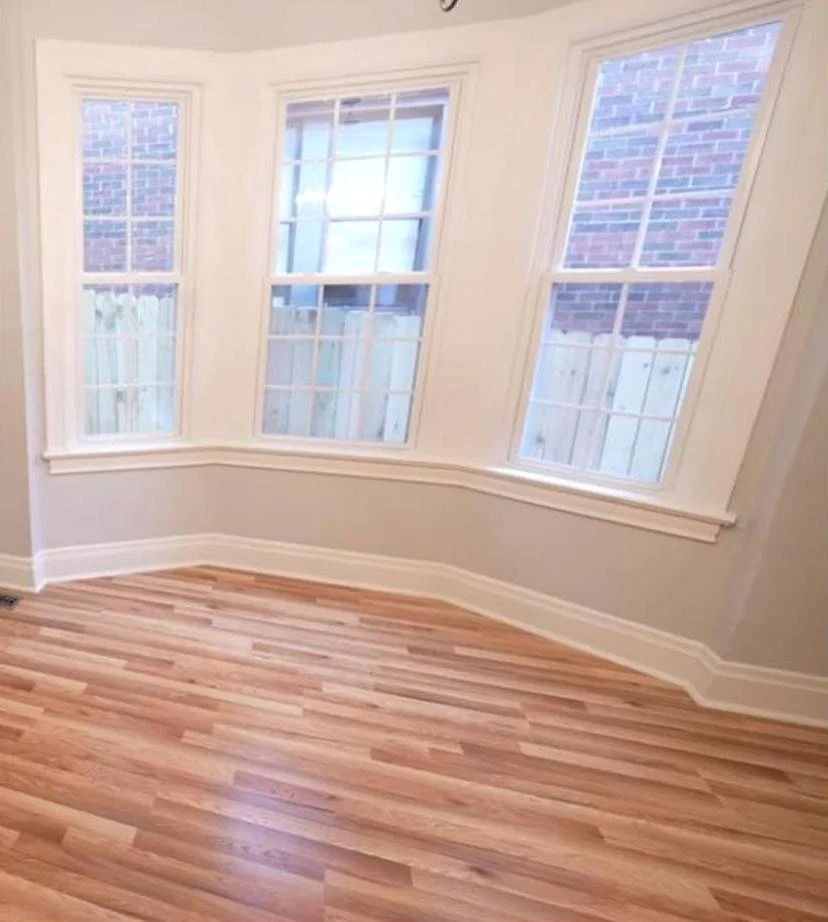
Completion 🎉🎉 Like there was never an issue in the first place 😃

Enroll in the Tile Shower Repair Course 😊

One-time payment, that’s it 👊

Lifetime access

Guides & Material checklists

Contractor’s quote

Support, ask a question about your own project in any of the tutorials 👍

Comment

Comment

HOW TO CHOOSE THE BEST CAULKING GUN

Hey Students!

Did you know that:

ALL CAULKING GUNS ARE NOT CREATED EQUALLY?

I used to throw whatever cheap caulking gun I could find into my cart at Home Depot or Lowes. I always need caulking guns, and I was never really happy with those cheap ones. They often dripped and weren’t very reliable. Plus, if I was doing a lot of caulking, my hand would be cramping and aching at the end of the day. Those cruddy caulking guns really didn’t make my job easy at all.

Then I found NEWBORN CAULKING GUNS. Their guns have changed my caulking game. I spend less time caulking now, and I’m not nearly as messy as I used to be (which is saying A LOT!). They offer this amazing chart that can help you determine which caulking gun would be serve your needs.


I go over this chart in the video above. I may be a little overwhelming at first, and once you get past the sciencey part of it, you will see how each specific gun will make caulking easier and cleaner.


My two most-used and favorite caulking guns I have from Newborn are the Octogun and the 360-DT. I can confidently say that my caulking work has improved 100% by using these guns. I will never buy those cheap guns again.

GET 10% OFF OF YOUR PURCHASE WITH CODE BRT10.

Disclaimer: These are affiliate links, and every and any purchase is very much appreciated. Try a Newborn Gun and let me know what you think. Thanks for your support!

Visit our dedicated NEWBORN page in the BUILD section of the website.

💥LEARN how to BUILD your dream bathroom 🎓 - COURSES + MEMBERSHIP https://www.bathroomremodelingteacher.com/learn

💥Visit my Amazon Store for all products and tools that I use & recommend https://www.amazon.com/shop/bathroomremodelingteacher_

💥BRT MERCH —> Check out the Official Bathroom Remodeling Teacher apparel line!

All the tools and products I use and recommend can be found on my Amazon Storefront (detailed in the description box of the video). You can find my Storefront, and all of my other social medias, by going to https://linktr.ee/bathroomremodelingteacher. Any and all purchases from my Amazon Storefront are greatly appreciated and help keep my channel going!

I hope this helps you with your own installation. Subscribe to my channel to make sure you don’t miss a new upload!

See you next class,

Steve


Comment

Comment

THE BEST WAY TO INSTALL VINYL FLOORING

Hey Students!

My wife and I went to Lowe’s to find some incredibly durable yet easy-to-install flooring for our extra living space above our garage. And luckily, we found the perfect stuff. It’s the SmartCore by Coretec vinyl floors in Claremont Oak (fyi: THIS IS NOT SPONSORED! We paid for the flooring ourselves). It’s not the cheapest (a little over $4/sqft), but it is definitely the toughest AND prettiest.

In this video, I go over each step to easily (and perfectly!) laying down this flooring.

To quickly break it down for you, I began by sanding my base floor, which was just cheap plywood. You have to make sure the floor is level. I also had to do some patchwork on some spots to make the floors smooth & even.

 
vinyl floor installation how to diy bathroom remodeling teacher smartcore lowes
 

Then I explained why I chose to start where I wanted to start and how to keep your planks nice and straight. {Hint: I usually start in a farthest corner). And once you get that down, the rest flows very easily & quickly.

 
vinyl floor installation how to diy where to start bathroom remodeling teacher smartcore lowes
 

In the video’s description, I share all the tools and products I used to help me achieve the best result.

 
tools and products to use to help you install vinyl flooring diy how to bathroom remodeling teacher smartcore lowes
 

I give an honest review of the flooring at the end, along with some helpful advice to get your moving along with your flooring project.

 
final look of smartcore vinyl flooring how to diy bathroom remodeling teacher lowes
 

This project only took me 1 day to do. I know I’m a professional, but I promise you this one really is incredibly easy. You will love the end result.

UPDATE: I’ve had these floors for about 4 months now, and I’ve put them through the ringer. Why? Because I just finished a full bathroom in the space nd I did not use very much protection on these floors. I’m so happy to report that there are ZERO scratches or dents (and I had a lot of power tools on the floors!). There are some stains (RedGard mainly) but we did manage to get most of them up. Those stains are my fault because like I said, I wasn’t diligent on protecting the floors. I give these floors an A+ and highly recommend them.

Be sure to watch the video for the entire step-by-step process of installing the SmartCore vinyl floors.

💥Visit my Amazon Store for all products and tools that I recommend and use on a regular basis 👍 https://www.amazon.com/shop/bathroomremodelingteacher_

💥MERCH —> Check out the Official Bathroom Remodeling Teacher apparel line!

💥LEARN how to BUILD your dream bathroom 🎓 -

All the tools and products I use and recommend can be found on my Amazon Storefront (detailed in the description box of the video). You can find my Storefront, and all of my other social medias, by going to https://linktr.ee/bathroomremodelingteacher. Any and all purchases from my Amazon Storefront are greatly appreciated and help keep my channel going!

I hope this helps you with your own installation. Subscribe to my channel to make sure you don’t miss a new upload!

See you next class,

Steve

Comment

Comment

BARBIE BATHROOM: FINAL REVEAL!

Hey Students!

Many of you might be asking why we decided to go with this particular style of bathroom. We wanted to create a somewhat updated version of a bathroom you would find in the average home in America during the 1960s. Colors were used often at that time, and we really loved the muted tones of pink in these tiles. Although pink can be a controversial color choice for a bathroom, we are hoping to make you fall in a love with pink!

We have done a mix of old and new in this bathroom. A lot of homeowners have to do this in order to stay on budget or just be less wasteful. You will see quite a few older fixtures used in this Barbie Bathroom.

Let’s take it back to the beginning with the interior design board and tile selections that helped form this bathroom.

 
barbie bathroom pink merola tile pink mosaic rose hexagon bathroom remodeling teacher

The mood board for the Barbie Bathroom


Steve constructed this bathroom in his home office that sits above our garage. His course (the Home Office Bathroom Course) goes over how Steve built this extra living space above our detached garage. Steve built the entire structure on his own from the ground up. Since it was basically a new build, we had the freedom to do whatever we wanted. In order to give it a realistic and relatable approach, we decided to make the bathroom a standard size (5ft X 9ft). This bathroom size is very common in a lot of homes in the United States.

As described and outlined in his Home Office Bathroom Course, Steve first installed the electric/instant hot water tank/plumbing/drywall/vent fan/floor leveler/etc., creating the bathroom space. We had a vintage cast iron tub Steve refinished here and installed that first. After the tub was installed, it was time to waterproof. Steve used RedGard, and it was quite the experience.

 
barbie bathroom pink merola tile pink mosaic rose hexagon bathroom remodeling teacher

The last time ever using RedGard!


Once the bathroom was prepped with the waterproofing, it was smooth sailing from there. Steve makes tile work look easy. It took him about 3 days total to tile the floor and walls (and that doesn’t include the grouting).

The tile is very high quality and a breeze to cut. The pink tones are well-muted, so the bathroom isn’t a blaring or garish pink. It’s very soft and subtle. The floor tile is textured, giving it some grip for your feet to hold on to when stepping out of the tub. For those of you who are sensory sensitive, you will find the floor and walls to be incredibly soothing.

The wall and floor grout we decided to use is Mapei FA in Honey Butter. Honey Butter is off-white, and it blended seamlessly with the tiles.

The next big item to find and install was the bathroom sink. We knew we wanted something vintage, floating, and fairly beat up. We are fortunate to have an upcycling warehouse called Construction Junction in Pittsburgh. They sell so many vintage and modern items found in homes and buildings around the Pittsburgh area. We found our sink there for only $15!

 
barbie bathroom pink merola tile pink mosaic rose hexagon bathroom remodeling teacher construction junction pittsburgh

Looks can be deceiving… this place is a goldmine of home goods!

barbie bathroom pink merola tile pink mosaic rose hexagon bathroom remodeling teacher vintage sink

Our $15 vintage sink. Steve used the Ekopel 2K Recasting Kit to paint the sink white.


Installing an old sink like this one is usually a challenge. The bolts and screws and brackets don’t come with it, so you have to use some creative solutions to properly mount this sink on a wall. Steve managed to do it, though it took him a little longer than he would have liked.

Once the sink was in, the toilet followed. We got an American Standard Cadet toilet, which is one of Steve’s favorites to install. It comes pre-packaged with everything you need to install it.

 
barbie bathroom pink merola tile pink mosaic rose hexagon bathroom remodeling teacher
 

The floating quartz shelves were Steve’s idea. The extra bath storage was needed, and it’s a great way to elevate your bathroom AND add storage capacity! We went to a local granite manufacturer in our area called Asian Granite. This is actually much easier to do than you might think. Steve made a dedicated video on measuring, templating, and installing these floating shelves that you can check out here.

When it came to adding those finishing pieces to the Barbie Bathroom, we wanted to keep it somewhat modern with a mix of vintage.

In terms of the foundation of this bathroom, the floor tile and its color are definitely an interior style throw-back. The wall tiles help bring this bathroom to the present time. The hexagon shape and matte finish are 2 key style features that are trending today. Mixing these two together is a great way to unite the classic with the contemporary.

 
barbie bathroom pink merola tile pink mosaic rose hexagon bathroom remodeling teacher
 

PRODUCTS FEATURED

💥Visit my Amazon Store for all products and tools that I recommend and use on a regular basis 👍 https://www.amazon.com/shop/bathroomremodelingteacher_

WE GOT MERCH! —> Check out the Official Bathroom Remodeling Teacher apparel line!

FOR HELP WTH YOUR OWN BATHROOM REMODELING PROJECT —> 🎓ENROLL IN MY COURSES 🎓 -

All the tools and products I use and recommend can be found on my Amazon Storefront (detailed in the description box of the video). You can find my Storefront, and all of my other social medias, by going to https://linktr.ee/bathroomremodelingteacher. Any and all purchases from my Amazon Storefront are greatly appreciated and help keep my channel going!

I hope this helps you with your own installation. Subscribe to my channel to make sure you don’t miss a new upload!

See you next class,

Steve

Comment

Comment

Plastic VS Brass Plumbing Fixtures

Hey Students!

In my most recent video, I had a heck of a time with this plastic American Standard Tub Drain. If you cross thread it (which I did)…it's pretty much done and ruined.

 
brass vs plastic plumbing american standard bathroom remodeling teacher diy how to

Just SAY NO to this American Standard Tub Drain!


And what’s even more disheartening is that this is the SECOND time in the past month that American Standard has let me down.

The first time was with their tub surround I was installing for a client. It was flimsy and cheaply made plastic, and to make matters worse, it was one of the more expensive surrounds available!

 
brass vs plastic american standard tub surround bathroom remodeling teacher diy how to

Another American Standard product to avoid… their tub surround.


For my bathtub drain situation, I threw out the American Standard tub drain and got an Everbilt Brass Drain Assembly from Home Depot, which was way easier to install (AND LESS EXPENSIVE, TOO). It was also made of BRASS.

 
brass vs plastic everbilt drain tub bathroom remodeling teacher diy how to

Everbilt for the win with their brass drain assembly!


Which leads me to my point: When purchasing any and all items for your bathroom, you need to make sure it is made of high quality materials, and the item itself is well-made.

We can no longer trust the name brands we have long loved to consistently put out top quality products. My recent issues with American Standard has made me realize I can’t blindly trust them anymore. We must do our own homework, read consumer reviews, and most of all, really check out (touch, hold, feel) the items we purchase for our homes. You can easily spot a subpar product just by touching it.

Obviously, brass has been around for a long time, and it has been successfully used for many years in bathrooms. But, be aware that even not all brass isn’t created equally. Some brass is thin and low-grade, and you must avoid it if you want a long lasting, functional bathroom/plumbing.

I don’t dislike plastic. There are some plastic products that I think are awesome for bathrooms and plumbing, such as PEX piping.

Again, do your homework: research the product, and just feel it to ensure it is well-made. It will help you avoid current and future problems in your home.

This video will help you avoid the mistakes I made when I installed this drain assembly. I go over, from start-to-finish, fully installing this tub drain and the products I used to make sure it is a secure and long-lasting tub drain.

For all the details about the top products I use when remodeling bathrooms and how to install them, enroll in my DIY Geek Membership Course. The Geek Membership gives you access to all 9+ bathroom remodeling courses for only $249. One time payment, lifetime access!

💥Visit my Amazon Store for all products and tools that I recommend and use on a regular basis 👍 https://www.amazon.com/shop/bathroomremodelingteacher_

WE GOT MERCH! —> Check out the Official Bathroom Remodeling Teacher apparel line!

For help with your bathroom remodel 🎓Enroll in my courses today 🎓 -

All the tools and products I use and recommend can be found on my Amazon Storefront (detailed in the description box of the video). You can find my Storefront, and all of my other social medias, by going to https://linktr.ee/bathroomremodelingteacher. Any and all purchases from my Amazon Storefront are greatly appreciated and help keep my channel going!

I hope this helps you with your own installation. Subscribe to my channel to make sure you don’t miss a new upload!

See you next class,

Steve

Comment

Comment

Choosing Good Mosaic Tile

Hey Students!

Most of us already know that NOT ALL TILES ARE CREATED EQUALLY. There is a difference between a well-made tile, and a poorly made tile. If you have installed poorly made tiles before, you know how frustrating and difficult it can be. Chipping, different sizes, and problems adhering to the thinset are just a few issues flawed mosaics can create.

Mosaics can be a tricky tile. They need to be well-made in order to be properly installed. Otherwise, you are fighting the installation.

So, how do you know when a mosaic tile is high-quality and durable?

One easy and immediate thing you can do is check out the tile’s distributor. If you have a highly reputable tile distributor, such as Merola Tile, then you can rest assure knowing that just about any mosaic you choose will be reliable and solid.

 
choosing mosaic tile merola bathroom remodeling teacher diy

Go with a tile distributor that only stocks the best of the best tile. It will make choosing your tile effortless.


We choose Academy Pink Mosaic Tile from Merola Tile for our newest bathroom project, and for lack of a better word, it is PERFECT. It checks all the boxes for a high-quality, gorgeous mosaic tile.


choosing good mosaic tile barbie bathroom remodeling teacher diy

Here is the Academy Pink installed.


Another thing you want to check is the mesh backing on the mosaic tile. Is it completely covered in glue? Can you see the actual tile through the mesh that is holding them all together? If there is too much glue and you can’t see the actual tile, then stay away from that mosaic! Too much glue and not seeing the tile means the tiles on the mosaic won’t have a chance at bonding with the thinset, and they WILL eventually pop off from wear and tear.

choosing mosaic tile bathroom remodeling teacher diy

In terms of installing a mosaic tile, there are some technical things you can do to make the process go smoothly. One technical aspect that makes installing mosaics easy is to have a level surface to install them on. This may sound like a no-brainer, but you would be surprised how many people think they can “make it work” on a wonky surface. You will see every curve and flaw, guaranteed.

floor level choosing good mosaic tile bathroom remodeling teacher diy

A good thinset makes a world of difference, too. My favorite is the Ardex X5. It has a nice, fluffy consistency and a long pot life, which gives you plenty of time to work when installing.

Make sure you check out all the amazing mosaics Merola has to offer! You will definitely find something you love for your next project!

For all the details about choosing the best mosaic tile and how to install it, enroll in my DIY Geek Membership Course and go to the Home Office Bathroom Course. The Geek Membership gives you access to all 9+ bathroom remodeling courses for only $249. One time payment, lifetime access!

💥Visit my Amazon Store for all products and tools that I recommend and use on a regular basis 👍 https://www.amazon.com/shop/bathroomremodelingteacher_

WE GOT MERCH! —> Check out the Official Bathroom Remodeling Teacher apparel line!

For help with your bathroom remodel 🎓Enroll in my courses today 🎓 -

All the tools and products I use and recommend can be found on my Amazon Storefront (detailed in the description box of the video). You can find my Storefront, and all of my other social medias, by going to https://linktr.ee/bathroomremodelingteacher. Any and all purchases from my Amazon Storefront are greatly appreciated and help keep my channel going!

I hope this helps you with your own installation. Subscribe to my channel to make sure you don’t miss a new upload!

See you next class,

Steve

Comment

Comment

THE BARBIE BATHROOM WITH MEROLA TILE

Hey Students!

Exciting news! We're partnering with Merola Tile for our upcoming project: The Barbie Bathroom.

For those of you who know how Bathroom Remodeling Teacher works, it is probably hard to believe a Barbie Bathroom would be the first pick in terms of the color choice. PINK is incredibly (for lack of a better word) girly. But, we feel it is time to push the design/style envelope, so here are some answers to the questions you might be asking yourself…

How did we connect with Merola Tile?

We met Ann Telfeian, Merola’s Chief Revenue Officer, at the Merola Tile booth during the Coverings 2023 event in Orlando, FL this past April. A big fan of Bathroom Remodeling Teacher’s Instagram account, Ann told us to keep Merola in mind if we ever wanted to work with them. This past spring/summer, we got in touch with them, and we decided it was a great match and we should do some projects together!

How did we come up with the Barbie Bathroom concept?

Of course the Barbie movie was an influential part of the decision. We knew it was going to be a big hit! But, we also wanted to do something with COLOR. Merola Tile is absolutely the best choice to go with if you want a tile that is bold, colorful, and inspirational.


When we decided to work with Merola Tile, we began to talk about the styles of tile they have available on their website, and the one that really intrigued us was the Academy Pink Mosaic Tile.

 
retro bathroom pink tile Barbie Bathroom Remodeling Teacher

Old skool inspo pic from https://clickamericana.com/


Old skool inspo pic from https://clickamericana.com/


It was so old school, and it really conjured up a lot of old bathroom memories! We thought it would be challenging and fun to bring it back to the present time, and put our own modern twist on the the tile design.

How are you going to design it?

Nikki created a design board to capture the overall feel of this bathroom. We wanted it to feel like you were stepping back in time, with all of the modern conveniences included. There will be splashes of blue here & there. We also wanted to keep the budget at a minimum, and we plan to re-do and re-use an old sink and bathtub in the room.


The design board for the Barbie Bathroom


Isn’t pink too niche?

For some, yes. We’re certain a lot of people (i.e. mostly men) aren’t going to appreciate this bathroom’s color. Pink has been pigeon-holed as a “GIRLZ ONLY” color, and we feel differently. The color pink is warm and comforting, as well as nurturing and hopeful. Every day we use our bathrooms, and whether we realize it or not, our bathrooms and the things that are in them affect our mood. We firmly believe this bathroom will make every person feel comfortable and happy. Who wouldn’t want a bathroom that makes you feel like that?

When is the bathroom project going to start/finish?

We have already begun! Steve has been working on his bathroom remodeling courses as he is constructing the Barbie bathroom. Because of this, the construction process has been slowed down. We plan to start tiling in October and finishing the entire bathroom by the end of the month. Make sure you follow Bathroom Remodeling Teacher on Instagram to catch all of the stories and posts on the Barbie Bathroom (plus some hilarious reels that we are putting together, too!).

Where can I view and buy products from Merola Tile?

Simply click here.

We can’t wait for you to see what we are going to do! We hope to encourage everyone to BUILD their own colorful, bold, and inspirational bathroom.

💥Visit my Amazon Store for all products and tools that I recommend and use on a regular basis 👍 https://www.amazon.com/shop/bathroomremodelingteacher_

WE GOT MERCH! —> Check out the Official Bathroom Remodeling Teacher apparel line!

For help with your bathroom remodel 🎓Enroll in my courses today 🎓 -

All the tools and products I use and recommend can be found on my Amazon Storefront (detailed in the description box of the video). You can find my Storefront, and all of my other social medias, by going to https://linktr.ee/bathroomremodelingteacher. Any and all purchases from my Amazon Storefront are greatly appreciated and help keep my channel going!

I hope this helps you with your own installation. Subscribe to my channel to make sure you don’t miss a new upload!

See you next class,

Steve

Comment

Comment

CRITICAL AREAS TO WATERPROOF IN A TILE SHOWER

Hey Students!

Today we are going to focus on the absolute critical areas you need to focus on when waterproofing your bathroom.

As I see it, there are 5 critical areas that need to be waterproof before setting tile in a shower:

1. Along the side of the bathtub- This is one the most common problems I see when tearing out old bathrooms— deteriorated & moldy wall boards against a tub. I highly recommend you extend the waterproofing & tile out of the tub area a couple of inches. This will ensure a long lasting bathroom.

 
water damage bathtub shower bathroom remodeling teacher diy how to

An unfortunate common sight in a bathroom that is not waterproofed correctly— right alongside the tub.

waterproof side tub bathroom remodeling teacher diy how to

What it should look like when you waterproof it properly.


2. The tub flange- Whether you are using a foam board like Hydro-Blok, cement board, or other tile backer boards, it is extremely important to fully waterproof the tub to the backerboard area. The sealant application used in the Hydro-blok system is one of the easiest ways to go. The special sealant is designed to stay flexible, create a waterproof seal, & allow thinset to bond well to it.


Nasty mold and water damage along the tub flange.

waterproof tub flange bathroom remodeling teacher diy how to

Hydro-Blok board and joint sealant do the trick.


3. Corners & seams- This is somewhat obvious, but you want to make sure all intersections of tile backer boards are sealed. The sealant application method is the easiest, but you can also use a sheet membrane like Schluter, or a liquid waterproofing method.

 
corners seams water damage bathroom remodeling teacher diy how to

Ignoring corners and seams is a serious issue in the bathroom.

waterproof corners seams bathroom remodeling teacher how to diy

Using the Hydro-Blok board and joint sealant highly protects you against water damage.


4. Window- Windows don’t really belong in showers, but alas, they do! If you have one, this is a critical area to waterproof properly. Be sure to review the last video on this process.

 
window inside shower water damage bathroom remodeling teacher diy how to

Why were windows put in showers again???


waterproof window in shower bathroom remodeling teacher diy how to

Honestly, I went with Hydro-Blok to waterproof BECAUSE of this window. It made my job 1000X easier.


5. The tub spout- This is also a major area that I see water issues in older bathrooms. Most tub spouts do not have any type of sealing ability to the tile. Water can get behind the spout & into wall cavity if not sealed. A simple pipe seal will ensure a long lasting shower.

 
tub spout water damage bathroom remodeling teacher diy how to

Don’t let this happen to you.

tub spout waterproof bathroom remodeling teacher how to diy

This will prevent the above damage from happening.


Other areas that can be considered overkill, but not a bad idea to waterproof are:

- Shower valve (ensures water from not getting into wall; not all escutcheon plates have good seals)
- Shower head arm (pipe seal)
- Outside floor to tub (I typically use Schluter Ditra or other waterproof membrane; this ensures water damage on a wood floor)

Here's the material list for what I used in this shower:

-5 sheets of Hydro-Blok board
-100 count screws & washers
-5 sausage tubes of sealant
-Valve seal
-2 pipe seals
Find a local distributor of Hydro-Blok

Be sure to watch the video for the entire explanation of the most critical areas to waterproof in your bathroom. Also, the Tub/Shower Replacement Course is available for you for only one payment of $49. That gives you lifetime access to the course, and first hand access to me.

Check out HYDRO-BLOK’s website and view all of their amazing products. I highly recommend using their waterproof foam boards and the sealant. They are simply the best.

HOT TIP: Check with your local vendors to see if they carry HYDRO-BLOK. I live in Pittsburgh, PA and you can get it from Daltile in Cranberry (you just gotta call and place the order with them).

💥Visit my Amazon Store for all products and tools that I recommend and use on a regular basis 👍 https://www.amazon.com/shop/bathroomremodelingteacher_

WE GOT MERCH! —> Check out the Official Bathroom Remodeling Teacher apparel line!

For help with your bathroom remodel 🎓Enroll in my courses today 🎓 -

All the tools and products I use and recommend can be found on my Amazon Storefront (detailed in the description box of the video). You can find my Storefront, and all of my other social medias, by going to https://linktr.ee/bathroomremodelingteacher. Any and all purchases from my Amazon Storefront are greatly appreciated and help keep my channel going!

I hope this helps you with your own installation. Subscribe to my channel to make sure you don’t miss a new upload!

See you next class,

Steve

Comment

Comment

HOW TO WATERPROOF A WINDOW IN A TILE SHOWER

Hey Students!

Why windows were ever put inside a shower…I’ll never understand!

I mean, I do get it from a “natural source of light” and “somewhere to put my shampoo” point of view. But other than that, they just exist to make things difficult to clean and remodel!

CASE IN POINT:

My client’s home was built in the 1950’s, and it was a common period time to build a window inside the shower. This is a very familiar scenario for many homeowners in America. There are tons of older homes out there that have windows inside the shower, and they probably look something like this…

 
window in shower example bathroom remodeling teacher how to diy
 
 
window in shower example bathroom remodeling teacher diy how to
 
 
window in shower bathroom remodeling teacher diy how to waterproof
 

My job was to remove the existing tile in the bathtub area for my client, then waterproof and retile it. That window was an obstacle for me. It’s a huge obstacle for a lot of remodelers and DIYers alike.

You might be thinking, “Well, if a window is a huge problem, just get rid of it by boarding it up and tiling over it.” Most of the time, this just isn’t the best way to go. Why? Well, this particular home had a brick exterior, and you can’t easily patch over a window with brick involved without it looking unsightly. Matching siding, whatever it may be, typically doesn’t look very nice. Plus, it’s another major expense for the homeowner, and another laborious task to add to the already long list of tasks.

So, now you’re keeping the window inside your shower. But then another MAJOR CONCERN pops up— waterproofing. You want to have a solid, waterproof shower. I’m here to tell you that IT IS POSSIBLE to have a window inside your shower, and have it look nice and clean, and best of all, WATERPROOFED!

This video shows you how I do that with one of my FAVORITE waterproofing methods— HYDRO-BLOK.

Before going into those steps, I want to take a step back and emphasize the importance of replacing the window inside your shower first. You can watch how I did that HERE. This makes waterproofing and tiling much more effective and easy.

Getting back to the waterproofing… I break down exactly how I used the HYDRO-BLOK foam board and joint sealant to get that perfect waterproofed window in this video and in my newest course, the Tub/Shower Replacement Course.

Here is a pictorial breakdown of the essential steps to waterproof a window in your shower using Hydroblok:

 
window in shower waterproofing hydroblok bathroom remodeling teacher diy how to tub shower replacement course
 
 
window in shower waterproofing hydroblok bathroom remodeling teacher diy how to tub shower replacement course
 
 
window in shower waterproofing hydroblok bathroom remodeling teacher diy how to tub shower replacement course
 
 
window in shower waterproofing hydroblok bathroom remodeling teacher diy how to tub shower replacement course
 
 
window in shower waterproofing hydroblok bathroom remodeling teacher diy how to tub shower replacement course
 
 
window in shower waterproofing hydroblok bathroom remodeling teacher diy how to tub shower replacement course
 
 
window in shower waterproofing hydroblok bathroom remodeling teacher diy how to tub shower replacement course
 

Be sure to watch the video in its entirety to catch all of my well-practiced tips and tricks to help you along your own bathroom remodeling journey. Also, the Tub/Shower Replacement Course is available for you for only one payment of $49. That gives you lifetime access to the course, and first hand access to me.

Check out HYDRO-BLOK’s website and view all of their amazing products. I highly recommend using their waterproof foam boards and the sealant. They are simply the best.

HOT TIP: Check with your local vendors to see if they carry HYDRO-BLOK. I live in Pittsburgh, PA and you can get it from Daltile in Cranberry (you just gotta call and place the order with them).

💥Visit my Amazon Store for all products and tools that I recommend and use on a regular basis 👍 https://www.amazon.com/shop/bathroomremodelingteacher_

WE GOT MERCH! —> Check out the Official Bathroom Remodeling Teacher apparel line!

For help with your bathroom remodel 🎓Enroll in my courses today 🎓 -

All the tools and products I use and recommend can be found on my Amazon Storefront (detailed in the description box of the video). You can find my Storefront, and all of my other social medias, by going to https://linktr.ee/bathroomremodelingteacher. Any and all purchases from my Amazon Storefront are greatly appreciated and help keep my channel going!

I hope this helps you with your own installation. Subscribe to my channel to make sure you don’t miss a new upload!

See you next class,

Steve

Comment

Comment

MY PREFERRED METHOD OF WATERPROOFING A TUB SURROUND

Hey Students!

There are many ways to go about waterproofing a tub/shower surround for a tile installation. With all the different companies and brands out there in the market, it can be an overwhelming decision to make when it comes to your own bathroom project.

I’m going to share MY PREFERRED METHOD of waterproofing a tub surround. Now, I’m taking overall cost, ease of installment, time spent, and clean up into consideration.

With this particular tub surround I was finishing (it had a window in it!), I decided to go with a waterproof backerboard. My favorite brand is HYDRO-BLOK.

Let’s get into the reasons why I love this brand.

 
method waterproofing tub surround hydroblok bathroom remodeling teacher diy how to
 

One huge reason I love HYDRO-BLOK backerboards is because they are SO EASY TO CUT. You can use a simple utility knife to get the job done. I use my chalk line to create the the straight edge I need and cut it down with my utility knife. Easy peasy.

 
method waterproofing tub surround hydroblok bathroom remodeling teacher diy how to
 

If you have ever cut cement board, you know how dusty things can get. The BEST PART about HYDRO-BLOK’s waterproof foam board is that there is ZERO DUST when it is cut.

 
method waterproofing tub surround bathroom remodeling teacher diy how to
 

If you are anything like me and you need to make some slight adjustments to get the foam board to fit, you can easily scribe cut HYDRO-BLOK’s foam board and make it work in any wonky situation.

 
method waterproofing tub surround bathroom remodeling teacher how to diy
 

Raise your hand if you hate lugging heavy waterproofing products and sweating profusely while doing it! HYDRO-BLOK’s foam board is super light weight. No sweating necessary.

 
method waterproofing tub surround bathroom remodeling teacher diy how to
 

The main reason I prefer a foam backer board system like this is the sealant application. There is nothing faster or easier, in my opinion, than the HYDRO-BLOK JOINT SEALANT. There is very little build-up of the sealant, too.

 
method waterproofing tub surround bathroom remodeling teacher diy how to
 

Make sure you check out HYDRO-BLOK’s website and view all of their amazing products. I highly recommend using their waterproof foam boards and the sealant. They are simply the best.

HOT TIP: Check with your local vendors to see if they carry HYDRO-BLOK. I live in Pittsburgh, PA and you can get it from Daltile in Cranberry (you just gotta call and place the order with them).

💥Visit my Amazon Store for all products and tools that I recommend and use on a regular basis 👍 https://www.amazon.com/shop/bathroomremodelingteacher_

WE GOT MERCH! —> Check out the Official Bathroom Remodeling Teacher apparel line!

For help with your bathroom remodel 🎓Enroll in my courses today 🎓 -

All the tools and products I use and recommend can be found on my Amazon Storefront (detailed in the description box of the video). You can find my Storefront, and all of my other social medias, by going to https://linktr.ee/bathroomremodelingteacher. Any and all purchases from my Amazon Storefront are greatly appreciated and help keep my channel going!

I hope this helps you with your own installation. Subscribe to my channel to make sure you don’t miss a new upload!

See you next class,

Steve

Comment

Comment

THE BEST TOOLS FOR GROUTING

Hey Students!

I’m going to piggyback on yesterday’s BEST GROUT POST and talk about the BEST TOOLS TO USE FOR GROUTING.

Let’s cut right to it! Below I’ve listed the tools I always use when I grout to make the job go as smoothly and as quickly as possibly {affiliate links listed next to product}. And get excited because these tools are SUPER SIMPLE.

1. Troxell Grout float -https://amzn.to/3rtHczt

I’ve purchased this float twice over the years, and there is a good reason for it. The size, shape, and grip are superb. It’s incredibly durable, which is a must for me because I really abuse my tools.

 
best grout float troxell usa bathroom remodeling teacher how to diy grouting tile
 

2. Ardex Sponges - https://amzn.to/3DaJFBu

A no-brainer if you ask me. I ALWAYS have an Ardex sponge with me when I’m grouting. There is nothing better out there. It holds the right amount of water; the sharp edges get in between grout joints easily; insanely long-lasting… zero downside to this sponge.

 
best grouting sponge ardex bathroom remodeling teacher grout tile diy how to
 

3. White Scrubby Pads - https://amzn.to/3PMvCK5

After a messy grouting session, you need to scrub off the excess grout on those tiles. That’s where these scrubby pads come in to play. These pads are nice and big, and they are perfect for this task!

 
best white scrubby pads grouting tools bathroom remodeling teacher diy how to
 

4. Microfiber Clothes - https://amzn.to/44iLhFu

These cloths have saved me many times from the dreaded GrOuT hAzE. I’ve tried other cloths, but the microfiber ones are the absolute best in removing any haze.

 
best microfiber cloths grouting shower tile bathroom remodeling teacher how to diy
 

5. Windex with vinegar - https://amzn.to/3PUHhXc

This Windex, paired with a microfiber cloth, is your best fight again a nasty grout haze on your tiles. There is some sort of chemical component in Windex that is able to break down the haze. BE SURE to get the Windex with Vinegar— the original blue WILL stain white tiles and light grout.

 
best cleaning solution grouting windex vinegar tile shower bathroom remodeling teacher diy how to
 

6. Rubber gloves - https://amzn.to/3XTSYzp

These gloves last the longest on me when I’m grouting. They aren’t perfect— I do manage to tear them up. But, that is because I grout like a wild boar feasting on a dead carcass in the deep forest.

 
best grouting gloves tile shower bathroom remodeling teacher how to diy
 

So, there you have it. My quick 3 minute video goes over all of the grout tools and why they are awesome. Be sure to check it out and give it a like and a comment! Thanks again for all of your support!

💥Visit my Amazon Store for all products and tools that I recommend and use on a regular basis 👍 https://www.amazon.com/shop/bathroomremodelingteacher_

WE GOT MERCH! —> Check out the Official Bathroom Remodeling Teacher apparel line!

For help with your bathroom remodel 🎓Enroll in my courses today 🎓 -

All the tools and products I use and recommend can be found on my Amazon Storefront (detailed in the description box of the video). You can find my Storefront, and all of my other social medias, by going to https://linktr.ee/bathroomremodelingteacher. Any and all purchases from my Amazon Storefront are greatly appreciated and help keep my channel going!

I hope this helps you with your own installation. Subscribe to my channel to make sure you don’t miss a new upload!

See you next class,

Steve

Comment

Comment

THE BEST GROUTS FOR YOUR BATHROOM

Hey Students!

The #1 question I get from people who watch my videos is WHAT IS YOUR FAVORITE GROUT TO USE?

I’m going to keep it simple and tell you my favorite grouts, listed from the absolute best to the very good. {Affiliate links provided with each product I list.}

1. Spectralock Pro Epoxy Grout - https://amzn.to/44hncil

 
bathroom remodeling teacher best grouts epoxy tile grouting diy how to
 

2. Ardex WA Epoxy Grout - https://amzn.to/46FGjUM

 
bathroom remodeling teacher best grouts epoxy tile grouting diy how to
 

3. Spectralock1 Premix grout - https://amzn.to/44lCq5Y

 
bathroom remodeling teacher best grouts epoxy tile grouting diy how to
 

4. Mapei FA High Performance - https://amzn.to/3JQvuFG

 
bathroom remodeling teacher best grouts epoxy tile grouting diy how to
 

5. Laticrete Permacolor High Performance - https://amzn.to/43nMs50

 
bathroom remodeling teacher best grouts epoxy tile grouting diy how to
 

6. Prism High Performance - https://amzn.to/46B9FUl

 
bathroom remodeling teacher best grouts epoxy tile grouting diy how to
 

7. Mapei CQ premix - https://amzn.to/3XOpwL5

 
bathroom remodeling teacher best grouts epoxy tile grouting diy how to
 

There are specific reasons why there are 7 grouts on this list.

I use all of these grouts interchangeably, and the reason I switch it up is because each individual bathroom has its own unique grouting needs. I look at every bathroom’s tile, the tile texture, the location of the bathroom, the use of the bathroom, etc. For ALL of these details, and what I use each grout for, check out my video.

In less than 6 minutes, you’ll learn all the ins and outs of my favorite grouts! {I didn’t mean to rhyme, but it’s kinda awesome that I did.}

💥Visit my Amazon Store for all products and tools that I recommend and use on a regular basis 👍 https://www.amazon.com/shop/bathroomremodelingteacher_

WE GOT MERCH! —> Check out the Official Bathroom Remodeling Teacher apparel line!

For help with your bathroom remodel 🎓Enroll in my courses today 🎓 -

All the tools and products I use and recommend can be found on my Amazon Storefront (detailed in the description box of the video). You can find my Storefront, and all of my other social medias, by going to https://linktr.ee/bathroomremodelingteacher. Any and all purchases from my Amazon Storefront are greatly appreciated and help keep my channel going!

I hope this helps you with your own installation. Subscribe to my channel to make sure you don’t miss a new upload!

See you next class,

Steve

Comment

Comment

EASY PUSH BUTTON SHOWER

Hey students!

Last year, I worked for a client who was getting older and having a tough time getting over the tub and into his shower. I managed to convert his tub into a walk-in shower in just 3 DAYS (check out my 3 Day Shower Course here!). Along with the walk-in shower, we wanted to keep his shower faucet system super simple and efficient. That’s where the Grohe Push Button Shower Faucet came in!

I was so impressed with this faucet. Installing it and setting it up for my client was very easy, and I was really happy to make his showering as effortless as a push of a button. He was recovering from a stroke at the time, and it was incredibly important to make showering a simple process for him to complete on his own.

In this video, I show you how I installed this Grohe Push Button Shower Faucet. {FYI: This faucet has a normal shower head and a hand-held}

 
easy push button shower grohe installation DIY how to bathroom remodeling teacher handheld
 

I show you exactly what I did throughout the entire installation process, from the framing and rough-in…

 
easy push button shower grohe installation DIY how to bathroom remodeling teacher handheld
 

…to the valve placement and plumbing installation…

 
easy push button shower grohe installation DIY how to bathroom remodeling teacher handheld
 

…and to the temperature setting and testing the water.

 
easy push button shower grohe installation DIY how to bathroom remodeling teacher handheld
 

I walk you through the installation, step-by-step, so you can simply do it on your own.

 
push button shower easy installment grohe bathroom remodeling how to diy
 

Check out all the installation details by watching this video. It really does make showering, especially for the elderly, so much easier.

👉 Tools used in this video:

The Grohe Smart Control Shower System -https://www.build.com/grohe-gss-grohtherm-cir-05-a/s1516963?uid=3559106

💥Visit my Amazon Store for all products and tools that I recommend and use on a regular basis 👍 https://www.amazon.com/shop/bathroomremodelingteacher_

WE GOT MERCH! —> Check out the Official Bathroom Remodeling Teacher apparel line!

For help with your bathroom remodel 🎓Enroll in my courses today 🎓 -

All the tools and products I use and recommend can be found on my Amazon Storefront (detailed in the description box of the video). You can find my Storefront, and all of my other social medias, by going to https://linktr.ee/bathroomremodelingteacher. Any and all purchases from my Amazon Storefront are greatly appreciated and help keep my channel going!

I hope this helps you with your own installation. Subscribe to my channel to make sure you don’t miss a new upload!

See you next class,

Steve

Comment

Comment

HOW TO TURN A VINTAGE DRESSER INTO A BATHROOM VANITY

Hey students!

Brand new bathroom vanities are insanely expensive. And a lot of times, they’re not that well made. Allow me to introduce an alternative bathroom vanity idea that not only effortlessly adds character and patina to your bathroom, but is also much more affordable. I give you the vintage-dresser-turned-to-a-vanity idea!

My wife and I love doing this in bathrooms when we are flipping homes and even in our own homes. It gives you that one-of-a-kind, unique vanity that can warm up a space instantly.

In our current home, we converted a vintage dresser into a vanity, and we LOVE it.

 
bathroom design converting vintage dresser vanity sink DIY how to bathroom remodeling
 

The best part is that it’s not too difficult to turn a dresser into a vanity.

This video shows you exactly how I converted this dresser…

 
bathroom design converting vintage dresser vanity sink DIY how to bathroom remodeling
 

…into a bathroom vanity.

 
bathroom design converting vintage dresser vanity sink DIY how to bathroom remodeling
 

So, you can go from dull and cheap…

 
bathroom design converting vintage dresser vanity sink DIY how to bathroom remodeling
 

…to high-quality and timeless.

 
bathroom design converting vintage dresser vanity sink DIY how to bathroom remodeling
 

Be sure to watch this video to get all the details and products to convert your vintage dresser into a classic bathroom vanity.

👉 Tools used in this video:

Vessel sink - https://amzn.to/44erBCc
Pop-up drain -
https://amzn.to/43TAAJe
Sink faucet -
https://amzn.to/3JtXSx8

💥Visit my Amazon Store for all products and tools that I recommend and use on a regular basis 👍 https://www.amazon.com/shop/bathroomremodelingteacher_

WE GOT MERCH! —> Check out the Official Bathroom Remodeling Teacher apparel line!

For help with your bathroom remodel 🎓Enroll in my courses today 🎓 -

All the tools and products I use and recommend can be found on my Amazon Storefront (detailed in the description box of the video). You can find my Storefront, and all of my other social medias, by going to https://linktr.ee/bathroomremodelingteacher. Any and all purchases from my Amazon Storefront are greatly appreciated and help keep my channel going!

I hope this helps you with your own installation. Subscribe to my channel to make sure you don’t miss a new upload!

See you next class,

Steve

Comment

Comment

HOW TO REFINISH AN OLD CAST IRON TUB

Hey students!

Old cast iron tubs are… OLD. And a lot of them show their age. They discolor, chip, and generally look pretty worn the older they are. I have torn out a lot of cast iron tubs in my bathroom remodeling career, and I’m here to tell you DON’T DO IT. They don’t make tubs like they used to, and these cast iron tubs are rock solid and feel much more substantial than those new acrylic ones.

There is an affordable, DIY way to fix your dingy cast iron bathtub. It’s called Ekopel (and no, this is NOT sponsored). It’s a complete tub refinishing kit you can order off of Amazon, and it seriously makes your cast iron tub look BRAND SPANKING NEW. I recently used it to finish a cast iron tub I tore out of an client’s home, and I was incredibly pleased with the results (and so was my wife!).

This video details exactly how I refinished the tub and what products I used to get the best results.

To begin, make sure your tub is clean and the room is warm. The epoxy finish won’t be able to adhere properly in cold temperatures. Here I am next to a very nasty cast iron tub with the tub refinishing kit below.

 
cast iron tub refinish refurbish bathroom remodeling teacher DIY how to
 

Next up is sanding your tub to remove any flakes and chips, and then giving it a good cleaning scrub. The sanding also helps with the application of the epoxy finish.

 
cast iron tub refinish refurbish sanding bathroom remodeling teacher DIY how to
 

I then scraped off any existing silicone on the tub, and used Bondo to fill in all the chips and dents.

 
cast iron tub refinish refurbish dents Bondo bathroom remodeling teacher DIY how to
 

The trick is to pour the finish; don’t brush it on. Once the epoxy covers the walls of the tub, you can definitely manipulate it with a foam roller. But, let gravity do most of the work. A heating gun is crucial, as well, to get rid of any air pockets and pinholes. Don’t use a hair dryer. The air movement will cause all dust and particles to kick up and stick in your epoxy finish.

{Note: I’ve got to emphasize how much dust and debris is your enemy when you apply the epoxy finish. Make sure everything is as clean as possible.}

 
cast iron tub refinish refurbish bathroom remodeling teacher DIY how to
 

Here’s the before…

 
cast iron tub refinishing refurbishing bathroom remodeling teacher DIY how to
 

and after.

 
cast iron tub refinishing refurbishing bathroom remodeling teacher DIY how to
 

The video will show you every step I take to ensure the best outcome. Let me know what you think in the comments below, and thanks for watching!

👉 Tools used in this video:

Ekopel Tub Refinishing Kit - https://amzn.to/3WQuma6
Abrasive grinder discs -
https://amzn.to/3IYyC1O
Rubber gloves -
https://amzn.to/45QfPQ8
Heat gun -
https://amzn.to/3IYQTMy
Bondo -
https://amzn.to/3N00xzI

💥Visit my Amazon Store for all products and tools that I recommend and use on a regular basis 👍 https://www.amazon.com/shop/bathroomremodelingteacher_

Want to support the Bathroom Remodeling Teacher— in style?!? Check out the Official Bathroom Remodeling Teacher apparel line!

For help with your bathroom remodel 🎓Enroll in my courses today 🎓 -

All the tools and products I use and recommend can be found on my Amazon Storefront (detailed in the description box of the video). You can find my Storefront, and all of my other social medias, by going to https://linktr.ee/bathroomremodelingteacher. Any and all purchases from my Amazon Storefront are greatly appreciated and help keep my channel going!

I hope this helps you with your own installation. Subscribe to my channel to make sure you don’t miss a new upload!

See you next class,

Steve

Comment

Comment

CONCRETE REMOVAL FOR A BASEMENT BATHROOM

Hey students!

The latest project I’ve been working on has been constructing a basement bathroom (literally, from the ground up).

One of the first crucial steps I had to take to build this bathroom was busting up some very old, very hard concrete flooring. Why? I needed to make some serious space for the plumbing, insulation, heated flooring, and to make sure the floor was perfectly level to build on. One of the most important things to me was keeping everything level. That meant I didn’t want to have a slight step up into the bathroom space (tripping hazard, no thanks). This was all the more reason for me to bust up this concrete.

I’m building a curbless shower in this basement, and luckily there are some concrete removal tips & tricks I can let you in on, but first…

If you are thinking of building a basement bathroom in your home, I would encourage you to not only watch this video, but to also enroll in my DIY Geek Membership, where you would have access to ALL of my online bathroom remodeling courses AND early access to the Basement Bathroom Course I’m working on in real time.

The first step before starting your concrete removal is finding the perfect location for your basement bathroom. Find your existing waste stack and build from there.

Once I established my bathroom area, I began by measuring out the size of the bathroom (in this case, it is 4x8) and marking it on the concrete floor. I used my foam insulation board to trace my space easily.

 
foam insulation board measuring basement bathroom remodeling teacher diy
 

Once I outlined my space, I was ready to cut. I got my electric concrete saw (plus a small water pump to keep the dust down) and got to cutting. Pro tip: Be sure to wear your safety gear (face mask, glasses, and ear protection!).

 
wet concrete saw basement bathroom remodeling teacher diy
 

After cutting, I went to jack hammering the concrete. This was much more difficult than I thought it was going to be. Why? The house is old, which means the concrete is old… and very, very solid. Take your time and be patient. I’m an animal and kept going until I was finished— took me an hour. Haha! Pro tip: Keep wearing your safety gear (glasses, ear protection!).

 
jack hammering concrete basement bathroom remodeling teacher diy
 

Next up is the not-so-fun and very arduous task of removing all the broken up concrete.

 
concrete removal basement bathroom remodeling teacher diy
 

Once I had all of the debris out of there, I was able to examine the existing plumbing and come up with a new plumbing plan for the bathroom I was going to build.

 
existing plumbing under concrete basement bathroom remodeling teacher diy
 

Be sure to watch the video and find out all those details!

👉Helpful tools used in this video:

Electric concrete saw (the bigger one) - https://amzn.to/3MG5yhT
Jack hammer - https://www.harborfreight.com/15-amp-66-lb-1-18-in-hex-breaker-hammer-with-maximum-vibration-control-56407.html
Pro knee pads - https://amzn.to/42L1p1y
Ear protection - https://amzn.to/3InugRE

💥Visit my Amazon Store for all products and tools that I recommend and use on a regular basis 👍 https://www.amazon.com/shop/bathroomremodelingteacher_

Want to support the Bathroom Remodeling Teacher— in style?!? Check out the Official Bathroom Remodeling Teacher apparel line!

For help with your bathroom remodel 🎓Enroll in my courses today 🎓 -

All the tools and products I use and recommend can be found on my Amazon Storefront (detailed in the description box of the video). You can find my Storefront, and all of my other social medias, by going to https://linktr.ee/bathroomremodelingteacher. Any and all purchases from my Amazon Storefront are greatly appreciated and help keep my channel going!

I hope this helps you with your own installation. Subscribe to my channel to make sure you don’t miss a new upload!

See you next class,

Steve

Comment

Comment

WE GOT MERCH!

 
bathroom remodeling teacher hoodie merchandise apparel
 

Hey students!

The day has finally come… We have officially launched our Bathroom Remodeling Teacher Merch!

 
bathroom remodeling teacher tee shirt plan learn build merchandise apparel
 

We wanted to come up with a fun way to show your support for the Bathroom Remodeling Teacher, so we came up with this fun and practical line of apparel you can casually wear anywhere.

Each purchase directly supports Steve and his efforts in creating courses and content to teach you the best ways of remodeling bathrooms and other renovating projects.

 
bathroom remodeling teacher hat apparel merchandise
 

If you have been watching Steve for a while now, you will probably recognize a lot of these t-shirts. He personally loves wearing them when he is working hard on a bathroom remodel!

 
bathroom remodeling teacher womens vneck tshirt merchandise apparel
 

The best part is there are things for both men and women to wear! Be sure to check out all the merch, especially where Steve and Nikki modeling it!

If you do buy a shirt, be sure to tag @bathroomremodelingteacher_ on Instagram!

Thanks in advance for any and all support you have given the Bathroom Remodeling Teacher! We really do appreciate it— we would be here without you guys!

💥Visit my Amazon Store for all products and tools that I recommend and use on a regular basis 👍 https://www.amazon.com/shop/bathroomremodelingteacher_

For help with your bathroom remodel 🎓Enroll in my courses today 🎓 -

All the tools and products I use and recommend can be found on my Amazon Storefront (detailed in the description box of the video). You can find my Storefront, and all of my other social medias, by going to https://linktr.ee/bathroomremodelingteacher. Any and all purchases from my Amazon Storefront are greatly appreciated and help keep my channel going!

I hope this helps you with your own installation. Subscribe to my channel to make sure you don’t miss a new upload!

See you next class,

Steve

Comment

Comment

HOW TO TILE AROUND A ONE PIECE FIBERGLASS TUB SHOWER SURROUND

Hey students!

Fiberglass, one-piece tub shower surrounds are incredibly affordable, and very common in a lot of homes. Some may think they aren't "fancy" enough, but I have a great (and easy!) way to make them look high-end.

Let’s start off with the basics. Exactly what is a fiberglass tub and shower? Fiberglass reinforced plastic is made from layers of minuscule strings of interwoven glass, heated together. That is then molded, shaped, and sprayed with a resin gel coat. It's one of the most affordable materials for tubs and one of the easiest to install.

So, this is a great option for DIYers who are wanting to avoid a ton of tile work and save some serious cash.

In this video, I show you, from start to finish, how to tile around the top and sides of a fiberglass one-piece tub and shower surround.

First things first: LAYOUT. I’m using your run-of-the-mill, white subway tile you can get at Home Depot at a very reasonable price. I want to make sure everything is nice and straight. One of the first things you have to pay attention to is making sure your shower (and therefore your tile) is LEVEL. Get that level laser out!

 
tile layout around fiberglass tub shower surround laser level bathroom remodeling DIY how to
 

You’re gonna want to start your tile work on your back wall first. Let’s get out my FAVORITE thinset and start burning it into the substrate.

 
start tile back wall first fiberglass tub shower surround tile work bathroom remodeling DIY how to
 

I love using these horseshoe shims to make sure my grout lines are the right size, and to keep my tiles level.

 
horseshoe shims level tile work bathroom remodeling teacher fiberglass tub shower surround DIY how to
 

When I tiled the sides, I made sure to extend a nice bullnose tile all the way down the edge of the fiberglass surround. Why? It is incredibly important to make sure you waterproof and tile this area because that is where we see the MOST drywall deterioration due to high water exposure. So, protect your work and your bathroom walls and do this.

 
bullnose white subway tile edge fiberglass tub shower surround waterproof bathroom remodeling teacher DIY how to
 

It was really difficult to get an “after shot” of this bathroom because it was oddly shaped. I will say it made the unit look incredibly solid and more expensive. The fact that the walls above and around the unit were waterproofed and tiled made my customer extremely happy.

🔨Some of the materials & tools used in this video (Amazon affiliate links):

Fein Grinder Dust Shroud - https://amzn.to/3Lyp0eC
Fein Shop-vac - https://amzn.to/44ykzZN
Makita Grinder - https://amzn.to/3VAQ15S
Montolit CGX blade - https://amzn.to/42lU87S
Tlock tile leveling system: - https://amzn.to/44vAech
Montolit 24" tile cutter - https://amzn.to/4274lFo
Schluter Jolly (metal edging) - https://amzn.to/3AStqIn
Ardex X5 (cheaper at a supplier) - https://amzn.to/3AWXD90
Dewalt laser - https://amzn.to/425HABS
Montolit CGX blade - https://amzn.to/3AVm4ni
Montolit STL blade - https://www.contractorsdirect.com
Montlit squadron blade - https://amzn.to/3p41FcZ
Fein Multimaster cutter - https://amzn.to/423kSKt
Proknees 0714 knee pads - https://amzn.to/3p8Q0tw
Ardex sponge - https://amzn.to/413Zpjl
Horseshoe tile spacers - https://amzn.to/44rWRhY
Linoleum knife (scraper) - https://amzn.to/3pefZzF
Red tile spacer wedges - https://amzn.to/3LXB9eD
Troxell grout float - https://amzn.to/3LqQ3s0
Tile nippers - https://amzn.to/3ntD9lc

💥Visit my Amazon Store for all products and tools that I recommend and use on a regular basis 👍 https://www.amazon.com/shop/bathroomremodelingteacher_

For help with your bathroom remodel 🎓Enroll in my courses today 🎓 -

All the tools and products I use and recommend can be found on my Amazon Storefront (detailed in the description box of the video). You can find my Storefront, and all of my other social medias, by going to https://linktr.ee/bathroomremodelingteacher. Any and all purchases from my Amazon Storefront are greatly appreciated and help keep my channel going!

I hope this helps you with your own installation. Subscribe to my channel to make sure you don’t miss a new upload!

See you next class,

Steve

Comment

Comment

HOW TO INSTALL A SHOWER PAN

Hey students!

My most requested remodeling project these days is how to install a shower pan when converting from a tub to walk-in shower… and for good reason. Why? It’s in HIGH DEMAND (hello, aging Baby Boomers). It’s also not as costly as an all tiled walk-in shower, making it even more appealing to those who need a walk-in shower.

If I was a newer contractor starting in this business, this type of project is all I would be focusing on. You get in and out of a client’s home quickly. It makes for an easy work week. Plus, it’s really not that hard to do.

This kind of project is such a simple way to make good money if you are into remodeling bathrooms.

What’s even better is I already have a course {3 Day Tile Course} detailing how to successfully build a walk-in shower using a premade shower pan.

This video cuts straight to the point installing a shower pan when you are going from a tub to a walk-in shower. I go over the drain installation…

 
install shower pan tub to walk-in shower bathroom remodeling teacher DIY home improvement
 

… to patching the subfloor underneath…


…laying down the plastic vapor barrier and mortar to keep that pan dry and in place…

 
install shower pan tub to walk-in shower bathroom remodeling teacher DIY home improvement
 

…to setting the shower pan and connecting the plumbing.

 
install shower pan tub to walk-in shower bathroom remodeling teacher DIY home improvement
 

You can have a beautiful and affordable walk-in shower once you complete this project. Be sure to watch the entire video for all the tips and tricks of installing a shower pan, and check out my dedicated course to this project to help you out even more!

🔨Some of the materials & tools used in this video (Amazon affiliate links):

Dreamline Slimline bases - https://amzn.to/3nXyBU6
Wheeler Rex pipe cutter - https://amzn.to/3GuQ6S9

View the rest of the materials and tools in this checklist.

💥Visit my Amazon Store for all products and tools that I recommend and use on a regular basis 👍 https://www.amazon.com/shop/bathroomremodelingteacher_

For help with your bathroom remodel 🎓Enroll in my courses today 🎓 -

All the tools and products I use and recommend can be found on my Amazon Storefront (detailed in the description box of the video). You can find my Storefront, and all of my other social medias, by going to https://linktr.ee/bathroomremodelingteacher. Any and all purchases from my Amazon Storefront are greatly appreciated and help keep my channel going!

I hope this helps you with your own installation. Subscribe to my channel to make sure you don’t miss a new upload!

See you next class,

Steve

Comment

1 Comment

HOW TO INSTALL FLOATING LAMINATE FLOORING

Hey students!

Do you have wall-to-wall carpet you want to replace? Or tired, old wood floors that need to be refinished but you do not have the time, energy, and patience to complete?

Laminate flooring is a great solution to your flooring problems. It is lower in cost when compared to other flooring options (i.e. luxury vinyl plank flooring and hardwood flooring), and it’s installation is easy enough for you to do on your own.

The best part about laminate flooring? The products have become so well made and developed, a lot of them look like real hardwood floors (for a FRACTION of the cost!). The laminate flooring I’m installing in this video was $2.99/sqft. I had about 900 sqft I needed to cover, which brought me to about $2,700 in the flooring material.

Since this is a home remodeling project I’m very familiar with doing (I’ve installed too many to recall), I have some helpful methods and tools I wanted to share with you to make your laminate flooring installation go fast and easy.

One of my biggest tips is acclimating the laminate flooring before installing it. Make sure you get the laminate flooring sitting at the job site for at least a week before starting the installation so it can properly adjust to the current temperature and humidity levels of the home. I can’t tell you how many times I got bit in the ass with hurrying this part along. The laminate flooring can shift and move when adjusting to temps, and you want to avoid that so your freshly installed floor doesn’t buckle or move around on you.

 
installing floating laminate flooring DIY home improvement bathroom remodeling teacher acclimating moisture temperature
 

Another tip is to install a vapor barrier underneath the laminate flooring. This adds a bit of softness to your floors, but more importantly, it eliminates any moisture that comes up from beneath the floors (like the moisture in your basement). This step is especially crucial if you are installing laminate flooring over concrete.

 
installing floating laminate flooring DIY home improvement bathroom remodeling teacher  vapor barrier
 

A major problem a lot of DIYers run into when installing laminate flooring is the flooring layout. I go over some methods and tips on how to best install your flooring (i.e. the direction of the flooring, where to start when the room is not a simple square/rectangle shape, etc.).

 
installing floating laminate flooring DIY home improvement bathroom remodeling teacher layout pattern
 

There is a ton of information packed into this video that will definitely help you out with your own laminate flooring project, from my favorite flooring tools to tile and door transitions to filling in gaps in the subfloor.

You can go from this {dark & dingy}…

 
installing floating laminate flooring DIY home improvement bathroom remodeling teacher carpet dark dingy
 

…to this {bright & polished} in no time.

 
installing floating laminate flooring DIY home improvement bathroom remodeling teacher installed bright polished clean
 

You gotta watch the full video… I promise you will get a ton of useful tiling information out of it! 👊

🔨Some of the materials & tools used in this video (Amazon affiliate links):

Pro-knee pads - https://amzn.to/3lX44Ff
Fein Shop vac (dust extractor) - https://amzn.to/3nCxucp
Fein oscillating tool - https://amzn.to/3JXwWFr
Moisture meter - https://amzn.to/3nDst30
Toe kick saw - https://amzn.to/3JZYkme

View the rest of the materials and tools in this checklist.

💥Visit my Amazon Store for all products and tools that I recommend and use on a regular basis 👍 https://www.amazon.com/shop/bathroomremodelingteacher_

For help with your bathroom remodel 🎓Enroll in my courses today 🎓 -

All the tools and products I use and recommend can be found on my Amazon Storefront (detailed in the description box of the video). You can find my Storefront, and all of my other social medias, by going to https://linktr.ee/bathroomremodelingteacher. Any and all purchases from my Amazon Storefront are greatly appreciated and help keep my channel going!

I hope this helps you with your own installation. Subscribe to my channel to make sure you don’t miss a new upload!

See you next class,

Steve

1 Comment