Comment

HOW TO TILE A BATHROOM- MY BEST ADVICE

Hey students!

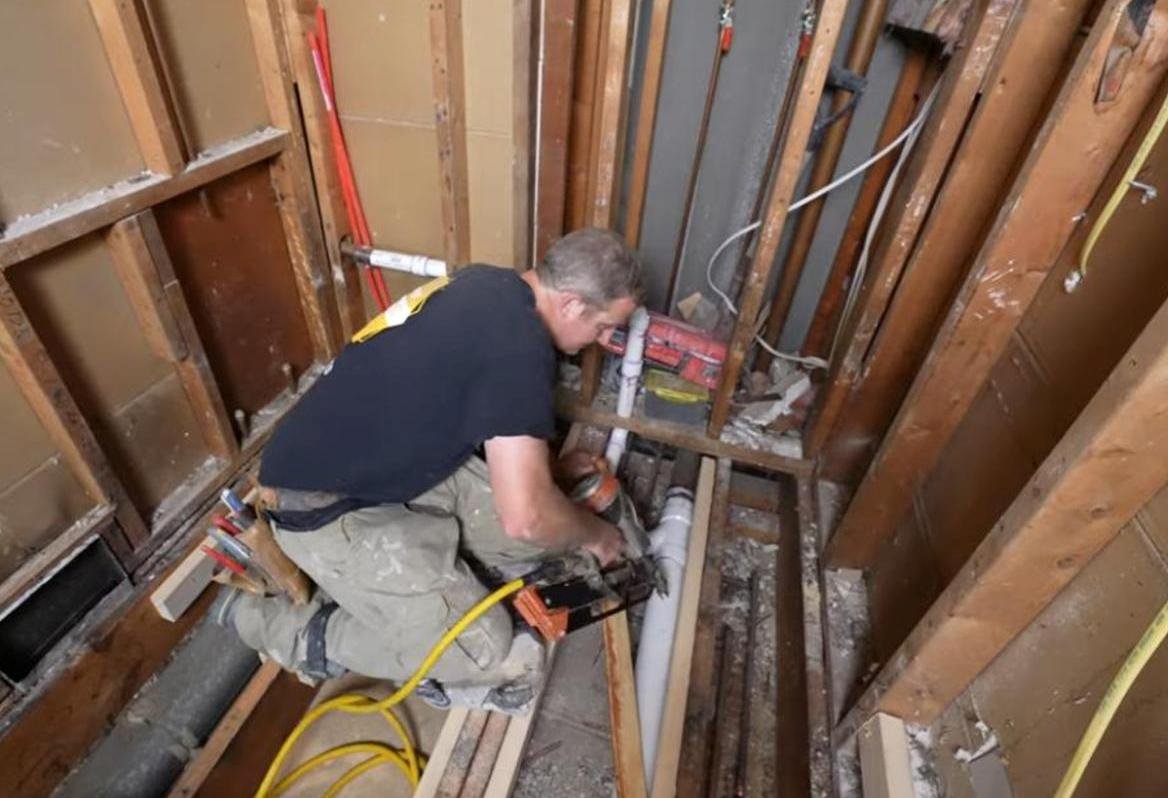
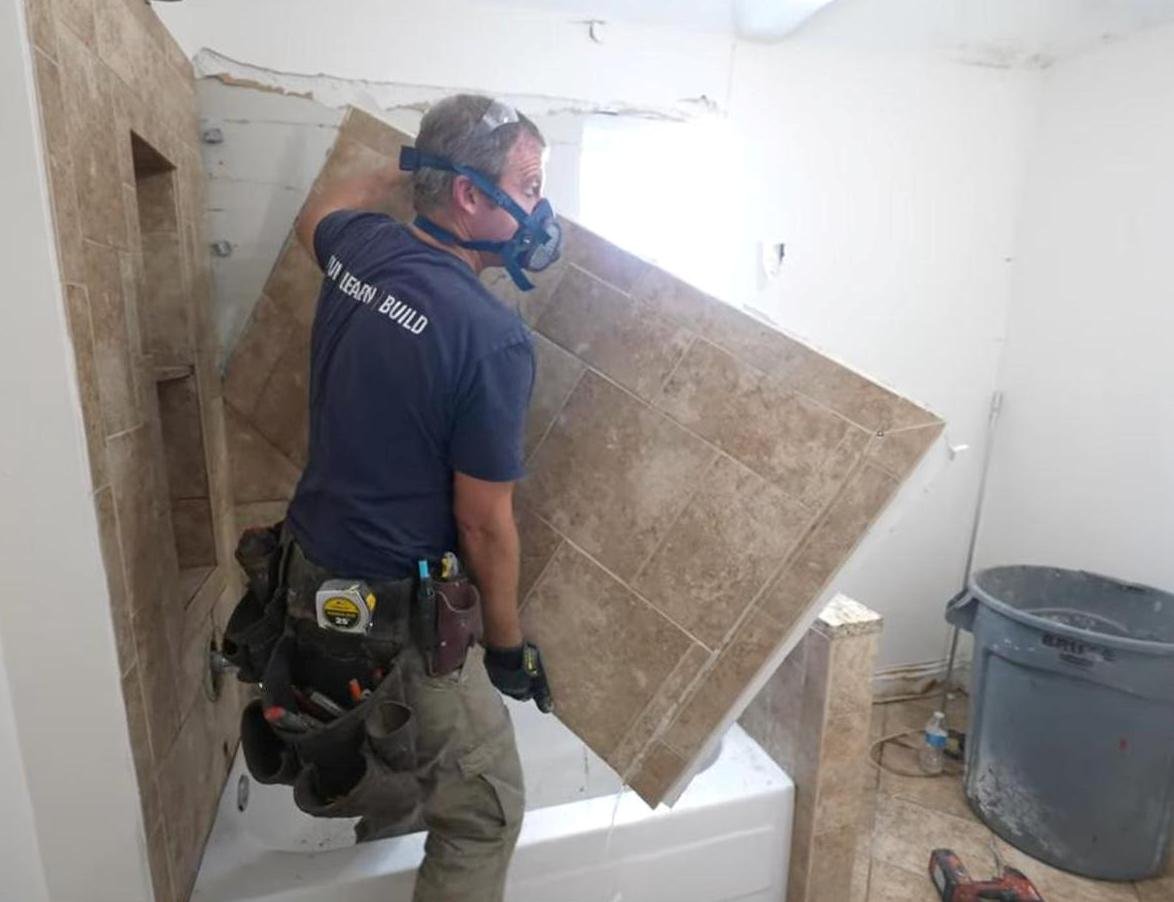
I’m often referred to as “that tile guy.” It’s understandable. I’ve been demonstrating how to tile bathrooms on YouTube since 2015. I’ve also been in the bathroom remodeling field for about 15 years.

Since I’ve put in a lot of time in this type of home remodeling, I’ve learned a ton of tips and easier short cuts when it comes to laying tile. I want to share my best tiling techniques with you.

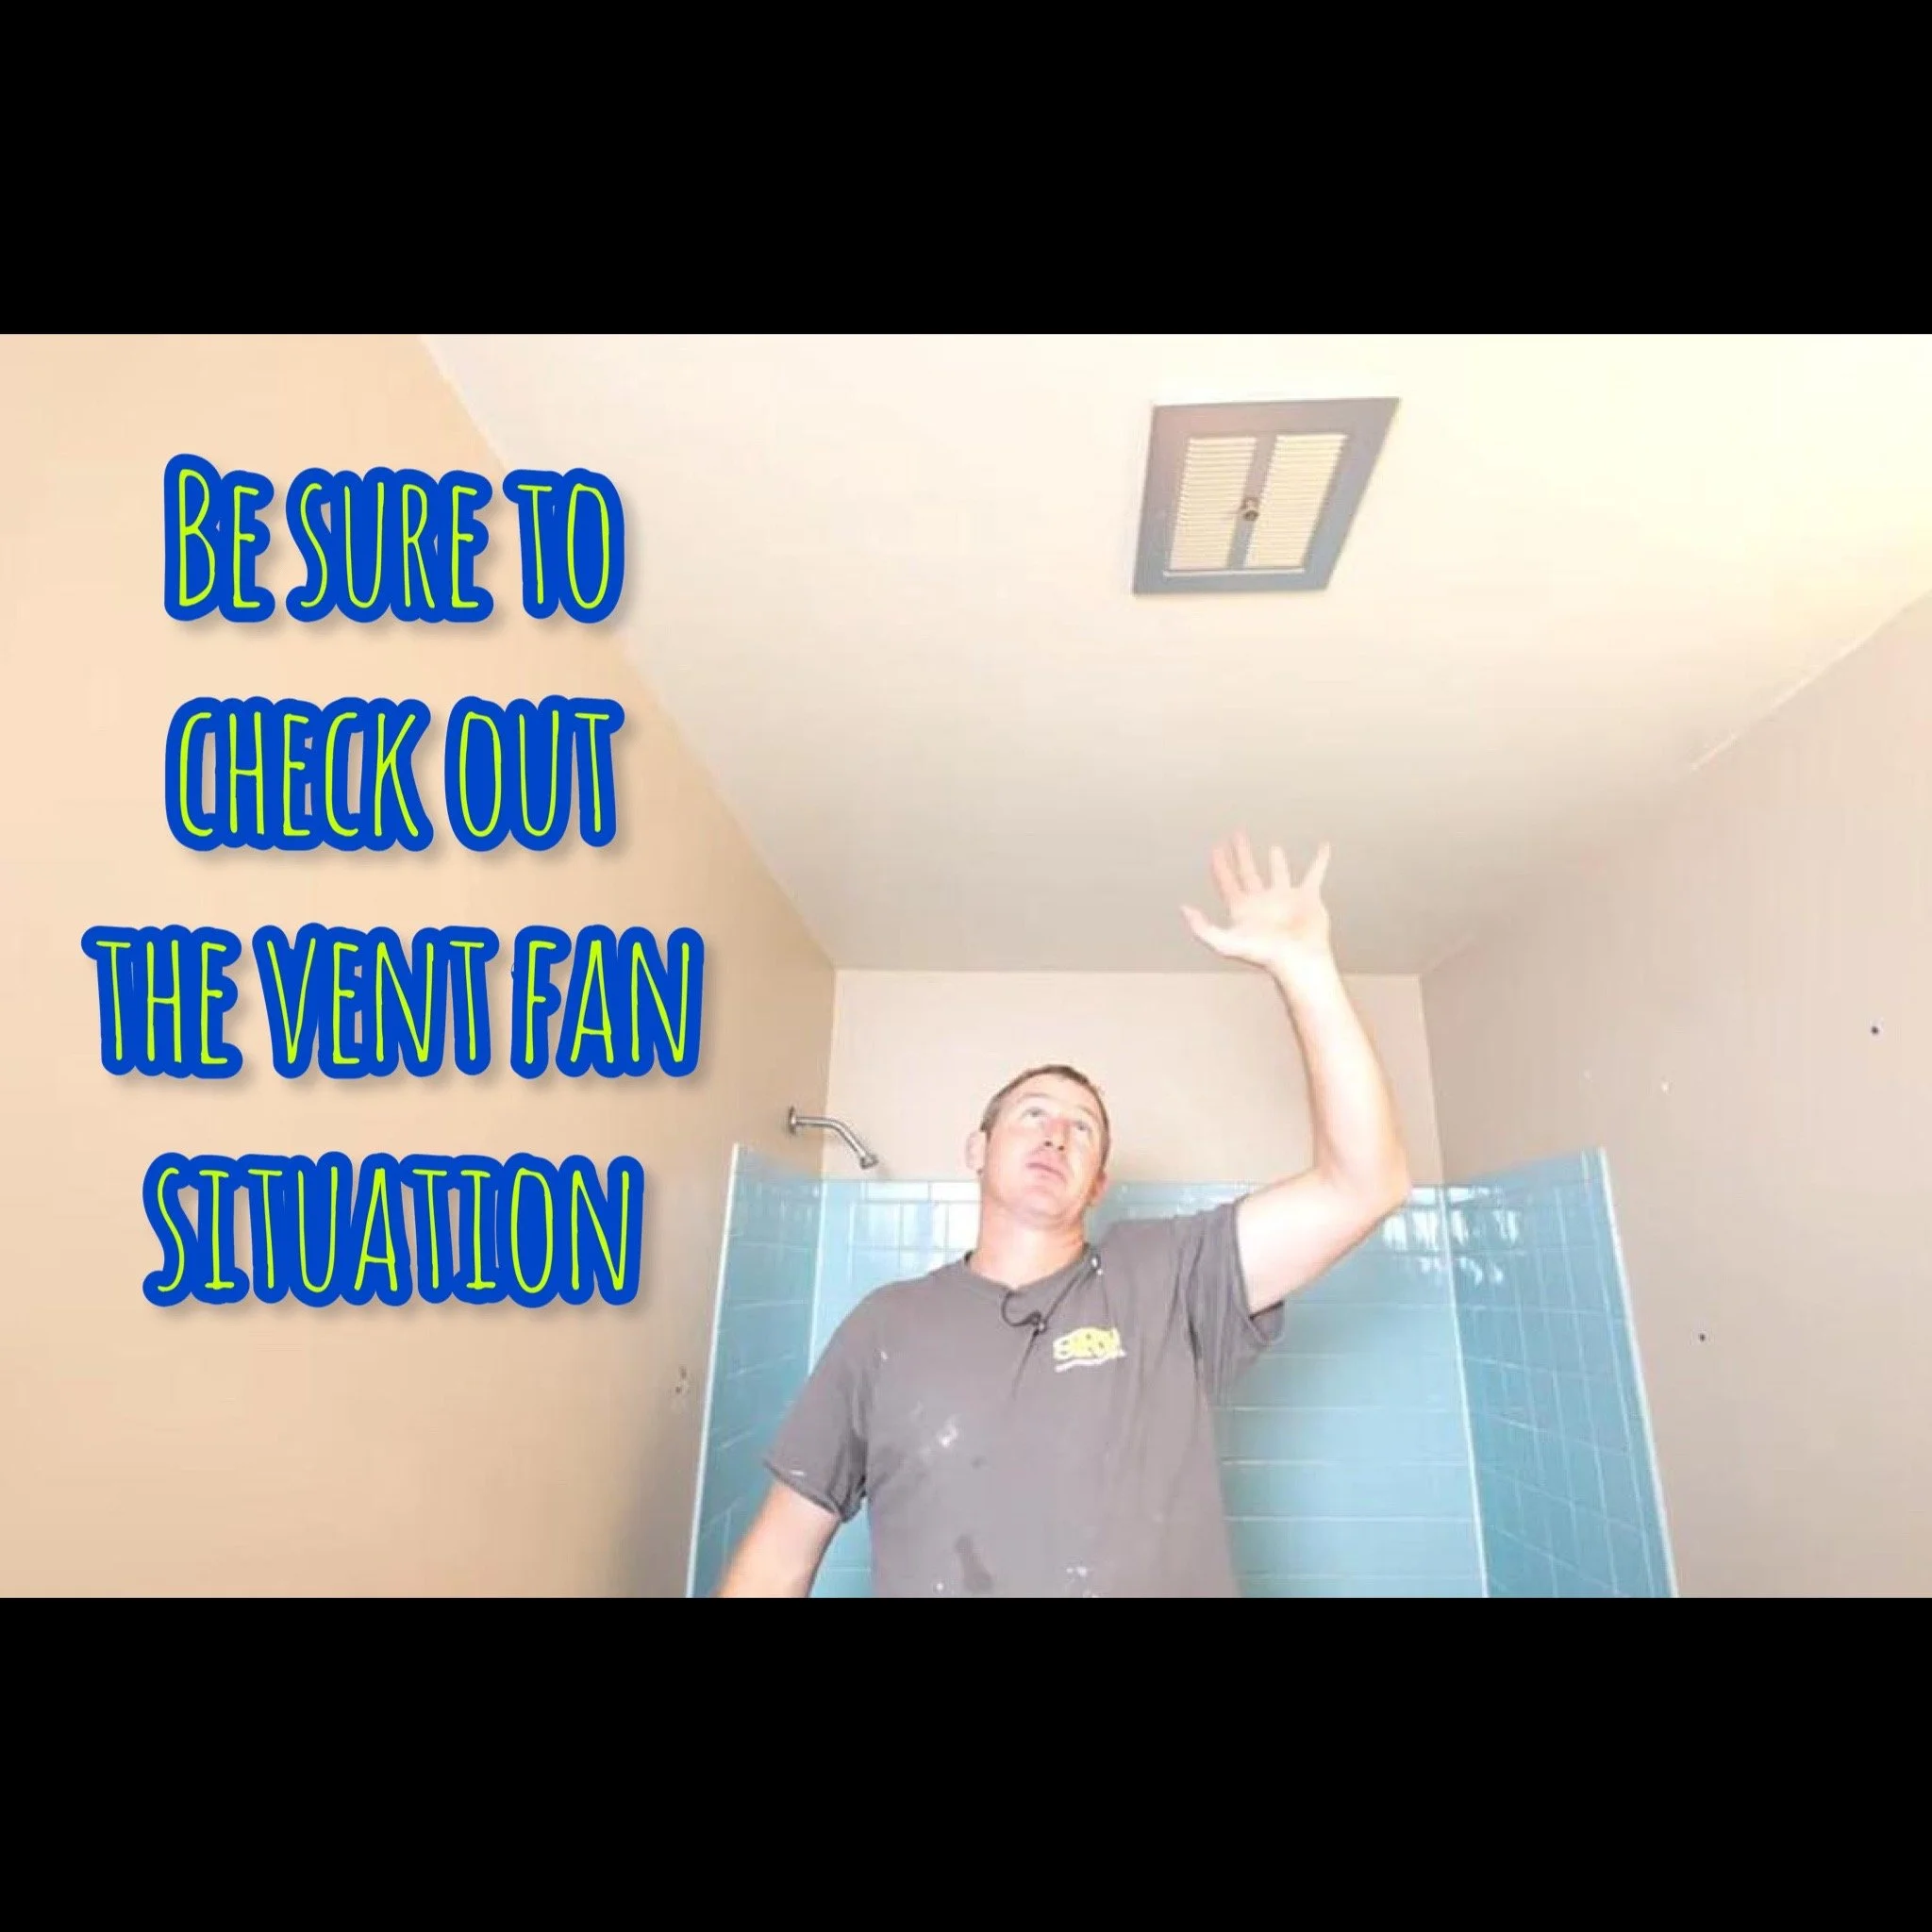
This video is PACKED with a ton of information. It will more than likely answer most of your tiling questions.

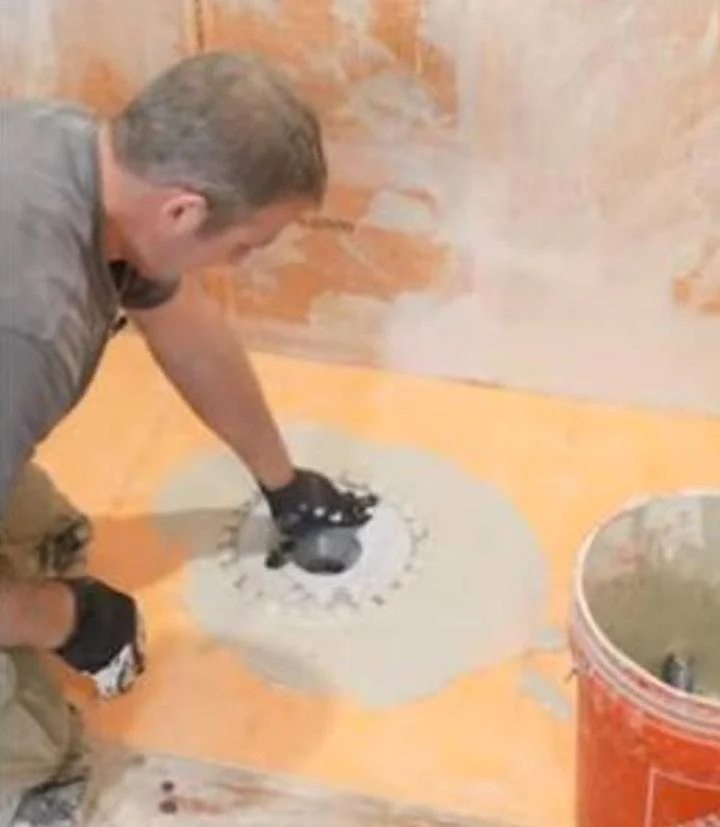
Some of the advice I share is the best thinset you can use to make tiling easier and why it is the best…

 
best tiling advice DIY home remodeling bathroom remodeling teacher ardex thinset
 

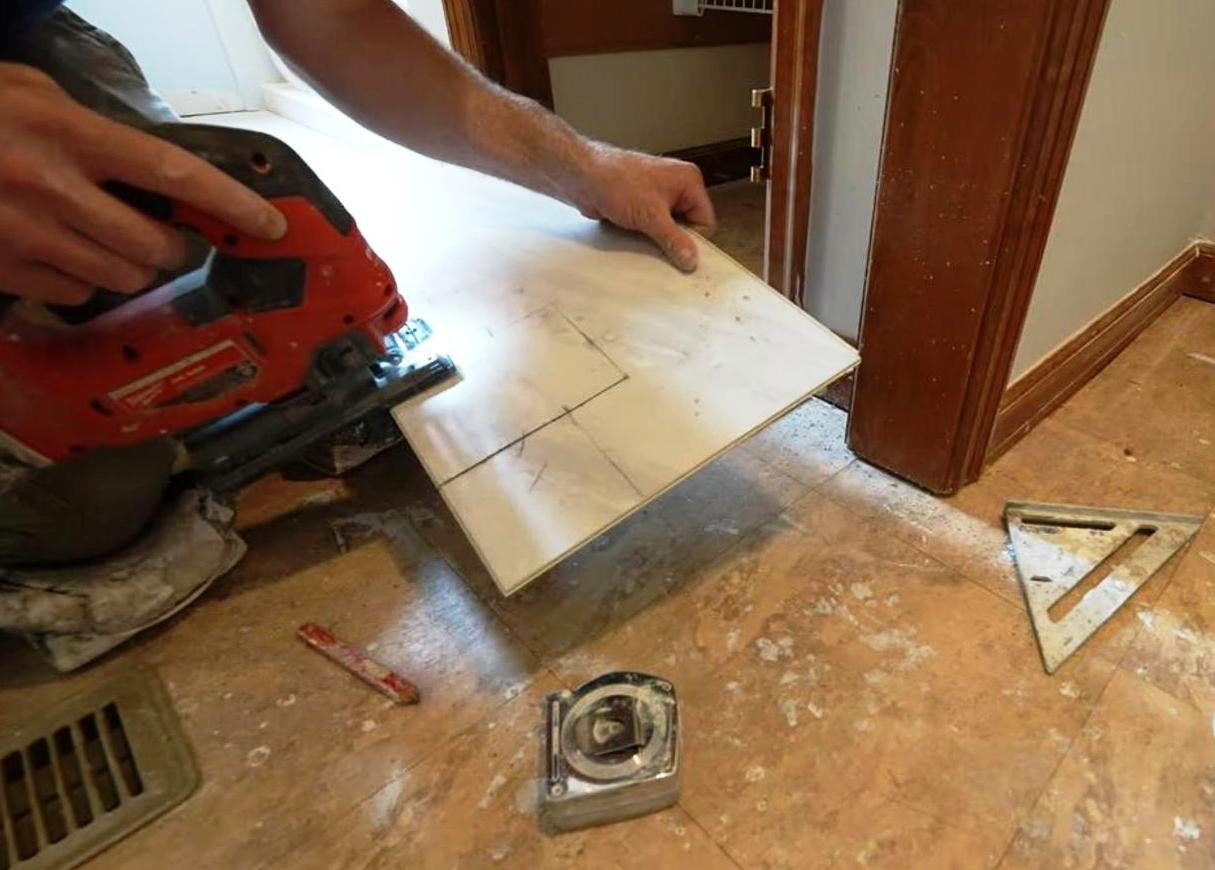
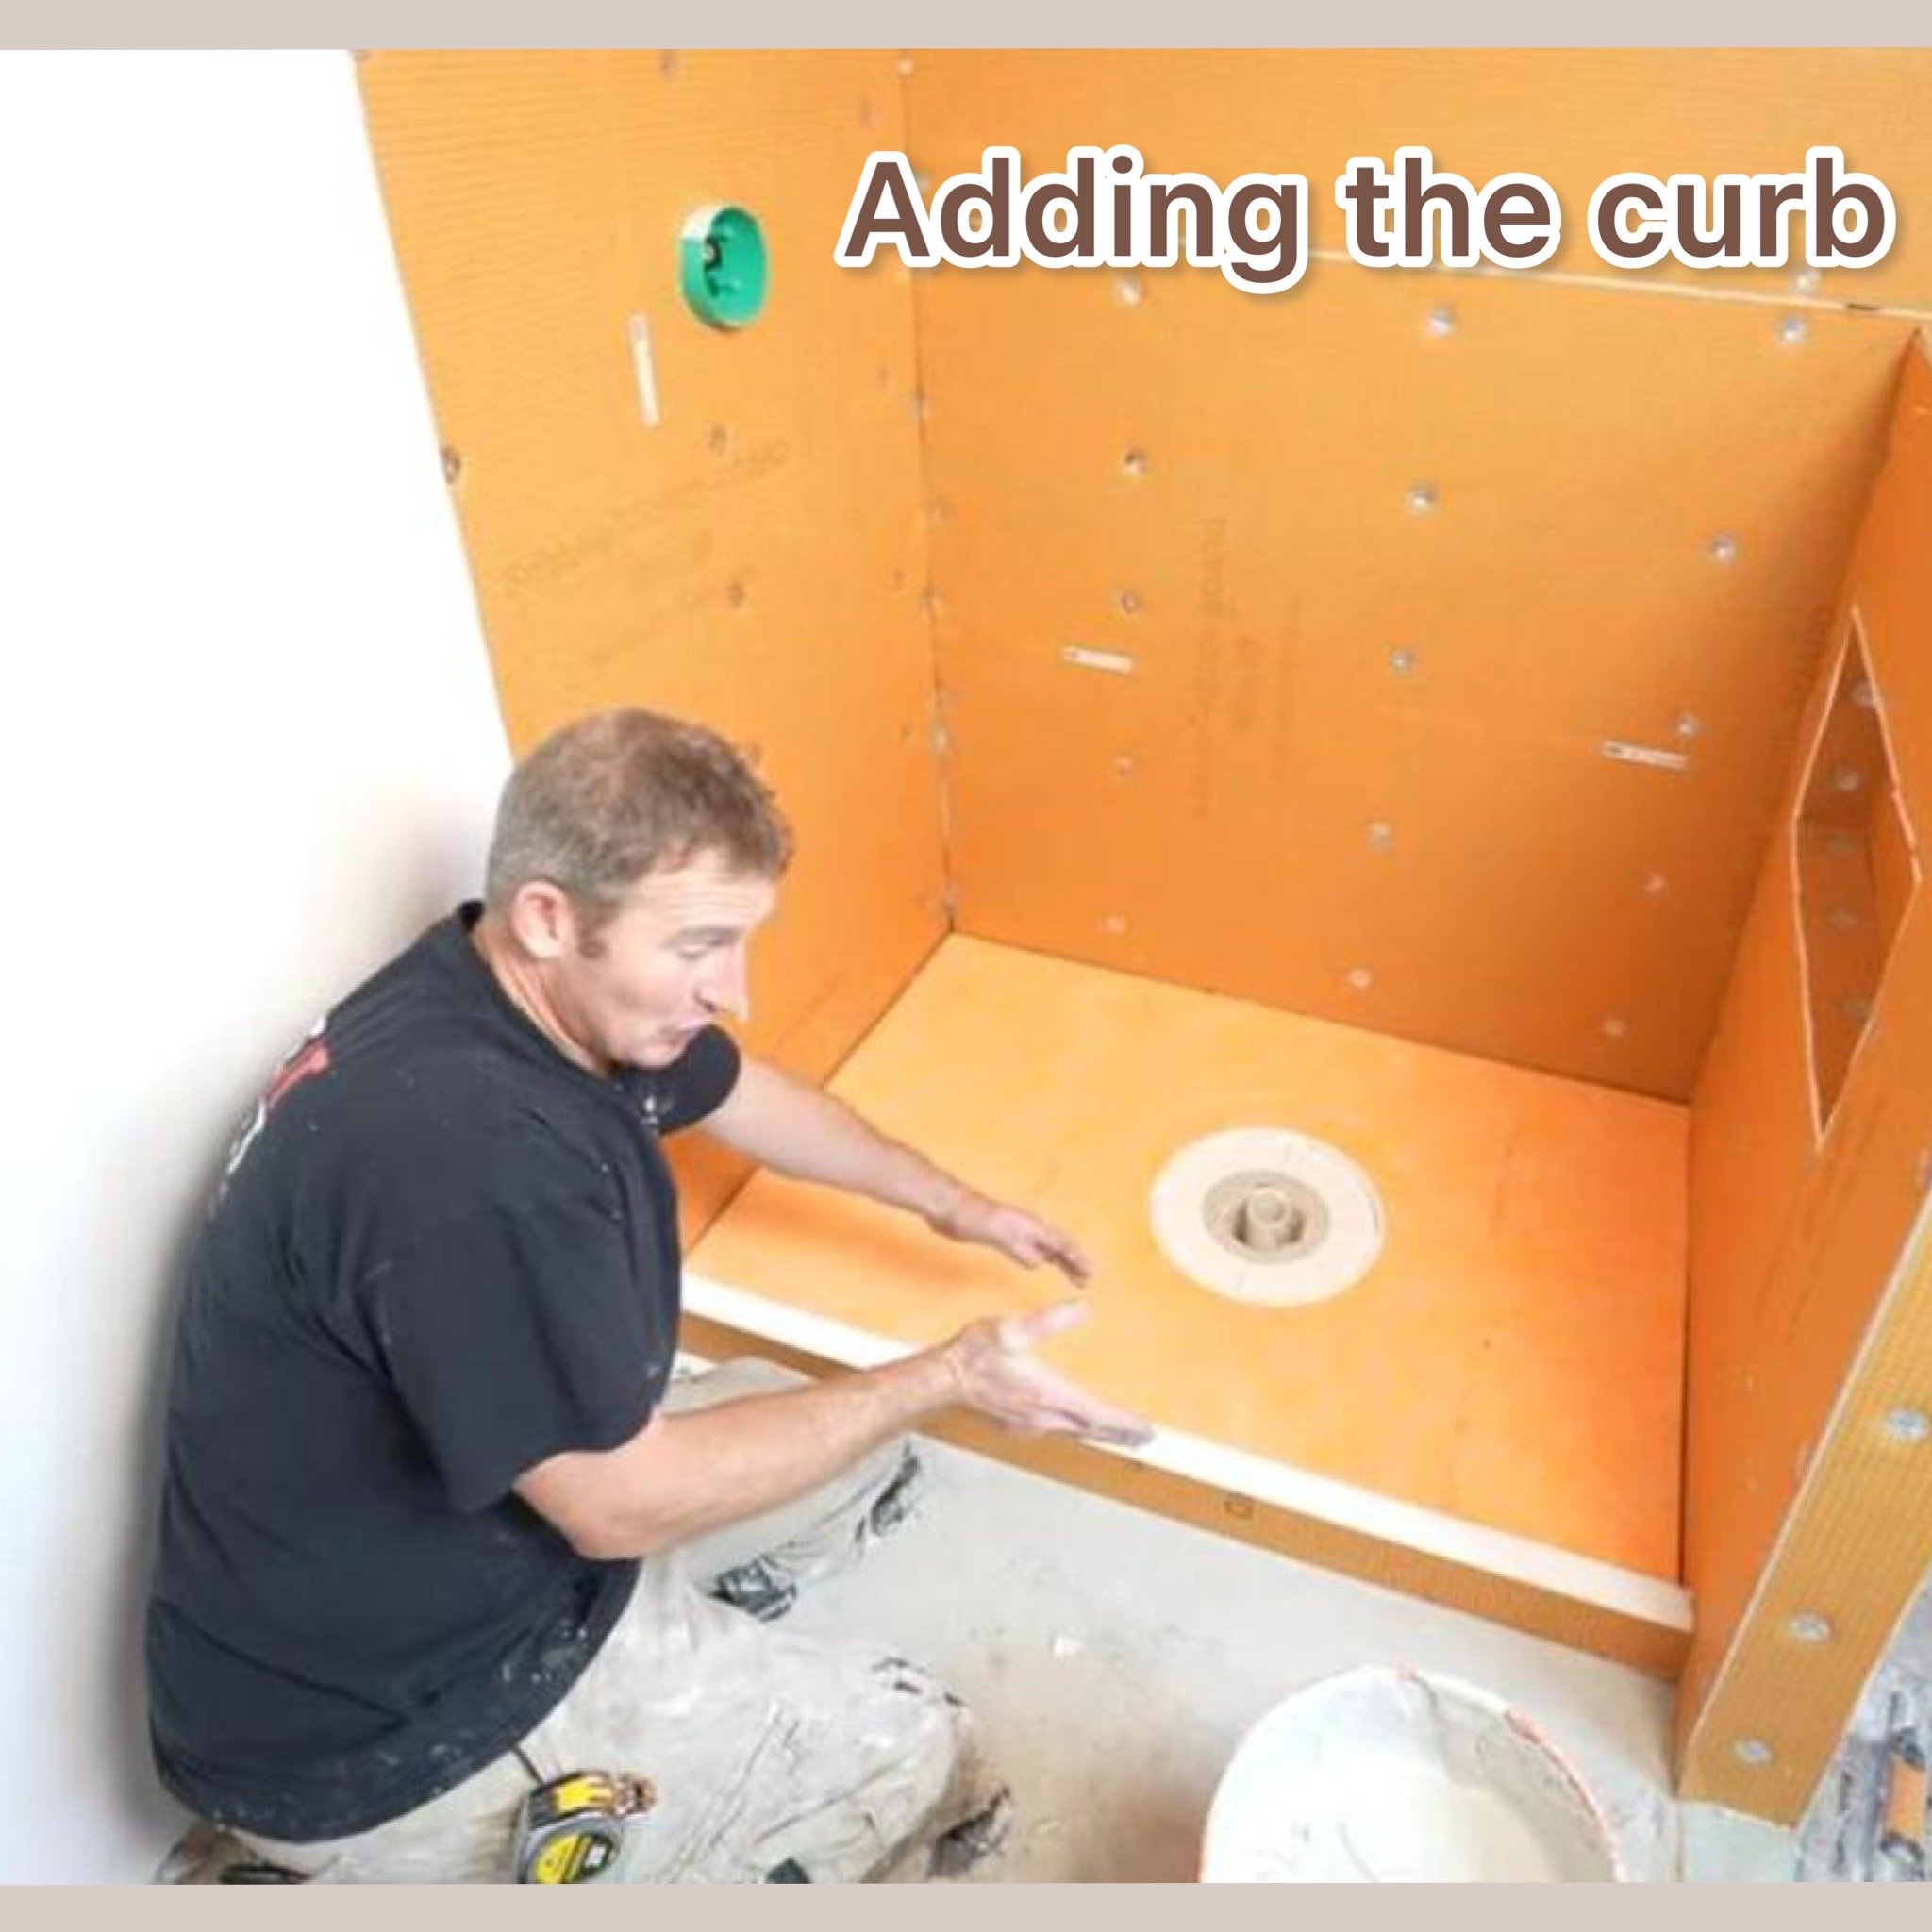
My favorite tools that make tiling easier…

 
best tiling advice DIY home remodeling bathroom remodeling teacher tile tools
 

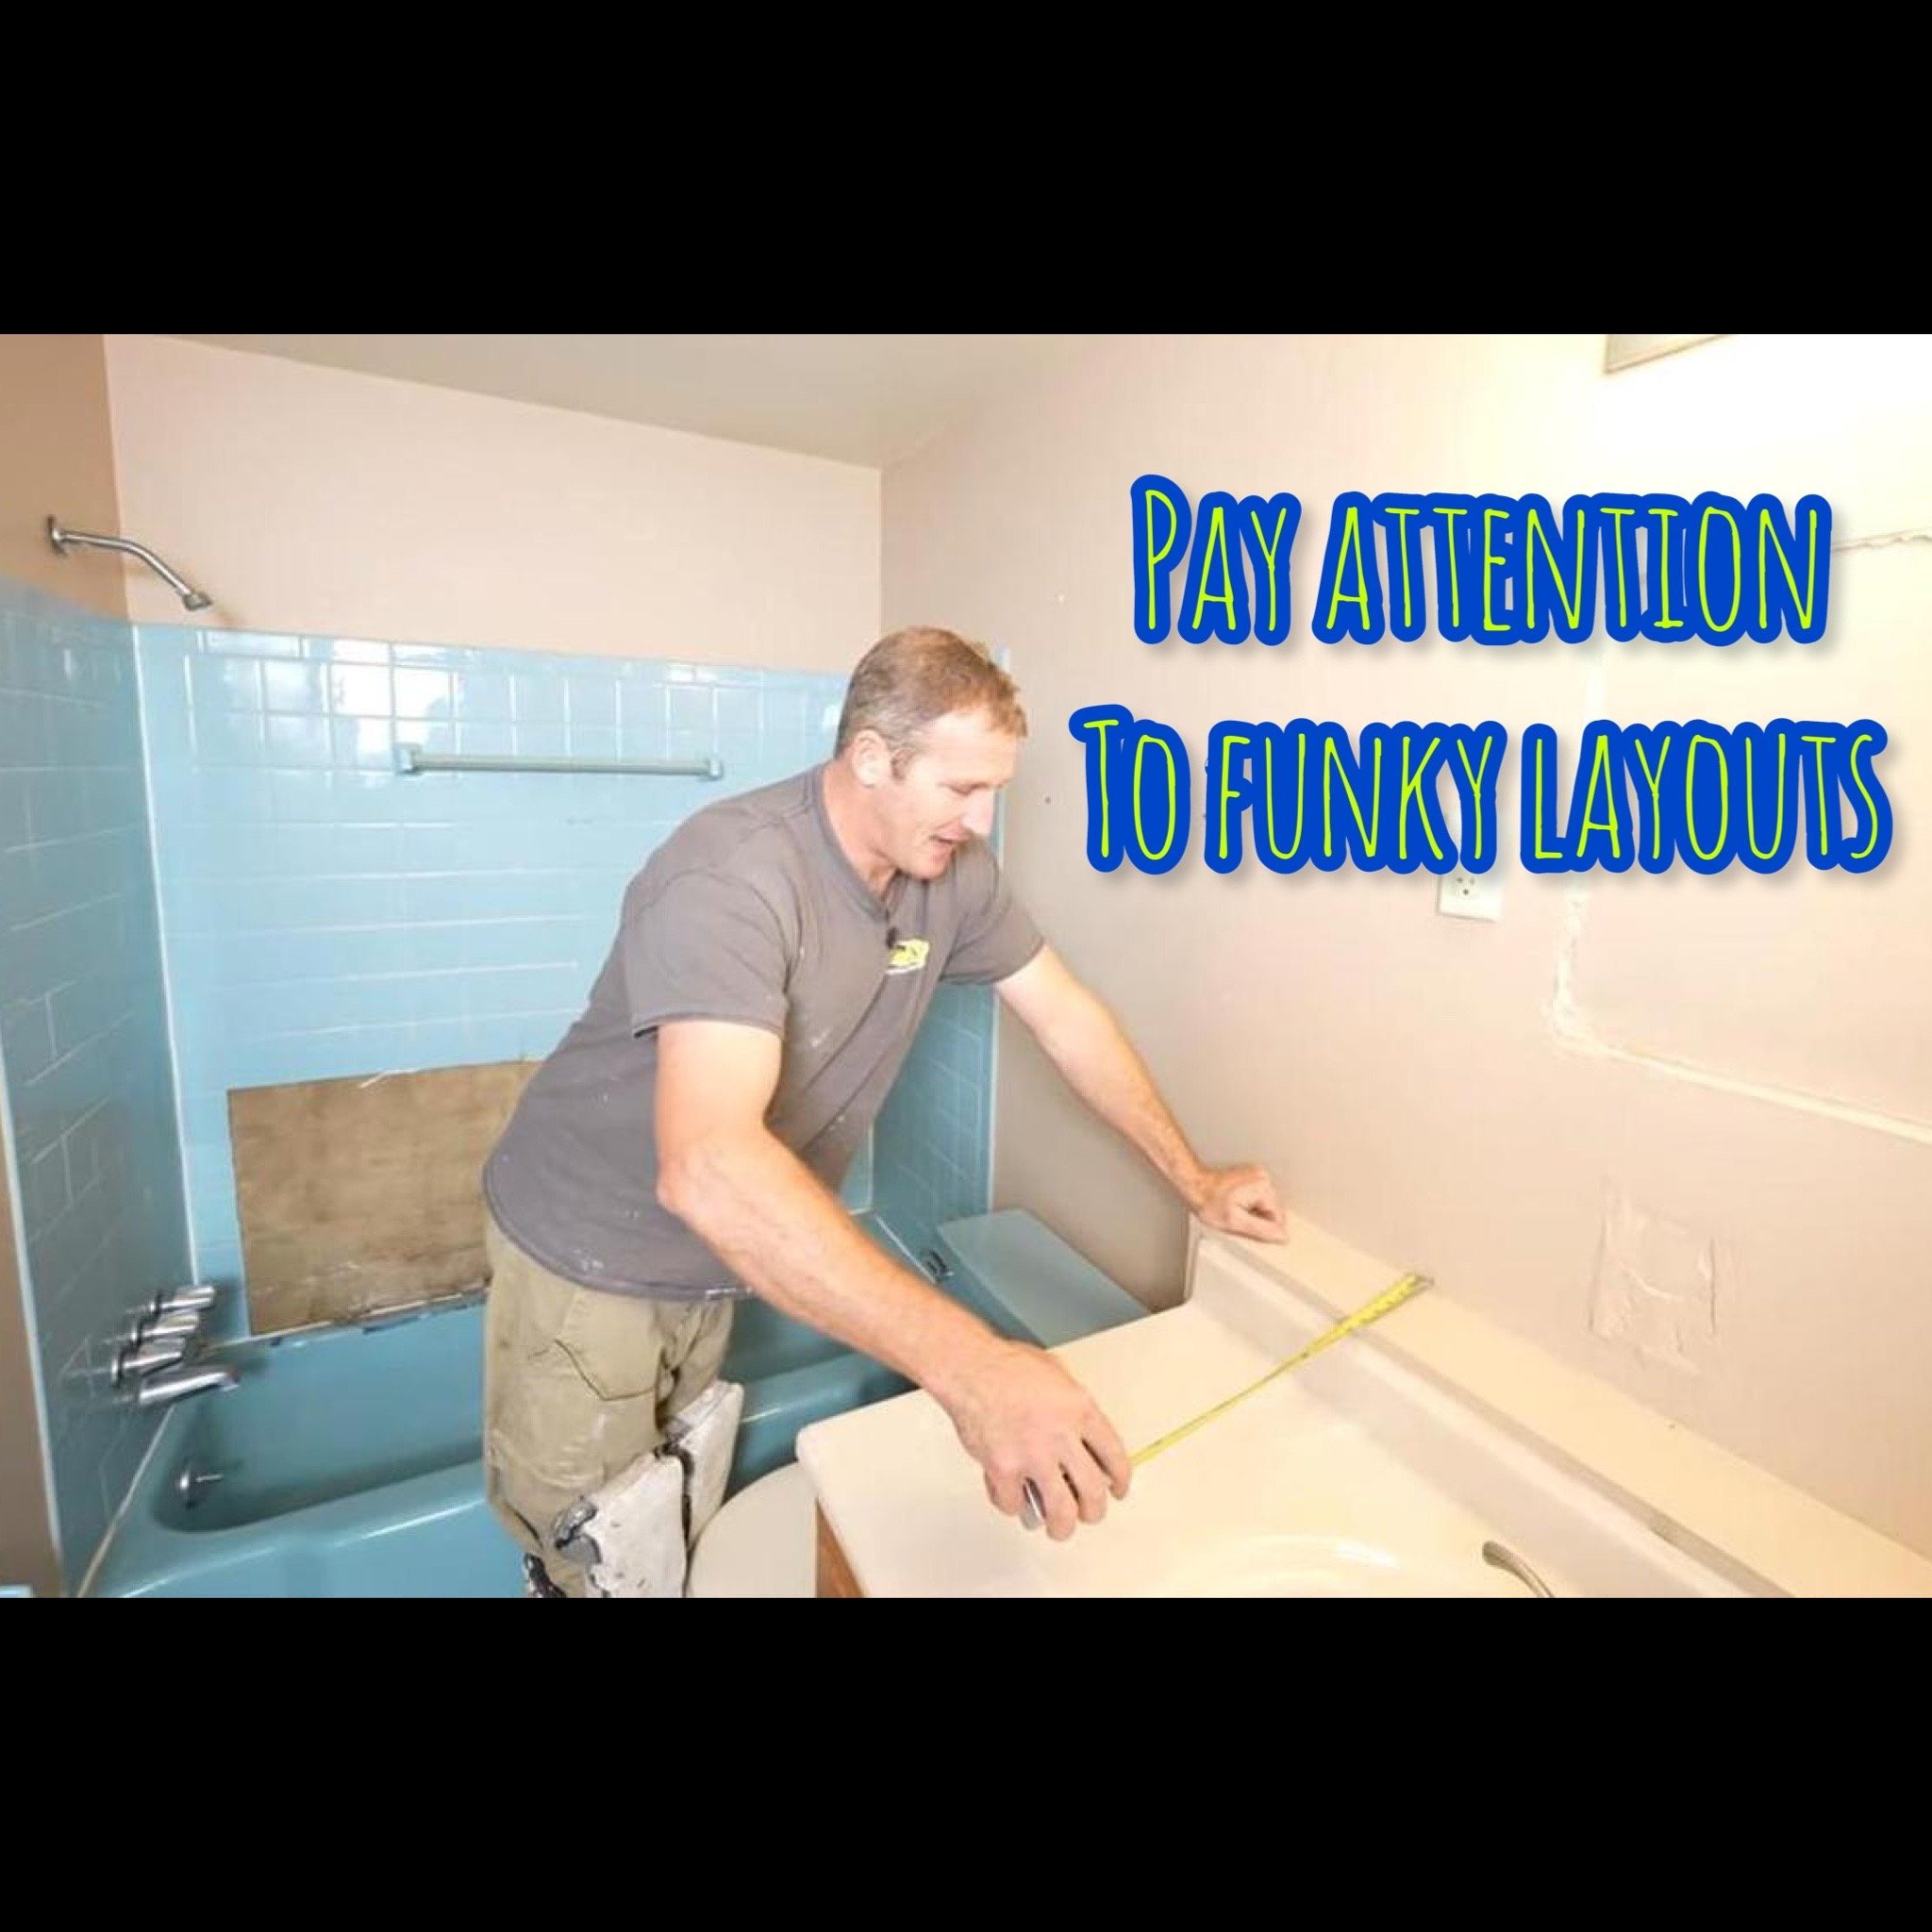
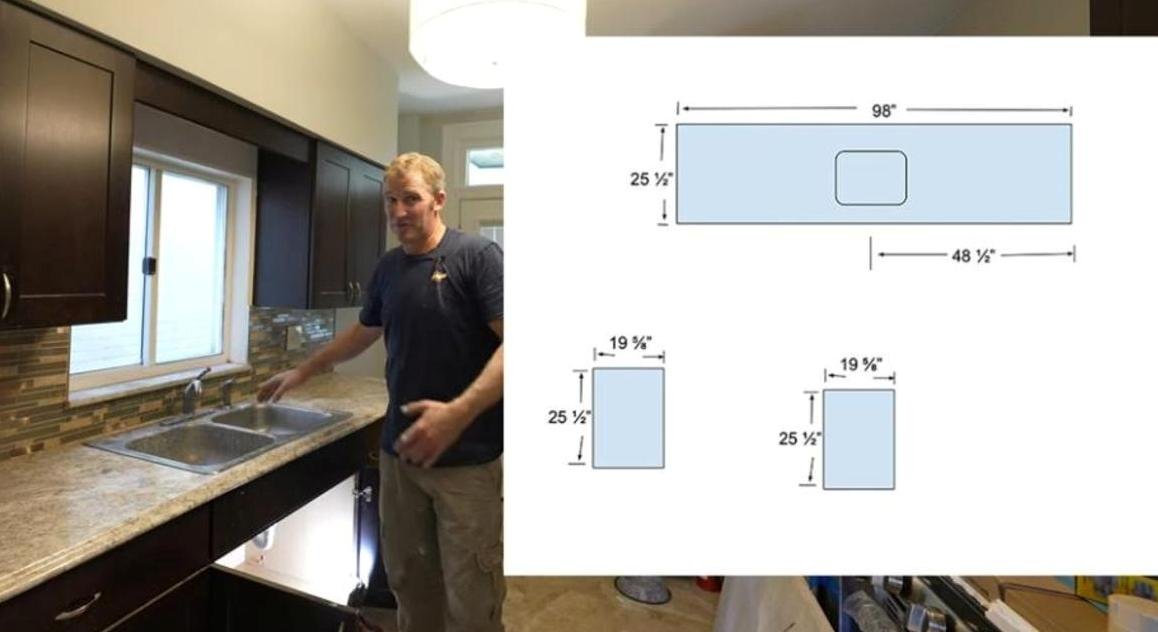
How to overcome tile layout issues…

 
best tiling advice home remodeling DIY bathroom remodeling teacher tile layout issues
 

And how to charge for your own bathroom remodeling jobs.

 
best tiling advice home remodeling DIY bathroom remodeling teacher charging customers for bathroom remodel
 

You gotta watch the full video… I promise you will get a ton of useful tiling information out of it! 👊

🔨Some of the materials & tools used in this video (Amazon affiliate links):

Fein Grinder Dust Shroud - https://amzn.to/3nqNH4b
Fein Shop-vac - https://amzn.to/40pkMfr
Makita Grinder - https://amzn.to/3lOVg4g
Montolit CGX blade - https://amzn.to/40m3OPe
T-lock tile leveling system: - https://amzn.to/3FTQSaP
Montolit 24" tile cutter - https://amzn.to/42OLbVO
Schluter Jolly (metal edging) - https://amzn.to/3FZXYdY
Ardex X5 (cheaper at a supplier) - https://amzn.to/3LY0Coj
Dewalt laser - https://amzn.to/3TQ7bv8
Montolit CGX blade - https://amzn.to/3KcK2jw
Montolit STL blade - https://www.contractorsdirect.com/
Montlit squadron blade - https://amzn.to/3ZsuvQS
Fein Multimaster cutter - https://amzn.to/3JQbgeb
Pro-knees 0714 knee pads - https://amzn.to/3Khvy1T
Ardex sponge - https://amzn.to/40plnhb
Horseshoe tile spacers - https://amzn.to/40oc3tQ
Linoleum knife (scraper) - https://amzn.to/42JSptX
Red tile spacer wedges - https://amzn.to/3TSD3j1
Troxell grout float - https://amzn.to/3KcKJcA
Tile nippers - https://amzn.to/3nvne5q

💥Visit my Amazon Store for all products and tools that I recommend and use on a regular basis 👍 https://www.amazon.com/shop/bathroomremodelingteacher_

For help with your bathroom remodel 🎓Enroll in my courses today 🎓 -

All the tools and products I use and recommend can be found on my Amazon Storefront (detailed in the description box of the video). You can find my Storefront, and all of my other social medias, by going to https://linktr.ee/bathroomremodelingteacher. Any and all purchases from my Amazon Storefront are greatly appreciated and help keep my channel going!

I hope this helps you with your own installation. Subscribe to my channel to make sure you don’t miss a new upload!

See you next class,

Steve

Comment

Comment

HOW TO FRAME A CURBLESS SHOWER

Hey students!

CURBLESS WALK-IN SHOWERS ARE THE PINNACLE OF BATHROOM LUXURY… AND YOU DESERVE TO HAVE THAT.

If you are remodeling your bathroom and you have the option of building of walk-in shower, making it curbless will be aesthetically pleasing and a highly practical choice. When we get much older (hopefully we all do!), stepping over tubs or curbs can be a risky challenge. Stumbles and falls increase with age. Because of this, it’s easy to justify a gorgeous curbless shower in your home! 😄

What’s even better is that you can install your own curbless shower with my help. I have a dedicated course {The Ultimate Curbless Shower Course} that contains over 100 AD FREE VIDEOS, written instructions, favorite curbless shower systems I like to use, checklists, guides, and more to assist you in your bathroom remodel. You won’t need outside contractors who are inconsistent and unreliable. You can get it done yourself.

In this video, I go over the fundamental aspects of building the frame work for a curbless shower.

One point I go over is that most of the curbless shower systems out there require you to get the plywood even with the top of the joist.

 
framing a curbless shower plywood level installing bathroom remodeling teacher DIY
 

I like to ensure the framework is reinforced to keep the shower floor level, strong, and secure. No tile movement or shifting!

 
frame curbless shower plywood nailgun bathroom remodeling teacher DIY
 

I address how I go around my vent stack, and demonstrate my method of installing the plywood to maintain levelness.

 
frame a curbless shower plywood floor nailgun bathroom remodeling teacher DIY
 

And, of course, drilling the hole for your shower drain. One step closer to making it a real shower!

 
drilling hole shower drain frame curbless shower bathroom remodeling teacher DIY
 

Be sure to watch the full video for all of these tips in detail, and enroll in my Ultimate Curbless Shower Course to learn how to BUILD your own curbless shower.

 
how to build a curbless shower DIY how to frame a curbless shower bathroom remodeling teacher
 

💥Visit my Amazon Store for all products and tools that I recommend and use on a regular basis 👍 https://www.amazon.com/shop/bathroomremodelingteacher_

For help with your bathroom remodel 🎓Enroll in my courses today 🎓 -

All the tools and products I use and recommend can be found on my Amazon Storefront (detailed in the description box of the video). You can find my Storefront, and all of my other social medias, by going to https://linktr.ee/bathroomremodelingteacher. Any and all purchases from my Amazon Storefront are greatly appreciated and help keep my channel going!

I hope this helps you with your own installation. Subscribe to my channel to make sure you don’t miss a new upload!

See you next class,

Steve

Comment

Comment

HOW TO INSTALL WATERPROOF LAMINATE FLOORING

Hey students!

It's happening whether you like it or not… 😄 Laminate flooring is taking over!

You know I LOVE tile, and I can't believe I'm saying it… but these waterproof laminate flooring systems are awesome! 💥 Slip resistant, softer feel on the feet, & definitely a lot warmer than tile (unless you have heated flooring, of course 😊). The fact that it is a fraction of the cost of real tile AND it’s easier to install also helps sway many homeowners into buying it.

In this video, I demonstrate how to install SmartCore Waterproof Laminate Flooring.

Just to give you a quick rundown, I talk about laminate flooring versus tile flooring, along with all the tools you will need to install the laminate flooring.

 
laminate flooring tools DIY bathroom remodeling teacher
 

I also go over the layout pattern and how to cut the laminate.

 
cutting laminate flooring DIY bathroom remodeling teacher
 

I share my cutting trick for the laminate around a door jamb, and the best tips on how to click the laminate flooring together.

 
cutting trick laminate flooring bathroom remodeling teacher
 

Finally, I discuss the door transition and sealing that gap between the shower base and new flooring.

 
sealing gap laminate flooring shower bathroom remodeling teacher
 

I hope these tips help you out! 👊

 
laminate tile flooring bathroom remodeling teacher
 

🔨Some of the materials & tools used in this video (Amazon affiliate links):

SmartCore Flooring - https://www.lowes.com/pd/SMARTCORE-Ultra-8-Piece-11-97-in-x-23-62-in-Tivoli-Travertine-Luxury-Vinyl-Plank-Flooring/1000779124
Fein Multimaster cutter - https://amzn.to/3IIW16g
Fein wide 2 1/2" blades - https://amzn.to/3KIzxVK
Pro knees 0714 - https://amzn.to/3KMUmPL
Floor tool kit - https://amzn.to/3KUNxeW
Roberts tapin block - https://amzn.to/3ZeFnCO
Milwaukee jig saw - https://amzn.to/3meoKbB
Milwaukee trim gun - https://amzn.to/3Yjmxcs
Flex trim - https://amzn.to/3Z9wZnL

💥Visit my Amazon Store for all products and tools that I recommend and use on a regular basis 👍 https://www.amazon.com/shop/bathroomremodelingteacher_

For help with your bathroom remodel 🎓Enroll in my courses today 🎓 -

All the tools and products I use and recommend can be found on my Amazon Storefront (detailed in the description box of the video). You can find my Storefront, and all of my other social medias, by going to https://linktr.ee/bathroomremodelingteacher. Any and all purchases from my Amazon Storefront are greatly appreciated and help keep my channel going!

I hope this helps you with your own installation. Subscribe to my channel to make sure you don’t miss a new upload!

See you next class,

Steve

Comment

1 Comment

HOW TO ESTIMATE A BATHROOM REMODEL-TIME AND LABOR

Hey students!

Time is money, and money is time. I’m a firm believer in that saying. And because of that, I value my time a great deal, and I hope you do the same for yourself.

When I go to look at a potential job, I examine the full scope of the project, and the amount of time it will take me to achieve the results I want to achieve. I also take into account the amount of labor and strength it will require me to get the job done. Let’s be real… our physicality will only get us so far for so long. In my opinion, all contractors need to be compensated for putting their body and health in risky situations.

For those of you wanting to get into the remodeling business as a main profession, this video will be a huge help when it comes to giving estimates to customers. It’s also just interesting to see how and why contractors price projects the way they do.

In this video, I evaluate my client’s bathroom, and give you an idea of the amount of time and labor that will go into the remodel.

To give you a quick video run down, one of the first things I check out is the amount of demo that will be required. How hard will it be to remove the flooring and existing tile? How much garbage am I going to be hauling out of there?

 
demo estimate time labor bathroom remodeling teacher DIY
 

You also need to pay close attention to any odd configurations in the space. In this bathroom, the sink had a funky layout that could be hiding potential issues that may affect the budget.

 
sink layout configuration estimate time labor bathroom remodeling teacher DIY
 

Another thing I consider is the time and work I will be spending on adding a new vent fan to the bathroom. Most times, these bathrooms have a terrible venting system, and I usually have to construct a better method of venting that bathroom.

 
vent fan estimate time labor bathroom remodeling teacher DIY home improvement
 

Lastly, I always pay attention to the odd electrical outlet placement. This lets me know that I will more than likely need to change some of the electrical components of the bathroom, which adds more work to the overall project.

 
electrical outlet placement estimate time labor bathroom remodeling teacher DIY home improvement
 

Be sure to watch the full video to learn all of my evaluation methods when it comes to estimating a client’s bathroom.

💥Visit my Amazon Store for all products and tools that I recommend and use on a regular basis 👍 https://www.amazon.com/shop/bathroomremodelingteacher_

ENROLL IN ANY OF MY COURSES FOR MORE TIPS ON ESTIMATING BATHROOMS 🎓 -

All the tools and products I use and recommend can be found on my Amazon Storefront (detailed in the description box of the video). You can find my Storefront, and all of my other social medias, by going to https://linktr.ee/bathroomremodelingteacher. Any and all purchases from my Amazon Storefront are greatly appreciated and help keep my channel going!

I hope this helps you with your own installation. Subscribe to my channel to make sure you don’t miss a new upload!

See you next class,

Steve

1 Comment

Comment

HOW TO REPAIR THE FRAMING IN A BATHROOM REMODEL

Hey students!

I’ve said it before, and I’ll say it again: when you are remodeling your bathroom, your best plan of action is to gut it down to the studs so you can see what is going on with the plumbing, electric, and FRAMING. This is definitely a must in an older bathroom/home.

Time and water can do extensive damage to existing framing in the bathroom space. Plus, you don’t know what the previous contractor did to that bathroom framing to make things work (like notching a chunk out of the floor framing to make the plumbing run right).

If you are laying down thousands of dollars worth of waterproofing, tile, and fixtures in a bathroom, you best believe you want to have a solid, LEVEL foundation. Otherwise, you might just be throwing your money away.

I know this can be an overwhelming process, and I am here to help guide you through it.

In this video, I go over the best way to evaluate your old framing, how to set a new ledger board, and I also explain exactly what a load bearing wall is, as well as balloon framing.

 
load bearing wall repair framing bathroom remodeling teacher DIY
 

I’ll also show you how to sister a new joist, and go over the common obstructions you might run into when adding new framing.

 
sistering joist framing repair bathroom remodeling teacher DIY
 

You’ll see me add new plywood to the space, and I explain why I like OSB Plywood the best. I’ll also show you a common framing issue at a bathroom door entrance and how I overcome it.

 
plywood flooring framing repair bathroom remodeling teacher DIY
 

I even throw in a spray foam adhesive disaster at the end to keep it real. 😄

 
spray foam adhesive framing repair bathroom remodeling teacher DIY
 

Be sure to watch the full video so you can freshen up your bathroom framing with confidence!

🔨Some of the materials & tools used in this video (Amazon affiliate links):

Paslode framing nailer - https://amzn.to/3SqPDVQ
8d ring shank nails - https://amzn.to/3xPQwOm
6ft level - https://amzn.to/3xKYTdS
Pro-knee pads 0714 - https://amzn.to/41niqPi

💥Visit my Amazon Store for all products and tools that I recommend and use on a regular basis 👍 https://www.amazon.com/shop/bathroomremodelingteacher_

For help with your bathroom remodel 🎓Enroll in my courses today 🎓 -

All the tools and products I use and recommend can be found on my Amazon Storefront (detailed in the description box of the video). You can find my Storefront, and all of my other social medias, by going to https://linktr.ee/bathroomremodelingteacher. Any and all purchases from my Amazon Storefront are greatly appreciated and help keep my channel going!

I hope this helps you with your own installation. Subscribe to my channel to make sure you don’t miss a new upload!

See you next class,

Steve

Comment

Comment

15 PAINTING HACKS FOR HOMEOWNERS

Hey students!

Painting is probably the easiest and fastest way to make a massive, positive change to your home. But, the downside is it can be very labor and time intensive.

Since I’ve painted at least over 100 homes in my life, I’ve learned a few tricks to make it easier along the way. I’ve come up with 15 painting hacks to share with you to make your painting job effortless.

In this video, I explain…

  • the benefits and techniques of using a paint sprayer vs. a paint brush

  • why you should use a quick drying siliconized caulking

  • the reasons I love the shrink free spackling for my touch-ups

  • the importance of wiping down all the walls before painting

 
painting house fast DIY railing bathroom remodeling teacher
 
  • why you should spray the ceiling, trim, and doors

  • how priming saves you time and money in the long run

  • how removing light fixtures makes the process simpler

  • the best way to spray your staircase railings (MAJOR TIME SAVER HERE!)

 
painting sprayer gable attic fast DIY bathroom remodeling teacher
 
  • the importance of removing all door hardware before painting

  • the best way to spray trim and cut in walls with the brush

  • how to use the drywall stilts for painting hard to reach places

  • why the angled brush is one of the best paint brushes (Link below!)

 
painting fast brush cutting in DIY bathroom remodeling teacher
 
  • the best technique of continual brush strokes

  • how to spray attic walls with gable ceilings

  • the benefits of the 18” paint roller

 
stilts painting fast house DIY bathroom remodeling teacher cutting in
 

The paint and my techniques transformed this house!

 
fast painting house DIY bathroom remodeling teacher
 

Be sure to watch the full video to make painting your house easier!

🔨Some of the materials & tools used in this video (Amazon affiliate links):

Graco X5 sprayer - https://amzn.to/3Z92qip
Purdy 12-18" roller - https://amzn.to/3InGuZt
Purdy extension pole - https://amzn.to/3ILK8Oh
Purdy large paint bucket - https://amzn.to/3kegDeJ
Purdy 2 1/2" brush - https://amzn.to/3KvmpTH
Drywall stilts - https://amzn.to/3Eux512

💥Visit my Amazon Store for all products and tools that I recommend and use on a regular basis 👍 https://www.amazon.com/shop/bathroomremodelingteacher_

For help with your bathroom remodel 🎓Enroll in my courses today 🎓 -

All the tools and products I use and recommend can be found on my Amazon Storefront (detailed in the description box of the video). You can find my Storefront, and all of my other social medias, by going to https://linktr.ee/bathroomremodelingteacher. Any and all purchases from my Amazon Storefront are greatly appreciated and help keep my channel going!

I hope this helps you with your own installation. Subscribe to my channel to make sure you don’t miss a new upload!

See you next class,

Steve

Comment

Comment

HOW TO MOVE PLUMBING IN A BATHROOM

Hey students!

How many of you would change the layout of your existing bathroom if you could? And how many of you are too scared to do it because of moving the existing plumbing?

I know I have felt that way MANY times when I’ve remodeled my own bathrooms. I felt it this past summer when I remodeled the bathroom in my rental/flip house. I HATED the layout of that bathroom, and I knew it needed to change.

The plumbing aspect is overwhelming at first. At least it definitely was for me. But, I was determined to learn. I acquired all of my knowledge and techniques from other plumbers who have been kind enough to teach me, and also by studying up on the subject online and in books, and from my professional plumbers who follow me. I still have A LOT to learn, but I have come a long way.

That being said, I wanted to share this video with you to help you with the plumbing in your own bathroom remodeling project. I show you how I remove the old plumbing stack.

 
plumbing bathroom moving stack bathroom remodeling teacher DIY
 

Then, I go over my new connection plan to the existing terracotta plumbing.

 
old terracotta plumbing new connection plan bathroom remodeling teacher DIY
 

I show you how I installed the toilet, sink, and bathtub plumbing.

 
toilet sink bathtub plumbing bathroom remodeling teacher DIY
 

And let’s not forget venting the stack! I definitely show you how to do that.

 
bathroom venting stack remodeling DIY
 

As you can see, we went from this…

 
before bathroom remodel picture DIY bathroom remodeling teacher
 
 
before bathroom remodel picture DIY bathroom remodeling teacher
 

…to this.

after bathroom remodel DIY bathroom remodeling teacher

Be sure to watch the full video for all the details and instruction to help you with your own project.

🔨Some of the materials & tools used in this video (Amazon affiliate links):

Milwaukee sawzall - https://amzn.to/3Z7VCB1
Fein multimaster tool - https://amzn.to/41f0XrY
Hydraulic cement - https://amzn.to/3XRhMX5
3" test plug - https://amzn.to/3Z5eaBQ

💥Visit my Amazon Store for all products and tools that I recommend and use on a regular basis 👍 https://www.amazon.com/shop/bathroomremodelingteacher_

For help with your bathroom remodel 🎓Enroll in my courses today 🎓 -

All the tools and products I use and recommend can be found on my Amazon Storefront (detailed in the description box of the video). You can find my Storefront, and all of my other social medias, by going to https://linktr.ee/bathroomremodelingteacher. Any and all purchases from my Amazon Storefront are greatly appreciated and help keep my channel going!

I hope this helps you with your own installation. Subscribe to my channel to make sure you don’t miss a new upload!

See you next class,

Steve

Comment

Comment

HOW TO BUILD A TILED SHOWER IN 3 DAYS-NEW COURSE!


Hey students!

Did you know that I now offer SIX bathroom remodeling courses?!

I have written and videoed each of these courses myself, so all of the information in every course is coming from a 15+ year experienced, professional bathroom remodeling contractor.

My latest course is called the “3 Day Tiled Shower Course.” This course is fantastic for DIYers because it guides you through the entire process of removing a bathtub and tub surround to installing a pre-made shower pan base and tiling the shower walls. It keeps you organized and moving so you can truly finish the project in just 3 days. And it’s only $39. 👊

My 30+ video and written instruction course will confidently lead you through the demo process…

 
how to build a shower in 3 days course bathroom remodeling demo wall panel
 

…to re-establishing and correcting the plumbing…

 
how to build a shower in 3 days course bathroom remodeling plumbing water supplies drain
 

…to setting and leveling the shower pan…


…to the tile layout and accurate installation…

 
how to build a shower in 3 days course bathroom remodeling tiling thinset coverage
 

…to the proper grouting methods…

 
how to build a shower in 3 days course bathroom remodeling grouting
 

…and even how to include corner shelves for your shower goods storage!

 
how to build a shower in 3 days course bathroom remodeling caulk corner shelf
 

The coolest part? If you decide to become a DIY Geek Member, you will get all 6 courses (at a discounted price, saving you $135!!!) AND all of the future courses I come out with.

Best. Deal. Ever. 👍

💥Visit my Amazon Store for all products and tools that I recommend and use on a regular basis 👍 https://www.amazon.com/shop/bathroomremodelingteacher_

#diy #shower #bathroomremodel #bathtub #homeimprovement
#realestate #renovation #construction #homerenovation #bathroomdesign #work #bathroomremodelingteacher #stevewhite #tipsandtricks #tutorial #howto #interiordesign #electrical #tiledesign

All the tools and products I use and recommend can be found on my Amazon Storefront (detailed in the description box of the video). You can find my Storefront, and all of my other social medias, by going to https://linktr.ee/bathroomremodelingteacher. Any and all purchases from my Amazon Storefront are greatly appreciated and help keep my channel going!

I hope this helps you with your own installation. Subscribe to my channel to make sure you don’t miss a new upload!

See you next class,

Steve

Comment

Comment

HOW TO INSTALL A FIBERGLASS SHOWER

Hey students!

I do not take on too many projects that do not involve custom tile work. However, I made an exception with this project.

The client needed a bathroom remodel, but also had a tight budget. Foregoing custom tile work and installing a fiberglass shower will achieve this goal. I took this job to show you guys how much money and time you can save by doing fiberglass instead of custom tile.

In this video, I installed a Clarion Fiberglass Shower unit, and I was very impressed with how it was made and how it all turned out.

This particular fiberglass shower was a walk-in shower that was made up of 4 parts, making it super easy to take apart to get inside your house.

 
fiberglass shower installation diy bathroom remodeling teacher
 

After going over some framing tips, the drain pipe placement, and connecting the drain to the shower, I set the shower pan in place with mortar.

 
fiberglass shower unit diy installation bathroom remodeling teacher
 

I also go over some important details you need to know when installing the walls of the unit, plus grab bars and proper caulking.

 
fiberglass shower unit installation diy bathroom remodeling teacher
 

Basically, at the end of the day, you can have a shower fully installed and finished.

 
fiberglass shower unit installation diy bathroom remodeling teacher
 

Be sure to watch the video for all the details on successfully installing a fiberglass unit!

🔨Some of the materials & tools used in this video (Amazon affiliate links):

Clarion Shower Surround - https://clarionbathware.com/product/4s11l-or-4s11r-60-x-33-acrylx-four-piece-alcove-shower/cl020014/cl020014-l-wh
Inside pipe cutter - https://amzn.to/3k4DHMz
New born caulking gun - https://amzn.to/3I28v8S

💥Visit my Amazon Store for all products and tools that I recommend and use on a regular basis 👍 https://www.amazon.com/shop/bathroomremodelingteacher_

For help with your bathroom remodel 🎓Enroll in my courses today 🎓 -

🚿 ULTIMATE CURBLESS SHOWER COURSE-
https://www.bathroomremodelingteacher.com/ultimate-curbless-shower-course-detail

🛁 —> 🚿 CONVERTING TUB TO WALK-IN SHOWER COURSE- https://www.bathroomremodelingteacher.com/converting-tub-to-walkin-shower-course-detail

🛁TUB/SHOWER BATHROOM REMODEL IN 7 DAYS OR LESS COURSE- https://www.bathroomremodelingteacher.com/tubshower-bathroom-remodel-in-7-days-or-less-course-detail

🚿 CUSTOM TILED WALK-IN SHOWER COURSE - https://www.bathroomremodelingteacher.com/custom-tiled-walkin-shower-course-detail

✨ CUSTOM GLASS ENCLOSURE COURSE - https://www.bathroomremodelingteacher.com/custom-glass-enclosure-course-detail

😄DIY BATHROOM GEEK COLLECTION {ALL 5 COURSES!}👊 -https://www.bathroomremodelingteacher.com/diy-geek-membership-detail

#diy #plumbing #bathroomremodel
#realestate #renovation #construction #homerenovation #bathroomdesign #work #bathroomremodelingteacher #stevewhite #tipsandtricks #tutorial #howto #interiordesign #electrical #tiledesign

All the tools and products I use and recommend can be found on my Amazon Storefront (detailed in the description box of the video). You can find my Storefront, and all of my other social medias, by going to https://linktr.ee/bathroomremodelingteacher. Any and all purchases from my Amazon Storefront are greatly appreciated and help keep my channel going!

I hope this helps you with your own installation. Subscribe to my channel to make sure you don’t miss a new upload!

See you next class,

Steve

Comment

Comment

DEMOLISHING AN OLD BATHROOM I BUILT

Hey students!

I despise demo days. Popular TV shows have always made demo days seem fun and exciting, but I think it’s just an insane amount of hard work and heavy lifting.

This past summer I had to demo an old bathroom I had installed years ago. This bathroom was in my rental property I was fixing up to sell. Since it was a rental, the entire house had taken a severe beating from tenant use.

Because I had installed this bathroom years ago, I knew I needed to completely gut it to check out and fix up all the plumbing and electrical. To be totally honest, I knew I had done a few incorrect things when I fixed it up a long time ago, and I wanted to make that right for potential buyers.

Demoing isn’t about going into a space and just going nuts and destroying everything you see. In order to be fast and efficient, you need to be methodical in your approach to gutting a bathroom.

In this video, I demonstrate how I demo an entire bathroom, give you some tips and tricks on doing demo work, and share the importance of exposing every inch of space you are planning on remodeling.

In this particular bathroom, I began by removing fixtures…

 
tile removal how to demo an old bathroom bathroom remodeling teacher DIY
 

…then the glass from the knee wall…

 
tile removal how to demo an old bathroom bathroom remodeling teacher DIY
 

and then the tiled tub surround.

 
tile removal how to demo an old bathroom bathroom remodeling teacher DIY
 

From that point, I make my way through the entire bathroom, gutting it down and baring studs and all to the light of day.

 
tile removal bathroom demo electrical plumbing bathroom remodeling teacher
 

Be sure to watch the video for all the demo details you will need to know before you start your own project.

🔨Some of the materials & tools used in this video (Amazon affiliate links):

Respirator - https://amzn.to/3jXtDFi
Milwaukee Sawzall - https://amzn.to/3I0L3c1
AX demo blades - https://amzn.to/3xmFaRB

💥Visit my Amazon Store for all products and tools that I recommend and use on a regular basis 👍 https://www.amazon.com/shop/bathroomremodelingteacher_

For help with your bathroom remodel 🎓Enroll in my courses today 🎓 -

🚿 ULTIMATE CURBLESS SHOWER COURSE-
https://www.bathroomremodelingteacher.com/ultimate-curbless-shower-course-detail

🛁 —> 🚿 CONVERTING TUB TO WALK-IN SHOWER COURSE- https://www.bathroomremodelingteacher.com/converting-tub-to-walkin-shower-course-detail

🛁TUB/SHOWER BATHROOM REMODEL IN 7 DAYS OR LESS COURSE- https://www.bathroomremodelingteacher.com/tubshower-bathroom-remodel-in-7-days-or-less-course-detail

🚿 CUSTOM TILED WALK-IN SHOWER COURSE - https://www.bathroomremodelingteacher.com/custom-tiled-walkin-shower-course-detail

✨ CUSTOM GLASS ENCLOSURE COURSE - https://www.bathroomremodelingteacher.com/custom-glass-enclosure-course-detail

😄DIY BATHROOM GEEK COLLECTION {ALL 5 COURSES!}👊 -https://www.bathroomremodelingteacher.com/diy-geek-membership-detail

#diy #bathroomremodel #homeimprovement #tile #plumbing #electrical #demo #shower
#realestate #renovation #construction #homerenovation #bathroomdesign #work #bathroomremodelingteacher #stevewhite #tipsandtricks #tutorial #howto #interiordesign #electrical #tiledesign

All the tools and products I use and recommend can be found on my Amazon Storefront (detailed in the description box of the video). You can find my Storefront, and all of my other social medias, by going to https://linktr.ee/bathroomremodelingteacher. Any and all purchases from my Amazon Storefront are greatly appreciated and help keep my channel going!

I hope this helps you with your own installation. Subscribe to my channel to make sure you don’t miss a new upload!

See you next class,

Steve

Comment

Comment

BEST REMODELING TIPS OF 2022

Hey students!

I may be a little late with the 2022 recap, but hey, better late than never!

In this video, I highlight my best tips and tricks from 2022. The best part is these tips encompass ALL DIFFERENT KINDS of remodeling.

One of my most popular videos was how I repaired these nasty concrete steps at my rental/flip property this past summer. This video was so popular that YouTube had me marked as a “concrete repair guy.” HA! Hardly. I did a decent job, but I am by NO means a concrete professional.

 
concrete repair bathroom remodeling teacher DIY

Steps before repair


concrete repair bathroom remodeling teacher DIY

Steps after repair


Another popular video I made was all about removing very old, very difficult, and VERY MESSY concreted tile. I worked on this for a client at the beginning of 2022, and it was HELL. But, it was also an opportunity to show you guys how to do it the best way possible. I go over what tools I used and how I went about doing the job.

 
tile removal bathroom remodeling teacher DIY
 

I’ve also included some of my most popular shorts in this video. Who can forget this toilet’s double wax ring that was used to build up its flange?!

 
toilet wax ring bathroom remodeling teacher DIY
 

Be sure to watch the whole video to catch all 16 of my BEST REMODELING TIPS OF 2022!

🔨Some of the materials & tools used in this video (Amazon affiliate links):

Schluter 38 x 60 shower kit - https://amzn.to/3YnAQNG
Schluter Kerdi band - https://amzn.to/3jUPE7v
Kerdi trowel - https://amzn.to/3JUxr4z

💥Visit my Amazon Store for all products and tools that I recommend and use on a regular basis 👍 https://www.amazon.com/shop/bathroomremodelingteacher_

For help with your bathroom remodel 🎓Enroll in my courses today 🎓 -

🚿 ULTIMATE CURBLESS SHOWER COURSE-
https://www.bathroomremodelingteacher.com/ultimate-curbless-shower-course-detail

🛁 —> 🚿 CONVERTING TUB TO WALK-IN SHOWER COURSE- https://www.bathroomremodelingteacher.com/converting-tub-to-walkin-shower-course-detail

🛁TUB/SHOWER BATHROOM REMODEL IN 7 DAYS OR LESS COURSE- https://www.bathroomremodelingteacher.com/tubshower-bathroom-remodel-in-7-days-or-less-course-detail

🚿 CUSTOM TILED WALK-IN SHOWER COURSE - https://www.bathroomremodelingteacher.com/custom-tiled-walkin-shower-course-detail

✨ CUSTOM GLASS ENCLOSURE COURSE - https://www.bathroomremodelingteacher.com/custom-glass-enclosure-course-detail

😄DIY BATHROOM GEEK COLLECTION {ALL 5 COURSES!}👊 -https://www.bathroomremodelingteacher.com/diy-geek-membership-detail

#diy #homeimprovement #bathroomremodel #tile #plumbing #electrical
#realestate #renovation #construction #homerenovation #bathroomdesign #work #bathroomremodelingteacher #stevewhite #tipsandtricks #tutorial #howto #interiordesign #electrical #tiledesign

All the tools and products I use and recommend can be found on my Amazon Storefront (detailed in the description box of the video). You can find my Storefront, and all of my other social medias, by going to https://linktr.ee/bathroomremodelingteacher. Any and all purchases from my Amazon Storefront are greatly appreciated and help keep my channel going!

I hope this helps you with your own installation. Subscribe to my channel to make sure you don’t miss a new upload!

See you next class,

Steve

Comment

Comment

DIY Granite Countertops

Hey students!

Are you remodeling your kitchen and want to save yourself $1,000 (or more!)? I can help you with that.

Most kitchen renovations call for new countertops, which can be a costly item in a kitchen renovation. There is a way to reduce the cost, and that is installing a granite countertop yourself.

How do I go about doing this? Easy.

Find yourself a wholesale granite manufacturer. Most cities and suburbs have them. I live right outside of Pittsburgh, and I used Asian Granite. I went there, found the granite I wanted (bonus points if you can find something in their remnant section!), and had the measurements of the countertop space in my kitchen all laid out, in detail, for them. This gives them a rough idea of how much granite your will need and how much it will cost.

 
diy granite countertop installation
 

The granite company will send a rep out to your home to get the exact measurements for the countertops once you have installed your kitchen cabinetry. Obviously, this is to ensure the most accurate cut.

I usually pick up my own granite once it is cut, but I understand that is not what most people can do. Don’t worry— delivery options are available.

As for the actually installation of the granite, you need to watch my video. I break it down step-by-step exactly what you need to do to install granite countertops, from cutting the existing backsplash to prepare for the new granite…

 
cutting backsplash tile diy granite countertop installation bathroom remodeling teacher
 

to setting (I had help on this part!) and caulking the new granite…

 
DIY installing granite countertop bathroom remodeling teacher
 

and cutting and installing your new faucet and kitchen sink!

 
farm sink kitchen faucet installation DIY bathroom remodeling teacher
 

The end product speaks for itself. I hope this video helps you out in your own project!

 
DIY granite countertop installation bathroom remodeling teacher
 

🔨Some of the materials & tools used in this video (Amazon affiliate links):

WEWE sink faucet (only $52 + 5 star ratings) - https://amzn.to/3Xl7UVt
Grinder diamond blade - https://amzn.to/3YyaHve

💥Visit my Amazon Store for all products and tools that I recommend and use on a regular basis 👍 https://www.amazon.com/shop/bathroomremodelingteacher_

For help with your bathroom remodel 🎓Enroll in my courses today 🎓 -

🚿 ULTIMATE CURBLESS SHOWER COURSE-
https://www.bathroomremodelingteacher.com/ultimate-curbless-shower-course-detail

🛁 —> 🚿 CONVERTING TUB TO WALK-IN SHOWER COURSE- https://www.bathroomremodelingteacher.com/converting-tub-to-walkin-shower-course-detail

🛁TUB/SHOWER BATHROOM REMODEL IN 7 DAYS OR LESS COURSE- https://www.bathroomremodelingteacher.com/tubshower-bathroom-remodel-in-7-days-or-less-course-detail

🚿 CUSTOM TILED WALK-IN SHOWER COURSE - https://www.bathroomremodelingteacher.com/custom-tiled-walkin-shower-course-detail

✨ CUSTOM GLASS ENCLOSURE COURSE - https://www.bathroomremodelingteacher.com/custom-glass-enclosure-course-detail

😄DIY BATHROOM GEEK COLLECTION {ALL 5 COURSES!}👊 -https://www.bathroomremodelingteacher.com/diy-geek-membership-detail

#diy #kitchen #homeimprovement
#realestate #renovation #construction #homerenovation #bathroomdesign #work #bathroomremodelingteacher #stevewhite #tipsandtricks #tutorial #howto #interiordesign #electrical #tiledesign

All the tools and products I use and recommend can be found on my Amazon Storefront (detailed in the description box of the video). You can find my Storefront, and all of my other social medias, by going to https://linktr.ee/bathroomremodelingteacher. Any and all purchases from my Amazon Storefront are greatly appreciated and help keep my channel going!

I hope this helps you with your own installation. Subscribe to my channel to make sure you don’t miss a new upload!

See you next class,

Steve

Comment

Comment

HOW TO BUILD A SHOWER OVER CONCRETE

Hey students!

My parents retired and built a new patio home last year. And if you know anything about patio homes, you know how much concrete is involved in them. I helped by building their bathrooms (naturally). Building a shower over a concrete floor can definitely have its challenges…the biggest one is the difficulty of moving any plumbing.

In this video, I go over the step-by-step process of what I find to be the easiest way to build a shower over concrete.

Let me break it down to you real quick…

 
concrete floor shower new construction Schluter drain assembly tile
 

I explain how I prep and finish filling in the concrete around the “existing” drain of the shower.

 
concrete floor shower new construction Schluter drain assembly tile
 

I talk about the thinset I decided to go with, as well as the shower system I chose.

 
concrete floor shower new construction Schluter drain assembly tile
 

Then, I show you how I tailor the shower system to fit perfectly in the shower, and install it.

***Also, check out that sweet knee wall I built! Learn how to do it yourself by watching my video on it.

 
concrete floor shower new construction Schluter drain assembly tile
 

Once I install the waterproofing shower system, I move on to the curb for the shower.

 
concrete floor shower new construction Schluter drain assembly tile
 

Lastly, I install the final parts of the drain (including the waterproofing fleece) and give you my tips for finishing everything off.

🔨The materials & tools used in this video (Amazon affiliate links):

Schluter 38 x 60 shower kit - https://amzn.to/3DhEDnw
Schluter Kerdi band - https://amzn.to/3HvP21h
Kerdi trowel - https://amzn.to/408kVEv

💥Visit my Amazon Store for all products and tools that I recommend and use on a regular basis 👍 https://www.amazon.com/shop/bathroomremodelingteacher_

For help with your bathroom remodel 🎓Enroll in my courses today 🎓 -

🛁 —> 🚿 CONVERTING TUB TO WALK-IN SHOWER COURSE- https://www.bathroomremodelingteacher.com/tub-to-shower-course-detail

🛁TUB & SHOWER REMODEL IN 7 DAYS OR LESS COURSE- https://www.bathroomremodelingteacher.com/tubshowercourse

🚿 CUSTOM TILED WALK-IN SHOWER COURSE - https://www.bathroomremodelingteacher.com/custom-tiled-walkin-shower

✨ CUSTOM GLASS ENCLOSURE COURSE - https://www.bathroomremodelingteacher.com/customglasscourse

😄DIY BATHROOM GEEK COLLECTION {all 4 courses!}👊 -https://www.bathroomremodelingteacher.com/geek-collection-detail

#diy #tile #bathroomremodel #homeimprovement
#realestate #renovation #construction #homerenovation #bathroomdesign #work #bathroomremodelingteacher #stevewhite #tipsandtricks #tutorial #howto #interiordesign #electrical #tiledesign

All the tools and products I use and recommend can be found on my Amazon Storefront (detailed in the description box of the video). You can find my Storefront, and all of my other social medias, by going to https://linktr.ee/bathroomremodelingteacher. Any and all purchases from my Amazon Storefront are greatly appreciated and help keep my channel going!

I hope this helps you with your own installation. Subscribe to my channel to make sure you don’t miss a new upload!

See you next class,

Steve

Comment

Comment

5 REASONS I USE SCHLUTER SHOWER SYSTEMS

Hey students!

I have installed more Schluter® Shower Systems than any other type of waterproofing system for showers. With so many choices out there, I want to shed some light on why these are such popular systems and why I continually use them.

Here are my 5 reasons why I use Schluter Shower Systems:


REASON #1: It’s extremely versatile. Schluter offers so many different products that you can always find something to fit your bathroom.


REASON #2: Their drain is the best. It comes in 3 parts and it’s very easy to install and adjust to your shower needs.


REASON #3: It’s easy to modify. The system allows you a lot of wiggle room when it comes to the location of your shower drain. You can easily change the system to make it work in your bathroom without compromising its function.


REASON #4: Widespread availability. You can find Schluter products in big box stores and other distributors effortlessly.

REASON #5: Price comparison. When you compare Schluter to the cost of other shower systems, you will more than likely find it to be the most affordable.

Be sure to watch the entire video, because I go in depth on the reasons I consistently use the Schluter Shower Systems.

🔨The materials & tools used in this video (Amazon affiliate links):

Schluter 38 x 60 shower kit - https://amzn.to/3wuISbi
Schluter Kerdi band - https://amzn.to/3kGTPUy
Kerdi trowel - https://amzn.to/3R2QLOR

💥Visit my Amazon Store for all products and tools that I recommend and use on a regular basis 👍 https://www.amazon.com/shop/bathroomremodelingteacher_

For help with your bathroom remodel 🎓Enroll in my courses today 🎓 -

🛁 —> 🚿 CONVERTING TUB TO WALK-IN SHOWER COURSE- https://www.bathroomremodelingteacher.com/tub-to-shower-course-detail

🛁TUB & SHOWER REMODEL IN 7 DAYS OR LESS COURSE- https://www.bathroomremodelingteacher.com/tubshowercourse

🚿 CUSTOM TILED WALK-IN SHOWER COURSE - https://www.bathroomremodelingteacher.com/custom-tiled-walkin-shower

✨ CUSTOM GLASS ENCLOSURE COURSE - https://www.bathroomremodelingteacher.com/customglasscourse

😄DIY BATHROOM GEEK COLLECTION {all 4 courses!}👊 -https://www.bathroomremodelingteacher.com/geek-collection-detail

#diy #tile #bathroomremodel #homeimprovement
#realestate #renovation #construction #homerenovation #bathroomdesign #work #bathroomremodelingteacher #stevewhite #tipsandtricks #tutorial #howto #interiordesign #electrical #tiledesign

All the tools and products I use and recommend can be found on my Amazon Storefront (detailed in the description box of the video). You can find my Storefront, and all of my other social medias, by going to https://linktr.ee/bathroomremodelingteacher. Any and all purchases from my Amazon Storefront are greatly appreciated and help keep my channel going!

I hope this helps you with your own installation. Subscribe to my channel to make sure you don’t miss a new upload!

See you next class,

Steve

Comment

Comment

THE BEST WAY TO SET MOSAIC TILE ON A BATHROOM FLOOR

Hey students!

Setting small tile on a bathroom floor is not exactly an easy task, but it is completely achievable. There are things you must do in order for this particular job to go smoothly. From the tile layout to a level floor, you have to be very detailed and prepared to set mosaic floor tile.

Here are my top 5 tips for setting small tile on a bathroom floor:


TIP #1: Use my favorite thinset, Ardex X5, to set your tile. Why? This stuff has a long bucket life, which gives you plenty of time to cut and adjust your tile.


TIP #2: Start with a level floor. This is the most important factor of installing a mosaic floor tile. Any type of deviation with the floor levelness will show in your tile work, and it is extremely hard to build up thinset to try and make it level. Do yourself a favor and make sure your floor is 100% flat.


TIP #3: Choose the right mosaic tile. When picking your mosaic tile, be sure to look at the backing of the tile that is holding the tiles together. Can you see the actual tiles through the mesh (like the left pic) or not (like the right pic)? If not, do NOT choose that mosaic. You need the thinset to adhere to the tile itself, not just the mesh backing. Mosaics with solid mesh backings will not fully set and will eventually come loose.


TIP #4: Wipe down the substrate with a damp sponge before applying thinset. This will make the thinset glide on the floor so easily.


TIP #5: Tamp down your mosaic tiles with a grout float. This will ensure an even distribution and setting of the thinset to the tile. I like using the Troxell grout float.

Be sure to watch the entire video, because I share a total of 15 TIPS on how to get that perfectly laid small tile floor in your bathroom.

🔨The materials & tools used in this video (Amazon affiliate links):

Fein Grinder Dust Shroud - https://amzn.to/3kJAodE
Fein Shop-vac - https://amzn.to/3WxpgxL
Makita Grinder - https://amzn.to/3JjQwx3
Montolit CGX blade - https://amzn.to/3JwyZBV
Tlock tile leveling system: - https://amzn.to/3kHpwgC
Montolit 24" tile cutter - https://amzn.to/3Dgb7yh
Schluter Jolly (metal edging) - https://amzn.to/3HaxuWY
Ardex X5 (cheaper at a supplier) - https://amzn.to/3Di7BU3
Dewalt laser - https://amzn.to/3Wx6XsN
Montolit CGX blade - https://amzn.to/3wvVMFW
Montolit STL blade - https://www.contractorsdirect.com/
Montlit squadron blade - https://amzn.to/3j38xES
Fein Multimaster cutter - https://amzn.to/402PIlV
Ardex sponge - https://amzn.to/3Hwovkv
Horseshoe tile spacers - https://amzn.to/3XG9L8m
Linoleum knife (scraper) - https://amzn.to/3JfrvmA
Red tile spacer wedges - https://amzn.to/3JiksJJ
Troxell grout float - https://amzn.to/3Jev4Jy
Tile nippers - https://amzn.to/3XCtSUO

💥Visit my Amazon Store for all products and tools that I recommend and use on a regular basis 👍 https://www.amazon.com/shop/bathroomremodelingteacher_

For help with your bathroom remodel 🎓Enroll in my courses today 🎓 -

🛁 —> 🚿 CONVERTING TUB TO WALK-IN SHOWER COURSE- https://www.bathroomremodelingteacher.com/tub-to-shower-course-detail

🛁TUB & SHOWER REMODEL IN 7 DAYS OR LESS COURSE- https://www.bathroomremodelingteacher.com/tubshowercourse

🚿 CUSTOM TILED WALK-IN SHOWER COURSE - https://www.bathroomremodelingteacher.com/custom-tiled-walkin-shower

✨ CUSTOM GLASS ENCLOSURE COURSE - https://www.bathroomremodelingteacher.com/customglasscourse

😄DIY BATHROOM GEEK COLLECTION {all 4 courses!}👊 -https://www.bathroomremodelingteacher.com/geek-collection-detail

#diy #tile #bathroomremodel #homeimprovement
#realestate #renovation #construction #homerenovation #bathroomdesign #work #bathroomremodelingteacher #stevewhite #tipsandtricks #tutorial #howto #interiordesign #electrical #tiledesign

All the tools and products I use and recommend can be found on my Amazon Storefront (detailed in the description box of the video). You can find my Storefront, and all of my other social medias, by going to https://linktr.ee/bathroomremodelingteacher. Any and all purchases from my Amazon Storefront are greatly appreciated and help keep my channel going!

I hope this helps you with your own installation. Subscribe to my channel to make sure you don’t miss a new upload!

See you next class,

Steve

Comment

Comment

HOW TO WATERPROOF A BATHROOM FLOOR

Hey students!

Excellent and thorough waterproofing saves bathrooms. I swear by this, time and time again. Whenever you are remodeling a bathroom, the #1 issue on your mind should be HOW CAN I BEST WATERPROOF AND PROTECT MY BATHROOM.

So, let’s focus on a specific area of waterproofing in a bathroom— like the floor.

Thanks to modern innovation and technology, it is easy and accessible to get your hands on some high quality waterproofing products and install them yourself. Since there are many different types of waterproofing systems available for bathroom floors, and depending on what kind of tile you are installing, you will want to choose the best option for your specific needs.

I go over all of my favorite waterproofing options for the bathroom floor, as well as the tools and products you need, in this video.

In this video, for the bathroom floor I’m waterproofing, I used a floor leveling system to make my floor perfect for the mosaic tile I was going to lay down. I felt my best option was to go with a liquid waterproofing membrane for the majority of the floor and use a membrane fabric for the corners.

 
waterproof bathroom floor DIY home improvement bathroom remodeling
 

Getting started, I vacuumed all the debris off of the bathroom floor. Then, I used the Laticrete Hydroban liquid membrane to adhere the fabric to the corners of the floor bathroom.

 
waterproof bathroom floor DIY home improvement bathroom remodeling
 

I made sure to do the entire perimeter of the room with the fabric mesh, but I left out the tub area.

 
waterproof bathroom floor DIY home improvement bathroom remodeling
 

Once I was done with the perimeter, I moved on to the tub area. I applied a generous coating of the Laticrete Hydoban liquid membrane to the outside of the tub, basically “cutting in” as close to the tub as I could. I completely waterproofed the tub with a sealant once the liquid membrane dried.

 
waterproof bathroom floor DIY home improvement bathroom remodeling
 

I applied a nice, thick amount of the liquid membrane around the toilet flange, and then I finished the entire floor.

 
waterproof bathroom floor DIY home improvement bathroom remodeling
 

After the first coat dried, I applied a second coat. I felt confident the bathroom floor was completely waterproofed and secure.

🔨The materials & tools used in this video (Amazon affiliate links):

Hydroban - https://amzn.to/3HqvVWo
Mesh for corners - https://amzn.to/3H1N1sd
Hydroban sealant - https://amzn.to/3J8uahO
1/2" nap roller - https://amzn.to/3Hspv90

💥Visit my Amazon Store for all products and tools that I recommend and use on a regular basis 👍 https://www.amazon.com/shop/bathroomremodelingteacher_

For help with your bathroom remodel 🎓Enroll in my courses today 🎓 -

🛁 —> 🚿 CONVERTING TUB TO WALK-IN SHOWER COURSE- https://www.bathroomremodelingteacher.com/tub-to-shower-course-detail

🛁TUB & SHOWER REMODEL IN 7 DAYS OR LESS COURSE- https://www.bathroomremodelingteacher.com/tubshowercourse

🚿 CUSTOM TILED WALK-IN SHOWER COURSE - https://www.bathroomremodelingteacher.com/custom-tiled-walkin-shower

✨ CUSTOM GLASS ENCLOSURE COURSE - https://www.bathroomremodelingteacher.com/customglasscourse

😄DIY BATHROOM GEEK COLLECTION {all 4 courses!}👊 -https://www.bathroomremodelingteacher.com/geek-collection-detail

#diy #tile #bathroomremodel #homeimprovement #waterproofing
#realestate #renovation #construction #homerenovation #bathroomdesign #work #bathroomremodelingteacher #stevewhite #tipsandtricks #tutorial #howto #interiordesign #electrical #tiledesign

All the tools and products I use and recommend can be found on my Amazon Storefront (detailed in the description box of the video). You can find my Storefront, and all of my other social medias, by going to https://linktr.ee/bathroomremodelingteacher. Any and all purchases from my Amazon Storefront are greatly appreciated and help keep my channel going!

I hope this helps you with your own installation. Subscribe to my channel to make sure you don’t miss a new upload!

See you next class,

Steve

Comment

Comment

FLOOR LEVELER TIPS IN A BATHROOM

Hey students!

The one HUGE thing a bathroom floor requires before you lay down the tile (especially a mosaic/smaller tile) is having a LEVEL FLOOR. This isn’t always achieved on its own. Thank goodness for self-leveling products that make this possible in the simplest way. Introducing my absolute favorite leveling system for bathroom floors: the Ardex Liquid Backerboard. This is a self-leveling underlayment for interior wood and concrete subfloors. I love it.

In this bathroom remodeling video, I’m using the Ardex leveling liquid over heated flooring wiring. Nothing better than having warm tootsies in your bathroom— especially in the winter. Doing a heated floor this way saves you a ton of money.

 
floor level bathroom remodel tile mosaic home improvement
 

As you can see, I’ve laid my wire down in the areas where I want the floor to be heated. Laying the wire down manually saves you a lot of money than getting the pre-wired matting.

 
floor level bathroom remodel tile mosaic home improvement
 

Before mixing the leveler, make sure the entire perimeter of the room is sealed and blocked. I used the Great Stuff Pro Sealant.

 
floor level bathroom remodel tile mosaic home improvement
 

Next up, you will want to prime the subfloor before laying down that leveler. I use the Ardex Primer.

 
floor level bathroom remodel tile mosaic home improvement
 

Be sure to watch this entire video, because I go into a few other things you want to do before mixing and pouring the leveling liquid, like setting screws to indicate a level floor and the tools I use to spread the leveler. But once you are done with all of that, you’ll mix up your leveler and pour away.

 
floor level bathroom remodel tile mosaic home improvement
 

Here is how my floor looked after spreading the liquid floor leveler. Very easy!

🔨The materials & tools used in this video (Amazon affiliate links):

30 Sqft Warming system - https://amzn.to/3H5pVAS
Collomixer - https://amzn.to/3HrTldK
Ardex Floor leveler - https://www.ardexamericas.com/product/ardex-liquid-backerboard/
P51 primer - https://amzn.to/3Xv5qEF
Spray foam gun - https://amzn.to/3Wwkfpk
Spray foam - https://amzn.to/3J7Ylpi
Leveler spreading kit - https://amzn.to/3XLN3Ls

💥Visit my Amazon Store for all products and tools that I recommend and use on a regular basis 👍 https://www.amazon.com/shop/bathroomremodelingteacher_

For help with your bathroom remodel 🎓Enroll in my courses today 🎓 -

🛁 —> 🚿 CONVERTING TUB TO WALK-IN SHOWER COURSE- https://www.bathroomremodelingteacher.com/tub-to-shower-course-detail

🛁TUB & SHOWER REMODEL IN 7 DAYS OR LESS COURSE- https://www.bathroomremodelingteacher.com/tubshowercourse

🚿 CUSTOM TILED WALK-IN SHOWER COURSE - https://www.bathroomremodelingteacher.com/custom-tiled-walkin-shower

✨ CUSTOM GLASS ENCLOSURE COURSE - https://www.bathroomremodelingteacher.com/customglasscourse

😄DIY BATHROOM GEEK COLLECTION {all 4 courses!}👊 -https://www.bathroomremodelingteacher.com/geek-collection-detail

#diy #tile #bathroomremodel #homeimprovement
#realestate #renovation #construction #homerenovation #bathroomdesign #work #bathroomremodelingteacher #stevewhite #tipsandtricks #tutorial #howto #interiordesign #electrical #tiledesign

All the tools and products I use and recommend can be found on my Amazon Storefront (detailed in the description box of the video). You can find my Storefront, and all of my other social medias, by going to https://linktr.ee/bathroomremodelingteacher. Any and all purchases from my Amazon Storefront are greatly appreciated and help keep my channel going!

I hope this helps you with your own installation. Subscribe to my channel to make sure you don’t miss a new upload!

See you next class,

Steve

Comment

Comment

THE BEST CURBLESS SHOWER SYSTEM

Hey students!

Curbless showers are an extreme luxury… and I want to make them more accessible to people.

Since I began specializing in bathroom remodeling 15 years ago, I've been asked to quote shower remodels in two different ways— with a curb and without. Curbless showers were a bit trickier to build back then, but now, with all the innovation in bathroom remodeling, they are much easier to construct.

I have 4 TOP NOTCH shower systems (listed below in no real order) that I can share with you to make your curbless shower building experience easier. In the video, I demo each shower system, give you tips on how to install them, and share my thoughts on each one.

Here is a very brief overview of my favorite systems I like to use:

 
curbless shower system DIY home improvement bathroom remodeling waterproofing
 

The Schluter Curbless Shower System: So simple to use, and the least expensive. Requires a bit more brain power than WEDI. The system is easier to get compared to WEDI since it is sold in more locations.

 
curbless shower system DIY home improvement bathroom remodeling waterproofing
 

WEDI Curbless Shower System: Another easy way to go, and lots of unique drain options are offered. This system is about 25% more expensive than Schluter.

 
curbless shower system DIY home improvement bathroom remodeling waterproofing
 

VIM Shower System: I’ve gotten away from this system because of the expense, but the drains are beautiful.

 
curbless shower system DIY home improvement bathroom remodeling waterproofing
 

Arc Shower System: Pricey, but the drain designs are phenomenal.

At the time I’m writing this blog, the Schluter Curbless Shower System is my main go-to. But, if I had to use any of the 4 to install a curbless shower, I wouldn’t be mad about it.

Be sure to check out my FREE Curbless Shower System Guide, which goes over, in detail, all of the curbless shower systems and tools/supplies needed to install them. http://bit.ly/3FDADPC

HEADS UP: I’m currently working on a bathroom remodeling course on CURBLESS SHOWERS right now, so stay tuned!

🔨The materials & tools used in this video (Amazon affiliate links):

Schluter 38" x 60" shower pan - https://amzn.to/3kmdYiu
Schluter 48" x 48" shower pan - https://amzn.to/3HlglLN
Wedi 36" x 48" shower pan - https://www.masterwholesale.com/wedi-fundo-ligno-curbless-shower-pan.html
VIM shower system - https://vimproducts.com/
ARC Shower system - https://amzn.to/3XrsB2S

💥Visit my Amazon Store for all products and tools that I recommend and use on a regular basis 👍 https://www.amazon.com/shop/bathroomremodelingteacher_

For help with your bathroom remodel 🎓Enroll in my courses today 🎓 -

🛁 —> 🚿 CONVERTING TUB TO WALK-IN SHOWER COURSE- https://www.bathroomremodelingteacher.com/tub-to-shower-course-detail

🛁TUB & SHOWER REMODEL IN 7 DAYS OR LESS COURSE- https://www.bathroomremodelingteacher.com/tubshowercourse

🚿 CUSTOM TILED WALK-IN SHOWER COURSE - https://www.bathroomremodelingteacher.com/custom-tiled-walkin-shower

✨ CUSTOM GLASS ENCLOSURE COURSE - https://www.bathroomremodelingteacher.com/customglasscourse

😄DIY BATHROOM GEEK COLLECTION {all 4 courses!}👊 -https://www.bathroomremodelingteacher.com/geek-collection-detail

#diy #shower #tile #bathroomremodel #homeimprovement
#realestate #renovation #construction #homerenovation #bathroomdesign #work #bathroomremodelingteacher #stevewhite #tipsandtricks #tutorial #howto #interiordesign #electrical #tiledesign

All the tools and products I use and recommend can be found on my Amazon Storefront (detailed in the description box of the video). You can find my Storefront, and all of my other social medias, by going to https://linktr.ee/bathroomremodelingteacher. Any and all purchases from my Amazon Storefront are greatly appreciated and help keep my channel going!

I hope this helps you with your own installation. Subscribe to my channel to make sure you don’t miss a new upload!

See you next class,

Steve

Comment

Comment

HOW TO INSTALL A SHOWER PAN BASE

Hey students!

“I want a walk-in shower, but I don’t want to deal with all the tile work, especially on the floor, that comes with it.”

“I don’t want to deal with cleaning all the grout lines in a walk-in shower.”

“It’s too overwhelming…”

These are just a few things I hear home owners and DIYers say when they are thinking about remodeling their bathroom and converting their tub to a walk-in shower.

There is an simpler way to do it. Introducing the pre-made DREAMLINE shower pan. I love this thing. It’s easier to clean, no grouting required, no tile layout on the floor necessary, and it comes in different colors to match your tile and decor. It’s great for beginning DIYers.

There are only 5 steps when installing a shower base pan. What’s even better is that I have a course on converting a tub to a walk-in shower, and it involves using this very pan!

 
shower pan base installation DIY home improvement bathroom remodel
 

Step #1: Check levelness. Take note of where the pan may need some help in levelness, so when you go to set it in the mortar, you can use the mortar to make the pan level. REMEMBER: You want to make sure this pan slopes toward that drain.

 
shower pan base installation DIY home improvement bathroom remodel
 

Step #2: Mix the mortar for the shower pan. The mortar gives the shower pan much needed support. You don’t want the pan to bow and flex while standing on it. NOTE: Be sure to pick a mortar that does not have any aggregate in it.


Step #3: Throw down that mortar. Be sure to wet and wipe down the substrate before putting down the mortar. Spread that mortar around like a the thick, chunky peanut butter it is, adding some build up to the areas that need some help with levelness.

 
shower pan base installation DIY home improvement bathroom remodel
 

Step #4: Set the drain BEFORE setting the pan in the mortar.

 
shower pan base installation DIY home improvement bathroom remodel
 

Step #5: Set the pan in the mortar and check for levelness. You may need to do some maneuvering and walking on the pan to make it level. Add plastic shims if needed. Once you have it where you need it, screw the shower pan’s flange in the wood framing to keep it there.

Your base is all set to go! You are ready to add the water-proofing (I love Go-Board for waterproofing) and attaching/finishing the shower drain. Watch the entire video for all those details.

🔨The materials & tools used in this video (affiliate links):

Dreamline SlimLine 32x60 in. shower pan base - https://amzn.to/3Xotvgw
MAPEI 4-to-1 Mud Bed Mix - https://amzn.to/3D3c0tV
Composite shims - https://amzn.to/3GSbccv
Shower pan bases and supplies - https://amzn.to/3wgSdDs

💥Visit my Amazon Store for all products and tools that I recommend and use on a regular basis 👍 https://www.amazon.com/shop/bathroomremodelingteacher_

For help with your bathroom remodel 🎓Enroll in my courses today 🎓 -

🛁 —> 🚿 CONVERTING TUB TO WALK-IN SHOWER COURSE- https://www.bathroomremodelingteacher.com/tub-to-shower-course-detail

🛁TUB & SHOWER REMODEL IN 7 DAYS OR LESS COURSE- https://www.bathroomremodelingteacher.com/tubshowercourse

🚿 CUSTOM TILED WALK-IN SHOWER COURSE - https://www.bathroomremodelingteacher.com/custom-tiled-walkin-shower

✨ CUSTOM GLASS ENCLOSURE COURSE - https://www.bathroomremodelingteacher.com/customglasscourse

😄DIY BATHROOM GEEK COLLECTION {all 4 courses!}👊 -https://www.bathroomremodelingteacher.com/geek-collection-detail

#bathroomremodel #shower #diy #homeimprovement #howto
#realestate #renovation #construction #homerenovation #bathroomdesign #work #bathroomremodelingteacher #stevewhite #tipsandtricks #tutorial #howto #interiordesign #electrical #tiledesign

All the tools and products I use and recommend can be found on my Amazon Storefront (detailed in the description box of the video). You can find my Storefront, and all of my other social medias, by going to https://linktr.ee/bathroomremodelingteacher. Any and all purchases from my Amazon Storefront are greatly appreciated and help keep my channel going!

I hope this helps you with your own installation. Subscribe to my channel to make sure you don’t miss a new upload!

See you next class,

Steve

Comment

Comment

COPPER TO PEX PRO TIPS

Hey students!

I ran into an unexpected problem on this particular job I did last year. I was converting a bath tub into a walk-in shower for older clients. When I removed their tub, I saw this goofy set-up.


The copper pipe was on top of the subfloor, which was not good. I needed to reconfigure the plumbing, and that is where PEX saved the day.


I removed part of the subfloor and wall so I could re-plumb the hot and cold with copper piping. In the video, I demonstrate all the tools I used to make this possible (the links of those tools are listed down below).


Once I had my newly configured copper pipes set up and soldered, I moved on to the Pex. I really do love PEX. It has made bathroom remodeling and plumbing so much easier. A lot of plumbers may disagree with me, but I personally stand by PEX and I have used it numerous times and in my own home with zero issues. Nothing but love for PEX here.

Be sure to watch the full length video here to see how I do it all.

I’ve also created a convenient Copper to PEX Checklist, which includes ALL the products and tools I used, plus extra links for help.

🔨The materials & tools used in this video (affiliate links):

Autocut tool - https://amzn.to/3XlUauq
Wicked pipe sanding tool - https://amzn.to/3iJ9D8S
Copper PEX adapters - https://www.supplyhouse.com/Sioux-Chief-644X2-PowerPEX-1-2-PEX-x-1-2-Female-Sweat-Copper-Pipe-Straight-Adapter-Lead-Free
Map gas torch - https://amzn.to/3Wffssl
Flame guard - https://amzn.to/3QLhvmM
Lead-free solder - https://amzn.to/3QW6ChZ
Flux brushes - https://amzn.to/3GPKrWe
Flux - https://amzn.to/3J1eDjJ
Pro crimp rings - https://amzn.to/3kfEz0E
PEX tubing cutter - https://amzn.to/3iHfjQJ
1/2" rigid PEX crimper - https://amzn.to/3iUm6q2

💥Visit my Amazon Store for all products and tools that I recommend and use on a regular basis 👍 https://www.amazon.com/shop/bathroomremodelingteacher_

For help with your bathroom remodel 🎓Enroll in my courses today 🎓 -

🛁 —> 🚿 CONVERTING TUB TO WALK-IN SHOWER COURSE- https://www.bathroomremodelingteacher.com/tub-to-shower-course-detail

🛁TUB & SHOWER REMODEL IN 7 DAYS OR LESS COURSE- https://www.bathroomremodelingteacher.com/tubshowercourse

🚿 CUSTOM TILED WALK-IN SHOWER COURSE - https://www.bathroomremodelingteacher.com/custom-tiled-walkin-shower

✨ CUSTOM GLASS ENCLOSURE COURSE - https://www.bathroomremodelingteacher.com/customglasscourse

😄DIY BATHROOM GEEK COLLECTION {all 4 courses!}👊 -https://www.bathroomremodelingteacher.com/geek-collection-detail

#diy #plumbing #homeimprovement #bathromremodel
#realestate #renovation #construction #homerenovation #bathroomdesign #work #bathroomremodelingteacher #stevewhite #tipsandtricks #tutorial #howto #interiordesign #electrical #tiledesign

All the tools and products I use and recommend can be found on my Amazon Storefront (detailed in the description box of the video). You can find my Storefront, and all of my other social medias, by going to https://linktr.ee/bathroomremodelingteacher. Any and all purchases from my Amazon Storefront are greatly appreciated and help keep my channel going!

I hope this helps you with your own installation. Subscribe to my channel to make sure you don’t miss a new upload!

See you next class,

Steve

Comment