
Wallpaper DIY Tips
I’ve been resisting this trend for years… Wallpaper in a Bathroom!
I must say…..it looks amazing! And the quality of this wallpaper is great. I don’t have any doubts that this will be easy to clean and maintain for years to come 👍

Tip #1
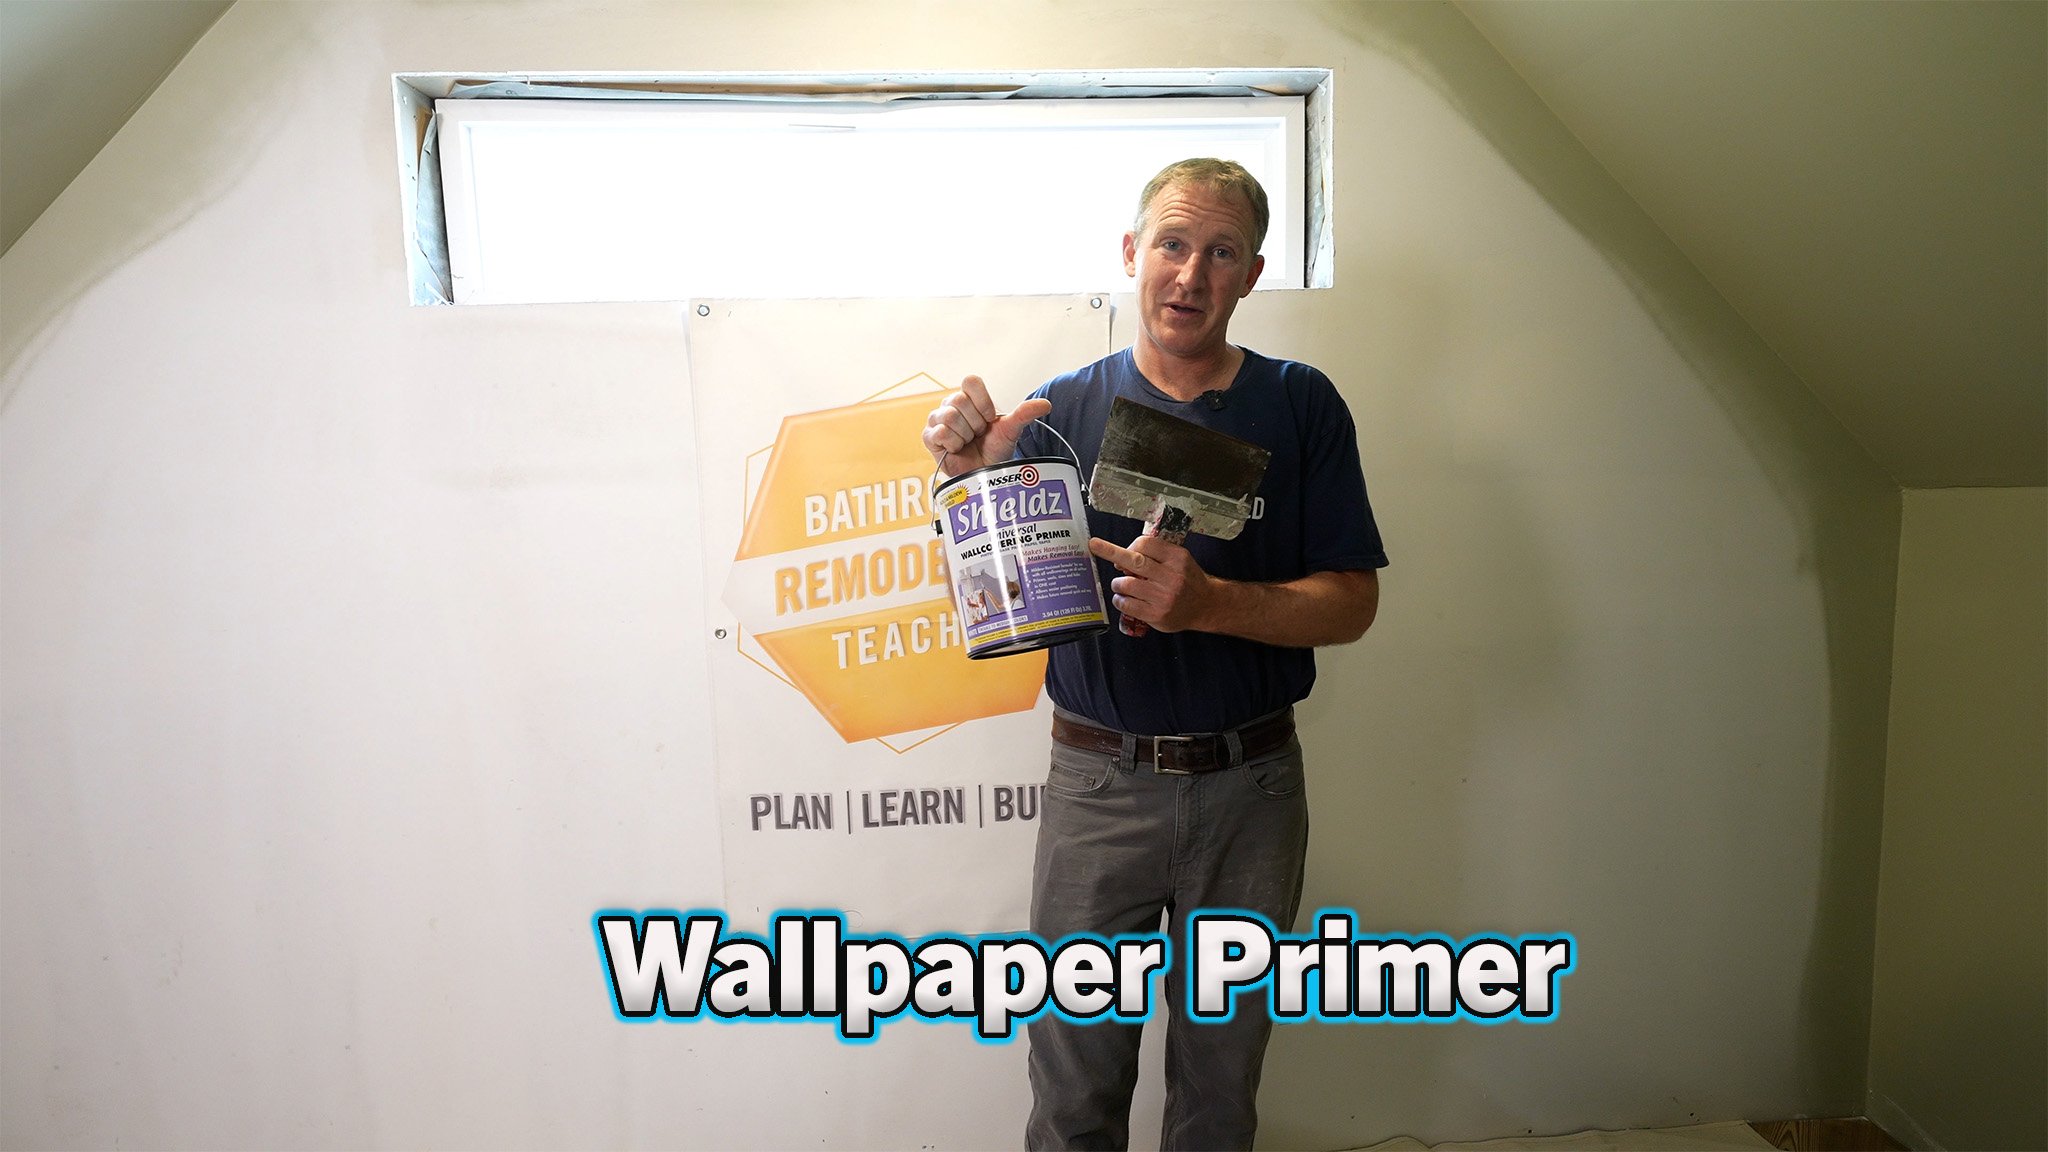
Use a wallpaper primer before setting wall paper
This will ensure the wallpaper paste does not immediately get absorbed into wall. It will allow you to easily move the wallpaper into place.
If your wall is already painted, ensure its has some kind of sheen to it. Flat wall paint will still be absorbent
For this project I’m using Shields Wall Covering Primer

Tip #2
Be sure clean, sand & scrape wall before beginning
Any holes, imperfections & dust will create problems for the installation


Tip #3
Use a laser to establish the first sheet.
This is important and similar to setting tile 😄
If you go off level on the first sheet….it will make everything else tough to set!
I’m using a simple Huepar Green Laser to establish the first sheet layout


Tip #4
Use a 1/2” nap roller to apply wallpaper adhesive
If you coat the entire wall with a generous amount of adhesive, the easier it will be to move wallpaper into place


Tip #5
Use a plastic wallpaper knife to flatten out wall paper
A plastic one verses a metal drywall knife will help prevent scuffing paper
This wallpaper tool kit was a nice little investment for this project 😊

Tip #6
Use a straightedge to cut closely to wall & ceiling

Tip #7
Be sure to reference laser & keep first sheet plumb. Scribe cut wallpaper to adjoining wall

Tip #8
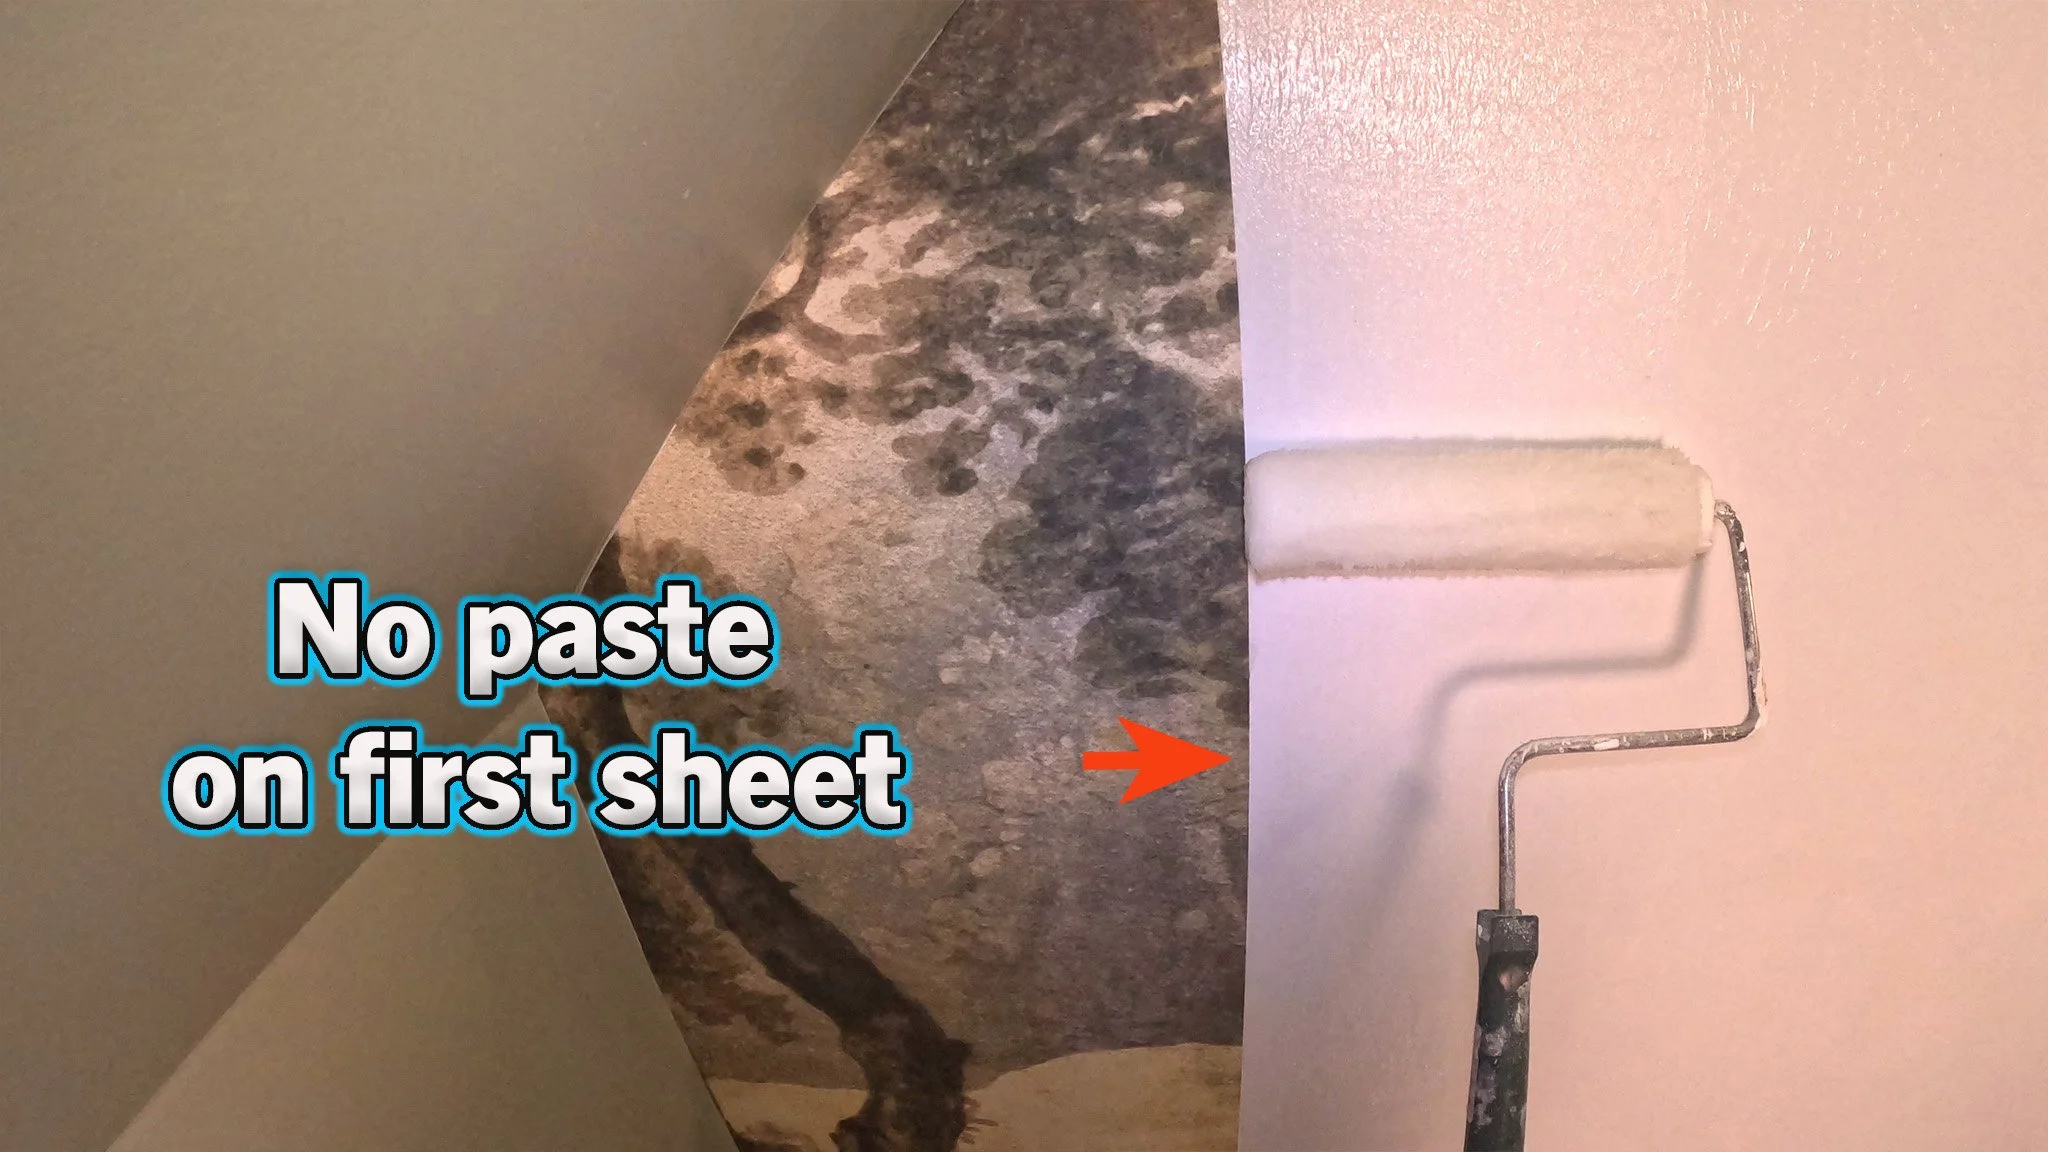
This wall paper from Rebel Walls does NOT overlap.
No need to add paste overtop of first sheet

Butt sheets, NOT overlapping 👍


The brush that comes with this Wallpaper Tool Kit helps remove air pockets from under wallpaper

Tip #9
Back rolling wall paper helps align and easily run remains sheets of wallpaper 👍


Tip #10
Enroll in a course for additional support and help with your bathroom remodeling project. 👍
This tutorial along with the rest of the construction of this 195 Sqft bathroom is included in the DIY GEEK MEMBERSHIP (one-time payment for access to all of my courses and future ones 👍) This course will be available individually for purchase once complete. My goal is to help & support you through the complexities of bathroom remodeling 😊 Sign up today !
Enroll in all of my courses in the DIY GEEK MEMBERSHIP
What's a DIY GEEK MEMBERSHIP?
Its a one-time payment for all of my courses 💥 And future ones 💥💥
You'll get access to all of my step-by-step courses that highlight all phases of a Bathroom Renovation Process:
Demo - Framing - Electrical - Plumbing - Drywall - Waterproofing - Tile setting - Shower doors - Lighting & much more 👍
🔥GUIDES - CHECKLISTS - SUPPORT🔥
Lifetime access - no ads
I now offer Bathroom Remodeling Coaching 😊
So if you have questions about your own bathroom, I'm here to help 👍
Schedule a 30 minute FaceTime or Zoom meeting
If you are a DIY GEEK MEMBER, ask me for the 20% discount code 👍
Feel free ask any questions below, I’d be happy to help 😊
Thanks
Steve
#diy #wallpaper #homeimprovement #bathroomremodel